

There are two ways to construct and validate forms in Angular:
- Template-driven forms
- Reactive forms
We have already seen the template-driven forms.
Another way to build forms in Angular is through reactive or model-driven approaches.
What are Reactive Forms?
Reactive forms are objects that provide synchronous access to form value data. They allow us to explicitly bind input fields to model values outside the template.
In Reactive Forms, the form is built in the component class. This allows you to have a contract that your form subscribes to field-value changes and ultimately unit-test your form logic without any UI layer.
Reactive forms use an explicit and immutable approach to managing their state at a given time. Thus, each change to the form state returns the new state, maintaining the model’s integrity between changes.
Reactive forms are built around observable streams, where the form inputs and values are provided as streams of input values, which can be accessed synchronously.
Here are some of the advantages of reactive forms:
- Using custom validators
- Changing validation dynamically
- Dynamically adding form fields
Here is the step-by-step guide:
Step 1: Setup an Angular project
The following command can create a new Angular project, assuming you have already installed the latest version of Angular CLI.
ng new reactive-app
Go inside the project:
cd reactive-app
Install the Angular Material library for styling using the below command:
ng add @angular/material
Step 2: Import Material Modules
We have already installed Material modules; now it is time to import them, and we will design our application using these modules. Write the following code inside the src/app/app.component.ts file:
// app.component.ts

import { Component } from '@angular/core';
import { CommonModule } from '@angular/common';
import { MatInputModule } from '@angular/material/input';
import { MatButtonModule } from '@angular/material/button';
import { MatFormFieldModule } from '@angular/material/form-field';
import { MatCardModule } from '@angular/material/card';

@Component({
  selector: 'app-root',
  standalone: true,
  imports: [
    CommonModule,
    MatInputModule,
    MatButtonModule,
    MatFormFieldModule,
    MatCardModule,
  ],
  templateUrl: './app.component.html',
  styleUrls: ['./app.component.css'],
})

export class AppComponent {}
Step 3: Registering the Reactive Forms module
To use reactive forms, import ReactiveFormsModule from the @angular/forms package and add it to the imports array of the src/app/app.component.ts file like this:
// app.component.ts

import { Component } from '@angular/core';
import { CommonModule } from '@angular/common';
import { MatInputModule } from '@angular/material/input';
import { MatButtonModule } from '@angular/material/button';
import { MatFormFieldModule } from '@angular/material/form-field';
import { MatCardModule } from '@angular/material/card';
import { ReactiveFormsModule } from '@angular/forms';

@Component({
  selector: 'app-root',
  standalone: true,
  imports: [
    CommonModule,
    ReactiveFormsModule,
    MatInputModule,
    MatButtonModule,
    MatFormFieldModule,
    MatCardModule,
  ],
  templateUrl: './app.component.html',
  styleUrls: ['./app.component.css'],
})
export class AppComponent {}
Step 4: Configure FormGroup and FormControl
The FormControl class is the basic building block when using reactive forms. To register a single form control, import the FormControl class into your component and create a new instance of the form control to save as a class property.
The individual form controls are now collected within a group. A FormGroup instance provides its model value as an object reduced from the values of each control in the group. Thus, a form group instance has the same properties (such as value and untouched) and methods (such as setValue()) as a form control instance.
You can also use the Constructor of FormControl to set its initial value, which, in this case, is an empty string. Creating these controls in your component class gives you immediate access to listen for, update, and validate the form input state.
For this example, I will not use the Constructor but the Life cycle method called ngOnInit().
Import FormGroup, FormControl, Validators, ValidatorFn, and AbstractControl directives inside the src/app/app.component.ts file.
Here is the complete code:
// app.component.ts

import { Component } from '@angular/core';
import { CommonModule } from '@angular/common';
import { MatInputModule } from '@angular/material/input';
import { MatButtonModule } from '@angular/material/button';
import { MatFormFieldModule } from '@angular/material/form-field';
import { MatCardModule } from '@angular/material/card';

import {
  ReactiveFormsModule,
  FormGroup,
  FormControl,
  Validators,
  ValidatorFn,
  AbstractControl,
} from '@angular/forms';

@Component({
  selector: 'app-root',
  standalone: true,
  imports: [
    CommonModule,
    ReactiveFormsModule,
    MatInputModule,
    MatButtonModule,
    MatFormFieldModule,
    MatCardModule,
  ],
  templateUrl: './app.component.html',
  styleUrls: ['./app.component.css'],
})
export class AppComponent {
  registrationForm: FormGroup;

  constructor() {
    this.registrationForm = new FormGroup(
      {
        username: new FormControl('', [
          Validators.required,
          Validators.minLength(3),
        ]),
        email: new FormControl('', [Validators.required, Validators.email]),
        password: new FormControl('', [
          Validators.required,
          Validators.minLength(6),
        ]),
        confirmPassword: new FormControl('', [Validators.required]),
      },
      { validators: this.passwordMatchValidator }
    );
  }

  passwordMatchValidator: ValidatorFn = (
    control: AbstractControl
  ): { [key: string]: boolean } | null => {
    const formGroup = control as FormGroup;
    const password = formGroup.get('password')?.value;
    const confirmPassword = formGroup.get('confirmPassword')?.value;
    return password === confirmPassword ? null : { mismatch: true };
  };

  onSubmit() {
    if (this.registrationForm.valid) {
      console.log(this.registrationForm.value);
    }
  }
}
Here are five forms’ important classes that work internally to create and validate Reactive forms:
- FormControl: It tracks an individual form control’s value and validation status.
- FormGroup: It manages the values and validity of a group of FormControl instances.
- Validators: It provides a set of built-in validators for Form controls.
- ValidatorFn: It is a type for custom validator functions.
- AbstractControl: It is a class for FormGroup and FormControl.
The registrationForm is an instance of FormGroup class that represents the registration form.
We are creating a signup form with a username, email, password, and confirmPassword form fields.
Inside the constructor(), we are creating an instance of FormGroup that consists of four FormControls:
- username
- password
- confirmPassword
Then, we set up the validators for each form control field, including required fields and minimum lengths.
To match the password and confirmPassword, we used a custom validator (passwordMatchValidator) to the form group. The passwordMatchValidator() method returns null if the passwords match or an error object if they don’t.
Atlast, we defined an onSubmit() method that checks if the form is valid and logs all form fields’ values.
By importing material modules, we can access all the Material components to craft a UI and Reactive Forms for form control and validation.
Step 5: Update the Component Template
Add the following code inside the src/app/app.component.html file:
<!-- app.component.html -->

<form
  [formGroup]="registrationForm"
  (ngSubmit)="onSubmit()"
  class="registration-form"
>
  <mat-card>
    <mat-card-content>
      <div class="form-group">
        <mat-form-field appearance="outline" class="full-width">
          <mat-label>Username</mat-label>
          <input matInput id="username" formControlName="username" />
          <mat-error
            *ngIf="
              registrationForm.get('username')?.invalid &&
              (registrationForm.get('username')?.dirty ||
                registrationForm.get('username')?.touched)
            "
          >
            <div *ngIf="registrationForm.get('username')?.errors?.['required']">
              Username is required.
            </div>
            <div
              *ngIf="registrationForm.get('username')?.errors?.['minlength']"
            >
              Username must be at least 3 characters long.
            </div>
          </mat-error>
        </mat-form-field>
      </div>

      <div class="form-group">
        <mat-form-field appearance="outline" class="full-width">
          <mat-label>Email</mat-label>
          <input matInput id="email" formControlName="email" />
          <mat-error
            *ngIf="
              registrationForm.get('email')?.invalid &&
              (registrationForm.get('email')?.dirty ||
                registrationForm.get('email')?.touched)
            "
          >
            <div *ngIf="registrationForm.get('email')?.errors?.['required']">
              Email is required.
            </div>
            <div *ngIf="registrationForm.get('email')?.errors?.['email']">
              Invalid email format.
            </div>
          </mat-error>
        </mat-form-field>
      </div>

      <div class="form-group">
        <mat-form-field appearance="outline" class="full-width">
          <mat-label>Password</mat-label>
          <input
            matInput
            type="password"
            id="password"
            formControlName="password"
          />
          <mat-error
            *ngIf="
              registrationForm.get('password')?.invalid &&
              (registrationForm.get('password')?.dirty ||
                registrationForm.get('password')?.touched)
            "
          >
            <div *ngIf="registrationForm.get('password')?.errors?.['required']">
              Password is required.
            </div>
            <div
              *ngIf="registrationForm.get('password')?.errors?.['minlength']"
            >
              Password must be at least 6 characters long.
            </div>
          </mat-error>
        </mat-form-field>
      </div>

      <div class="form-group">
        <mat-form-field appearance="outline" class="full-width">
          <mat-label>Confirm Password</mat-label>
          <input
            matInput
            type="password"
            id="confirmPassword"
            formControlName="confirmPassword"
          />
          <mat-error
            *ngIf="
              registrationForm.get('confirmPassword')?.invalid &&
              (registrationForm.get('confirmPassword')?.dirty ||
                registrationForm.get('confirmPassword')?.touched)
            "
          >
            <div *ngIf="registrationForm.errors?.['mismatch']">
              Passwords do not match.
            </div>
            <div
              *ngIf="registrationForm.get('confirmPassword')?.errors?.['required']"
            >
              Confirm Password is required.
            </div>
          </mat-error>
        </mat-form-field>
      </div>
    </mat-card-content>
    <mat-card-actions>
      <button
        mat-raised-button
        color="primary"
        type="submit"
        [disabled]="registrationForm.invalid"
      >
        Register
      </button>
    </mat-card-actions>
  </mat-card>
</form>
Also, add the CSS code in the src/app/app.component.css file:
.registration-form {
  display: flex;
  justify-content: center;
  align-items: center;
  height: 100vh;
  background-color: #f4f4f4;
}

mat-card {
  width: 400px;
}

.full-width {
  width: 100%;
}

.form-group {
  margin-bottom: 30px;
}
Save the file and start the development server using this command::
ng serve -o
You will see a screen like this:

Let’s check the further validation of the fields:

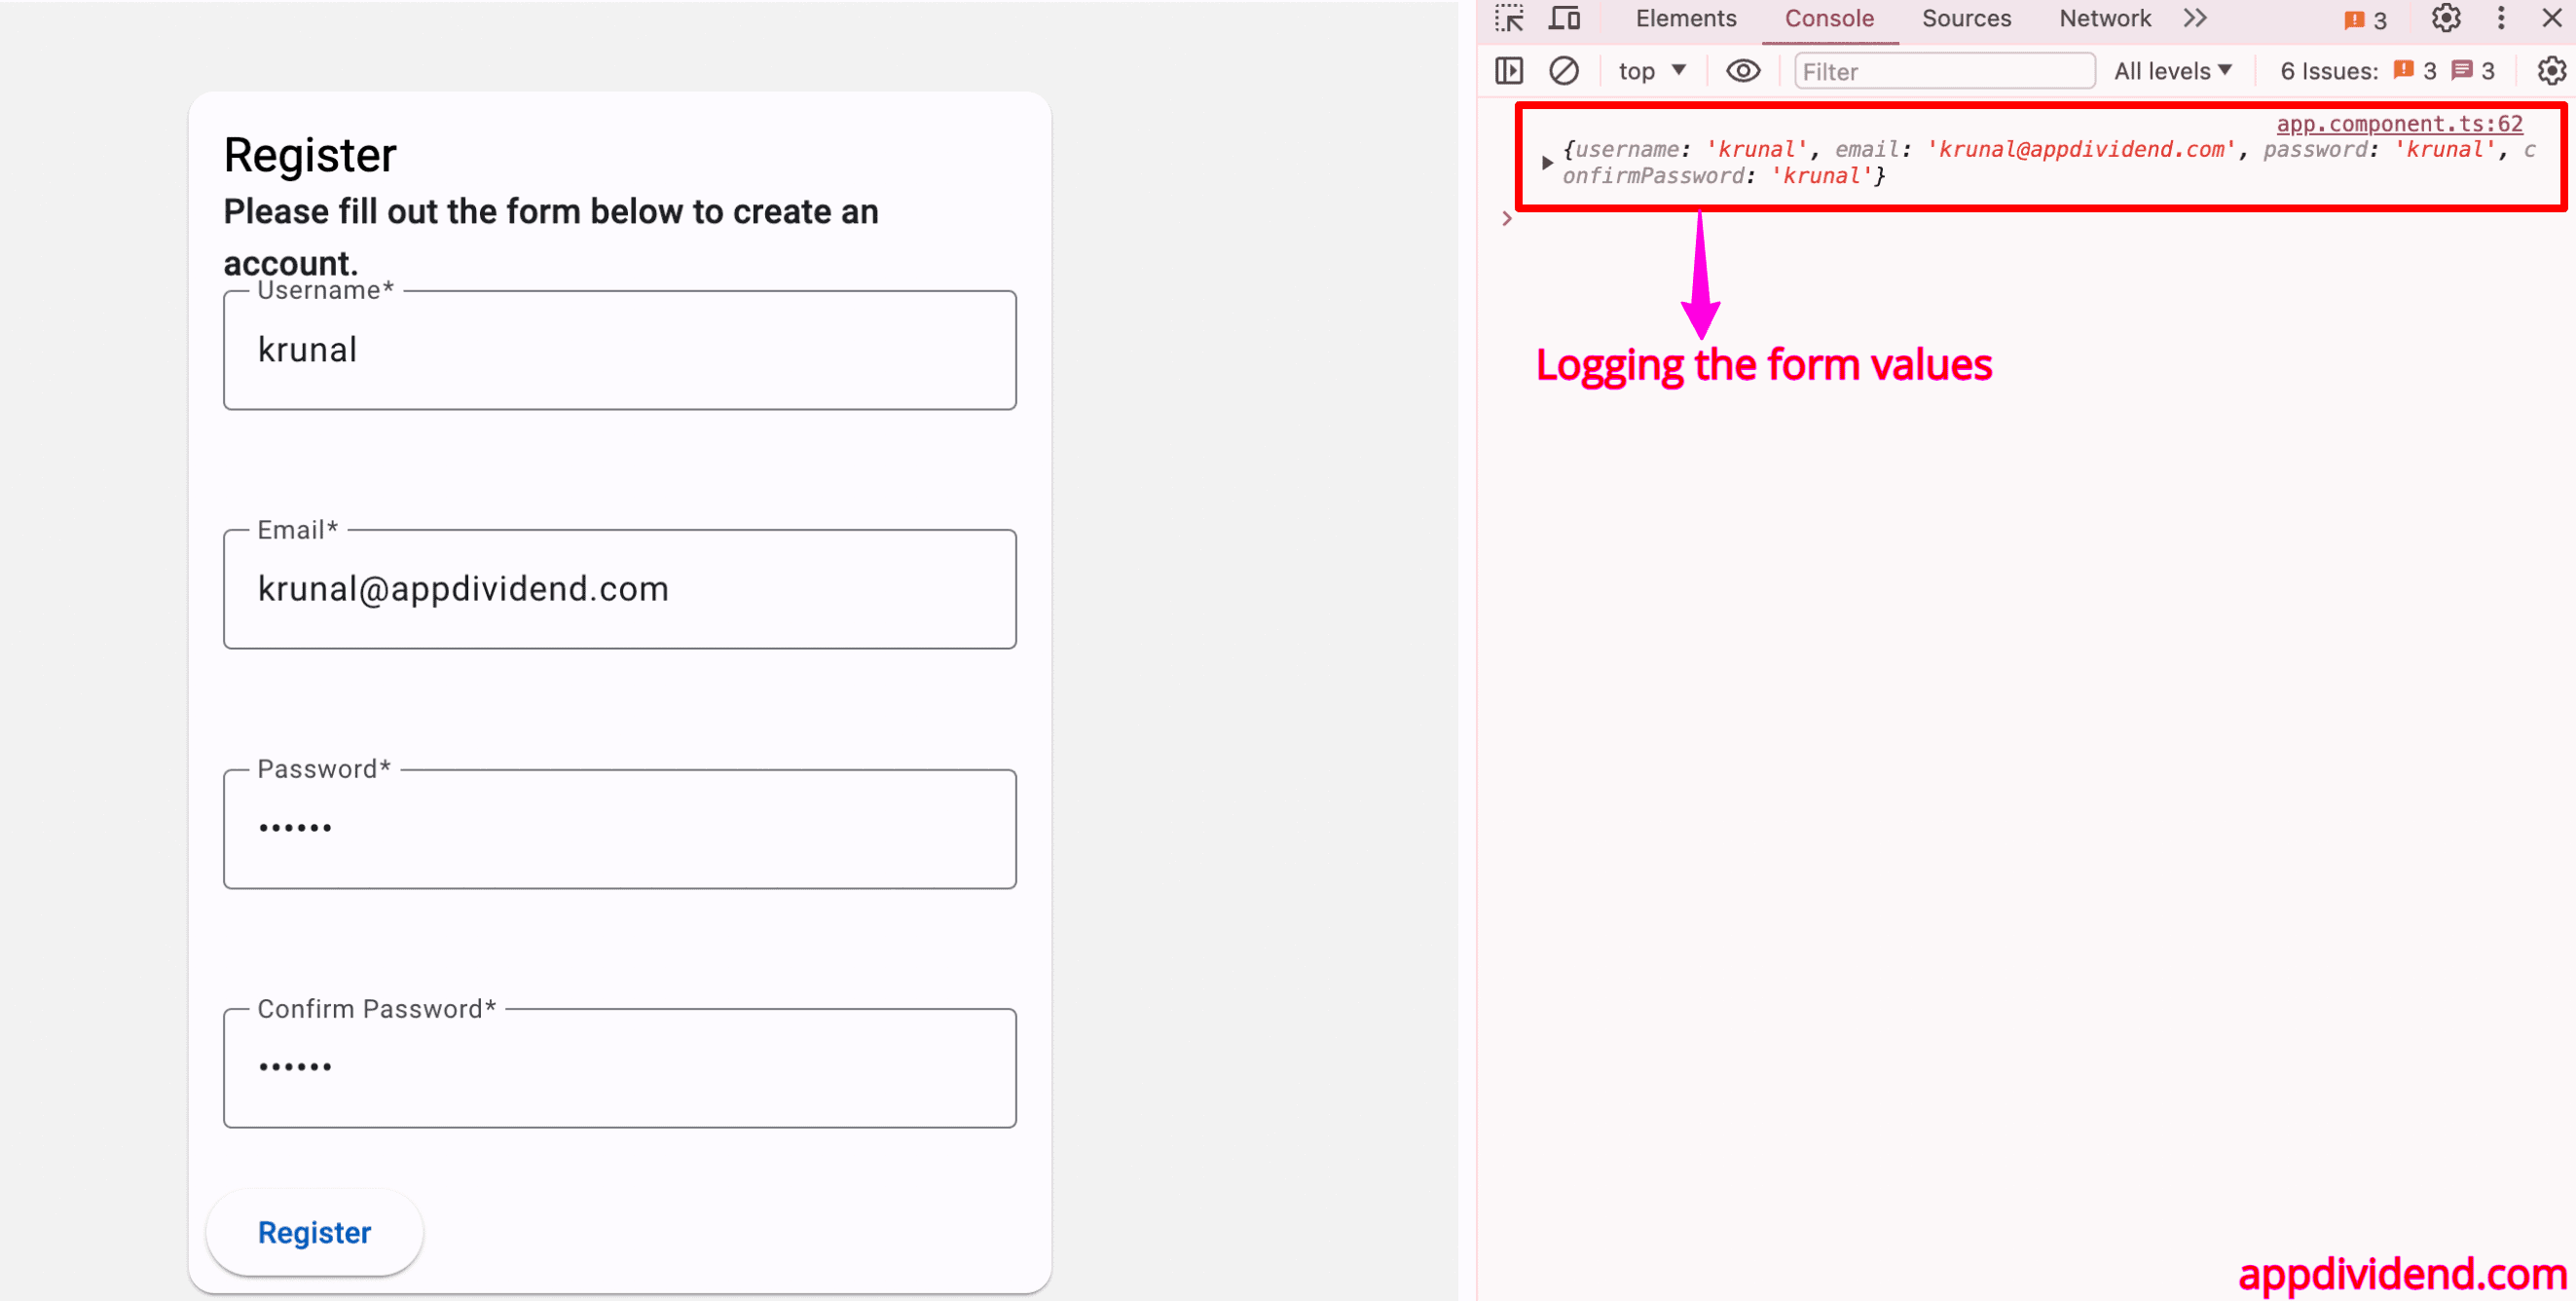
If you fill out every field correctly, the values of the fields will be logged in the console.
This small project shows how to integrate Angular Material components with Reactive Forms, providing a modern and consistent UI experience. Also, we saw how to implement validation and display error messages when validation fails.

mayra
hi