Angular ngOnChanges is a component lifecycle hook that unlocks robust reactive features in our web application. It instantly detects and responds to changes in our component’s input properties.
The book’s definition is this: Angular ngOnChanges() is a hook that is called when any data-bound property of a directive changes.
Picture this: you are working on your web application, where every user input instantly reflects changes throughout the interface. Paint a scenario where your components gracefully handle data updates, making your app feel alive, interactive, and responsive. All of this can be done using a single hook: ngOnChanges().
Why do we need ngOnChanges()
In real life, your application contains multiple parent and child components. The child component often receives data from the parent component via input properties. To update the child component based on input data, we need the ngOnChanges() hook.
The ngOnChanges() hook detects changes in these input properties, enabling the child components to update accordingly and maintaining data integrity.
We need the ngOnChanges() lifecycle hook because it makes reactive components and data binding painless.
By following this step-by-step guide, you will learn how to set up a parent-child component relationship where changes in the parent component’s data are detected and handled in the child component.
You don’t just learn theoretical knowledge but actual practical guides that will be helpful in your projects.
Step-by-Step Guide to Using ngOnChanges
Step 1: Setting up the Angular 18 project
As of today, Angular 18 is the latest version, so make sure that Angular CLI is installed on your machine. If not, then you can install it using the below command:
npm install -g @angular/cli
It will install the Angular CLI globally.
Now, you can create a new application using the below command:
ng new ngOnChangesExample

cd ngOnChangesExample
Step 2: Generating Parent and child components
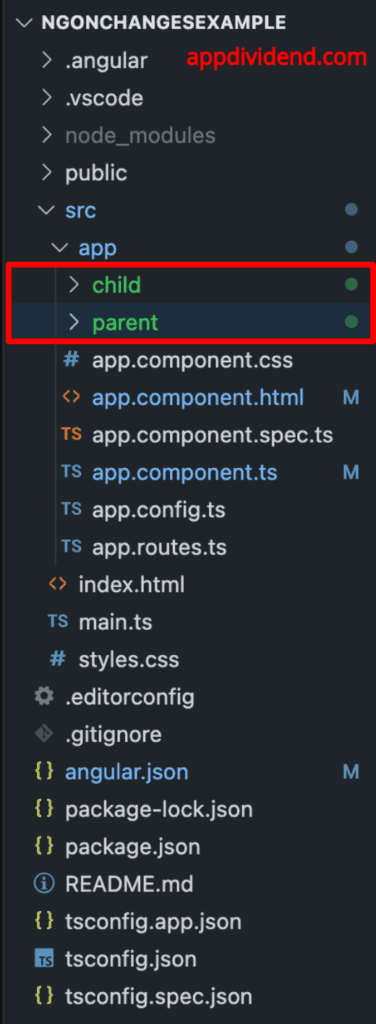
Let’s generate two parent and child components using the below command:
ng generate component parent

ng generate component child
Step 3: Import ParentComponent
We need to register the Parent component to our application, and to do that, we need to import the src/app/parent.component.ts file inside the src/app/app.component.ts file like this:
// app.component.ts

import { Component } from '@angular/core';
import { RouterOutlet } from '@angular/router';
import { ParentComponent } from './parent/parent.component';

@Component({
  selector: 'app-root',
  standalone: true,
  imports: [RouterOutlet, ParentComponent],
  templateUrl: './app.component.html',
  styleUrl: './app.component.css'
})
export class AppComponent {
  title = 'ngOnChangesExample';
}
Also, add the directive inside the src/app/app.component.html file:
<app-parent></app-parent>
Step 4: Define ParentComponent
Our application flow looks like this: we will define a property with initial data and pass that property to the ChildComponent.
Now, we will change the property by defining a function.
Add the below code inside the src/app/parent/parent.component.ts file:
import { Component } from '@angular/core';
import { ChildComponent } from '../child/child.component';

@Component({
  selector: 'app-parent',
  standalone: true,
  imports: [ChildComponent],
  templateUrl: './parent.component.html',
  styleUrl: './parent.component.css'
})
export class ParentComponent {
  parentData: string = 'Initial data';

  changeData() {
    this.parentData = 'Updated data ' + Math.random();
  }
}
Here, you can see that we imported ChildComponent because we will use this component to display the child component’s data.
Inside the ParentComponent class, you can see that we initialized the parentData and then defined a changeData() function that updated the property.
Display the data by adding the below code in src/app/parent/parent.component.html file:
<button (click)="changeData()">Change Data</button>

<app-child [data]="parentData"></app-child>
Here, what we did is the property binding. We bind the parentData property to the data input property of the child component, which we define in the next step.
Basically, when we click the button, it will call the changeData() function and update the property of parentData. The child component will then receive this property change and update it using the ngOnChanges() hook.
Step 5: Define ChildComponent
The ChildComponent is our main component as far as the ngOnChanges() function is concerned.
In the child component, we will use the ngOnChanges() hook to detect changes in the input properties.
Here is the code for src/app/child/child.component.ts file:
import { Component, Input, OnChanges, SimpleChanges } from '@angular/core';

@Component({
  selector: 'app-child',
  standalone: true,
  imports: [],
  templateUrl: './child.component.html',
  styleUrl: './child.component.css',
})
export class ChildComponent implements OnChanges {
  @Input() data!: string;

  constructor() {}

  ngOnChanges(changes: SimpleChanges) {
    if (changes['data']) {
      const change = changes['data'];
      console.log('Previous value: ', change.previousValue);
      console.log('Current value: ', change.currentValue);
      console.log('First change: ', change.firstChange);
    }
  }
}
You can see that we declared an input property “data” using the @input decorator.
Here comes the magic: when the input data changes, the ngOnChanges() lifecycle hook is called.
The changes is an object containing the current and previous values of the input properties. We are logging the current and previous values when the value of the “data” property changes.
Add the HTML code inside the src/app/child/child.component.html file:
<p>Data in child component: {{ data }}</p>
Step 6: Run the Application
Start the development server using the below command:
ng serve --open
It will open the browser and navigate to this URL: http://localhost:4200/
If you click on the “Change Data” button, you will see the following screenshot:
Here, we change the data from the parent component, and the ngOnChanges() hook detects the changes and updates the child component’s property.
Conclusion
The ngOnChanges() lifecycle hook helps create a more robust and dynamic application that fetches data from an API and manages it efficiently throughout the app.
In this post, we learn what the ngOnChanges() hook is and why it is useful. We implemented it in the demo application, passing data from parent to child. You can start implementing these steps in your project and making your application more dynamic and efficient.
If you found this guide helpful, share this article or comment your views or questions. Happy to help you out.


