
The most basic and regular functionality of any web application is sending emails about anything to its users, customers, or even employees, including newsletters.
Laravel provides a clean, simple email API to send an email to your customers or users.
It provides drivers for sending emails via SMTP, Mailgun, Postmark, Amazon SES, and Sendmail, allowing us to get started quickly by sending mail through a local or cloud-based service.
I will use SMTP protocol and the simple email-testing client called “Mailtrap.io” in this tutorial.
Here is the step-by-step guide to sending an email in Laravel 11:
Step 1: Setup an account on mailtrap
Go to the https://mailtrap.io and sign up for an account:
After signin up, you will see something like this:
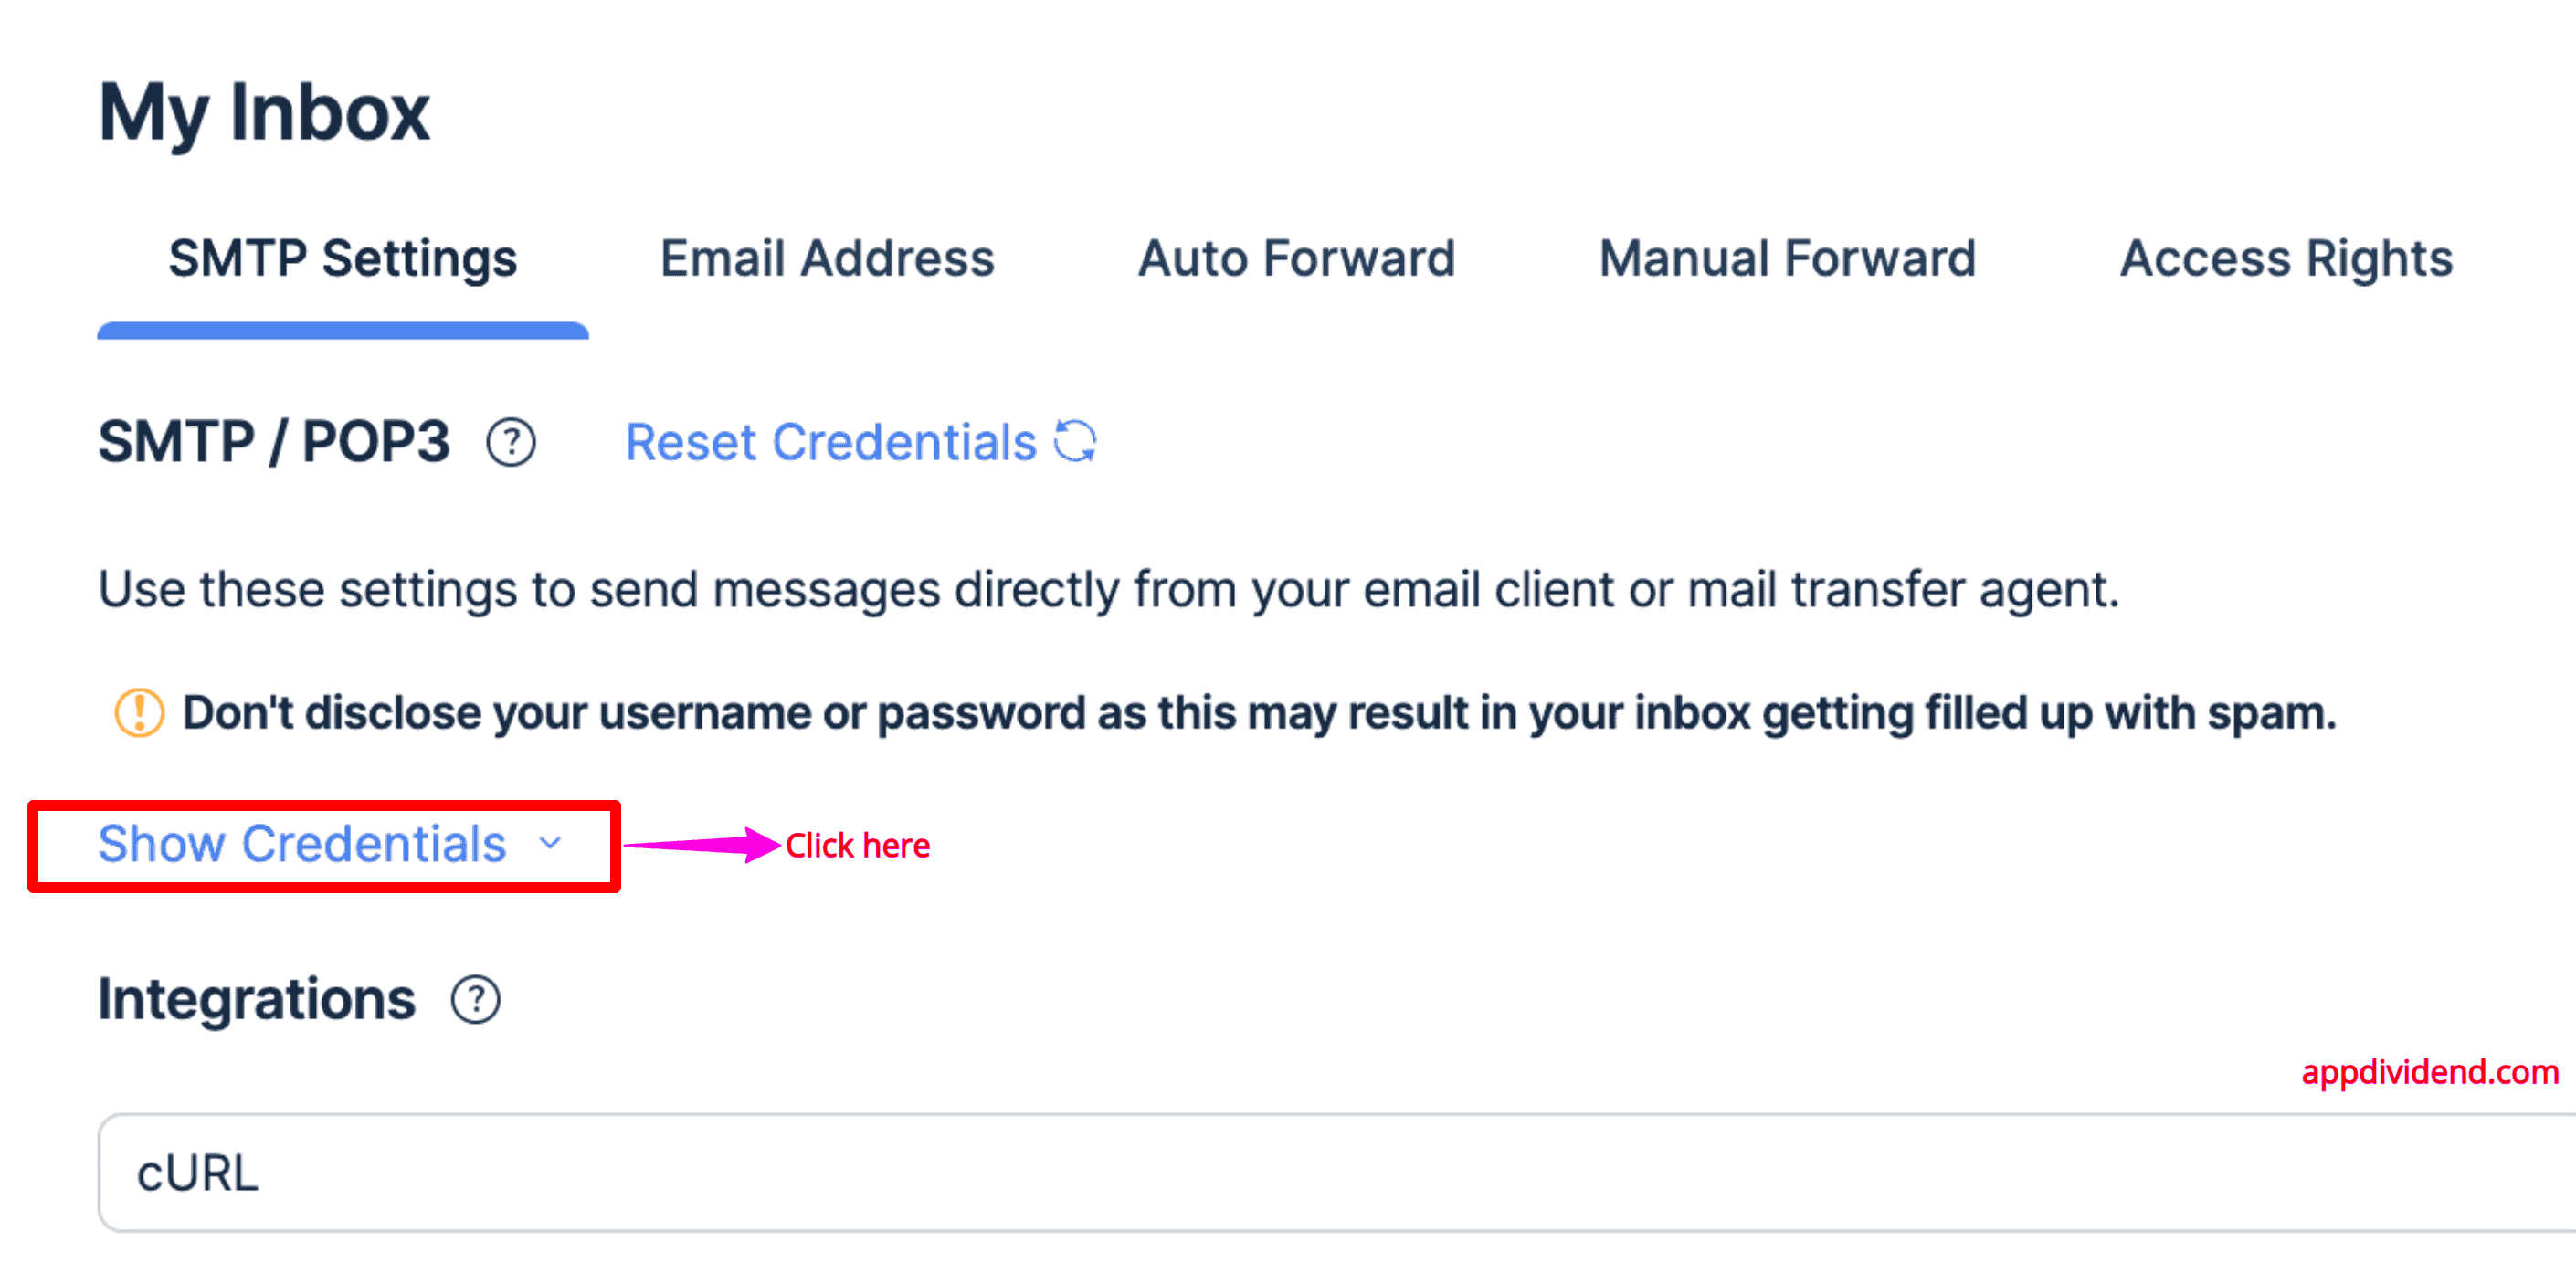
In the above figure, click on the “Show credentials” button, and it will display the credentials for SMTP and POP3 protocol like this:

I will be using the SMTP protocol to send an email. So, we need all the configurations and put them into Laravel’s .env file.
Step 2: Install Laravel 11
composer create-project --prefer-dist laravel/laravel emails
It will install brand new Laravel for us like this:

Go inside the project:
cd emails
Step 3: Add mailtrap credentials to the .env file
Open the .env file of the root of your project and add the below configuration if you are also using mailtrap like this:
MAIL_MAILER=smtp
MAIL_HOST=sandbox.smtp.mailtrap.io
MAIL_PORT=2525
MAIL_USERNAME=your_username
MAIL_PASSWORD=your_pwd
MAIL_ENCRYPTION=tls
MAIL_FROM_ADDRESS="support@appdividend.com"
MAIL_FROM_NAME="${APP_NAME}"
Save this file, and your mailtrap configuration will be ready!
Step 4: Create a Mail Class
Laravel provides a convenient artisan command to generate a Mailable class. This class encapsulates all the logic related to a specific email:
Type the below command to create a mailable class:
php artisan make:mail OrderShipped
The above command has created an OrderShipped.php file inside the app\Mail directory.
Here is the modified OrderShipped.php file:
<?php

namespace App\Mail;

use Illuminate\Bus\Queueable;
use Illuminate\Contracts\Queue\ShouldQueue;
use Illuminate\Mail\Mailable;
use Illuminate\Mail\Mailables\Content;
use Illuminate\Mail\Mailables\Envelope;
use Illuminate\Queue\SerializesModels;

class OrderShipped extends Mailable
{
    use Queueable, SerializesModels;
    public $order;

    /**
     * Create a new message instance.
     */
    public function __construct($order)
    {
        $this->order = $order;
    }

    /**
     * Get the message envelope.
     */
    public function envelope(): Envelope
    {
        return new Envelope(
            subject: 'Order Shipped',
        );
    }

    /**
     * Get the message content definition.
     */
    public function content(): Content
    {
        return new Content(
            view: 'mails.ordershipped',
            with: [
                'order_number' => $this->order->order_number,
                'order_amount' => $this->order->order_amount,
            ],
        );
    }

    /**
     * Get the attachments for the message.
     *
     * @return array<int, \Illuminate\Mail\Mailables\Attachment>
     */
    public function attachments(): array
    {
        return [];
    }
}
The Mailable class has the envelope(), content(), and attachments() methods.
The envelope() method returns an Illuminate\Mail\Mailables\Envelope object that defines the subject and, sometimes, the recipients of the message.
The content() method returns an Illuminate\Mail\Mailables\Content object that defines the Blade template that will be used to generate the message content.
The attachments() array returns any attachment sent to the recipient.
In this example, the Mailable class accepts an $order object and passes it to the mails.ordershipped view, and renders the email’s content.
Step 5: Create an email view
Create a new folder called mails inside the resources\views folder and in that folder.
Inside the mails folder, create a new file called ordershipped.blade.php and add the below code.
<!DOCTYPE html>
<html lang="en">
<head>
    <meta charset="UTF-8">
    <meta name="viewport" content="width=device-width, initial-scale=1.0">
    <title>Order Shipped</title>
</head>
<body>
    <h1>Your order has been shipped!</h1>
    <p>Order Number: {{ $order_number }}</p>
    <p>Order Amount: ${{ $order_amount }}</p>
</body>
</html>
This template renders information about the order in the email.
Step 6: Sending an email
To send an email, we need to use the Mail Facade.
We can write the code to send an email in a Controller or web.php file.
For this tutorial, let’s write the code inside the web.php file like this:
<?php

use Illuminate\Support\Facades\Route;

use App\Mail\OrderShipped;
use Illuminate\Support\Facades\Mail;

Route::get('/', function () {
    return view('welcome');
});

Route::get('/order/email', function () {
    $order = new stdClass();
    $order->order_number = 1110;
    $order->order_amount = 300;

    Mail::to('krunal@appdividend.com')->send(new OrderShipped($order));

    return "Email sent successfully";
});
Here, the Mail::to() method defines the recipient’s email address, and the send() method sends the specified Mailable class.
Save this file, go to the terminal, and start the development server:
php artisan serve
Go to the browser and navigate to this URL: http://localhost:8000/order/email
If all of your email configuration is correct, you will see this screen:

Now, check the mailtrap inbox and see what you got in the email:

We received the email with the Order number and Order amount.
That’s all for sending an email from the Laravel 11 application using mailtrap.
