
To create an Admin Panel from scratch in Angular 18, we will use the Angular material library. We will use the component of the Angular material library for the navigation bar, sidebar, and content area.
Here is the step-by-step guide:
Step 1: Setup Angular 18 project
Assuming that you have already installed Angular CLI, you can create a new project using the below command:
ng new admin-panel

cd admin-panel
Step 2: Install Angular Material
You can install the Angular material library using the below command:
ng add @angular/material
While installing the package, you must choose a pre-built theme, set up global typography, and enable animations during installation.
Install Flex Layout (Optional for Better Layout Control) for better layout and control.
npm install @angular/flex-layout
Step 3: Generate Components
To create a complete admin panel, we need to generate components for the navigation bar, sidebar, and main content area:
ng generate component components/navbar
ng generate component components/sidebar
ng generate component components/dashboard
ng generate component components/users
ng generate component components/settings
After generating these components, the project structure looks like this:

Step 4: Configure Routing
By default, Angular comes with the src/app/app.routes.ts file. So, add the following code inside that file.
// app.routes.ts

import { Routes } from '@angular/router';
import { DashboardComponent } from './components/dashboard/dashboard.component';
import { UsersComponent } from './components/users/users.component';
import { SettingsComponent } from './components/settings/settings.component';

export const routes: Routes = [
  { path: '', redirectTo: '/dashboard', pathMatch: 'full' },
  { path: 'dashboard', component: DashboardComponent },
  { path: 'users', component: UsersComponent },
  { path: 'settings', component: SettingsComponent },
];
We imported DashboardComponent, UsersComponent, and SettingsComponent and assigned each component’s route path.
Step 5: Implementing Navbar Component
To create a navbar using Angular material, we must import MatToolbarModule and MatIconModule.
Also, creating a toggleable navbar, which means we put the button, and if we click that button, it will toggle and show or hide based on the current condition.
Add the following code inside the src/app/navbar/navbar.component.ts file:
// navbar.component.ts

import { Component, Output, EventEmitter } from '@angular/core';
import { MatToolbarModule } from '@angular/material/toolbar';
import { MatIconModule } from '@angular/material/icon';

@Component({
  selector: 'app-navbar',
  standalone: true,
  imports: [MatToolbarModule, MatIconModule],
  templateUrl: './navbar.component.html',
  styleUrl: './navbar.component.css',
})
export class NavbarComponent {
  @Output() toggleSidenav = new EventEmitter<void>();

  onToggleSidenav() {
    this.toggleSidenav.emit();
  }
}
The @Output() toggleSidenav = new EventEmitter<void>() code declares an output property named toggleSidenav which is an instance of EventEmitter.
he EventEmitter<void> suggests that the event does not carry any payload (i.e., it emits a signal without any data). When the onToggleSidenav() method is called, it triggers the emission of the toggleSidenav event.
Add the following code inside the src/app/navbar/navbar.component.html file:
<mat-toolbar color="primary" class="navbar">
  <button mat-icon-button (click)="onToggleSidenav()">
    <mat-icon>menu</mat-icon>
  </button>
  <span class="navbar-title">Admin Panel</span>
  <span class="spacer"></span>
  <button mat-button>
    <mat-icon>notifications</mat-icon>
  </button>
  <button mat-button>
    <mat-icon>account_circle</mat-icon>
  </button>
</mat-toolbar>
Also, add the CSS code inside the src/app/navbar/navbar.component.css file:
.navbar {
  background: linear-gradient(45deg, #1e3c72 30%, #2a5298 90%);
  color: white;
}

.navbar-title {
  font-size: 1.5rem;
  font-weight: bold;
}

.spacer {
  flex: 1 1 auto;
}
Step 6: Implementing Sidebar Component
To create a proper sidebar, you need to import MatListModule.
Also, import RouterLink and RouterLinkActive modules to insert different component links.
Add the below code inside the src/app/sidebar/sidebar.component.ts file:
// sidebar.component.ts

import { Component } from '@angular/core';
import { RouterLink, RouterLinkActive } from '@angular/router';
import { MatListModule } from '@angular/material/list';
import { MatIconModule } from '@angular/material/icon';

@Component({
  selector: 'app-sidebar',
  standalone: true,
  imports: [RouterLink, RouterLinkActive, MatListModule, MatIconModule],
  templateUrl: './sidebar.component.html',
  styleUrl: './sidebar.component.css',
})
export class SidebarComponent {}
Add the below code inside the src/app/sidebar/sidebar.component.html file:
<mat-nav-list>
  <a mat-list-item routerLink="/dashboard" routerLinkActive="active"
    >Dashboard</a
  >
  <a mat-list-item routerLink="/users" routerLinkActive="active">Users</a>
  <a mat-list-item routerLink="/settings" routerLinkActive="active">Settings</a>
</mat-nav-list>
Step 7: Implement Dashboard, Users, and Settings Components
Update the src/app/dashboard/dashboard.component.html, src/app/users/users.component.html, and src/app/settings/settings.component.html to reflect the content of these sections:
Here is the code for the src/app/dashboard/dashboard.component.html:
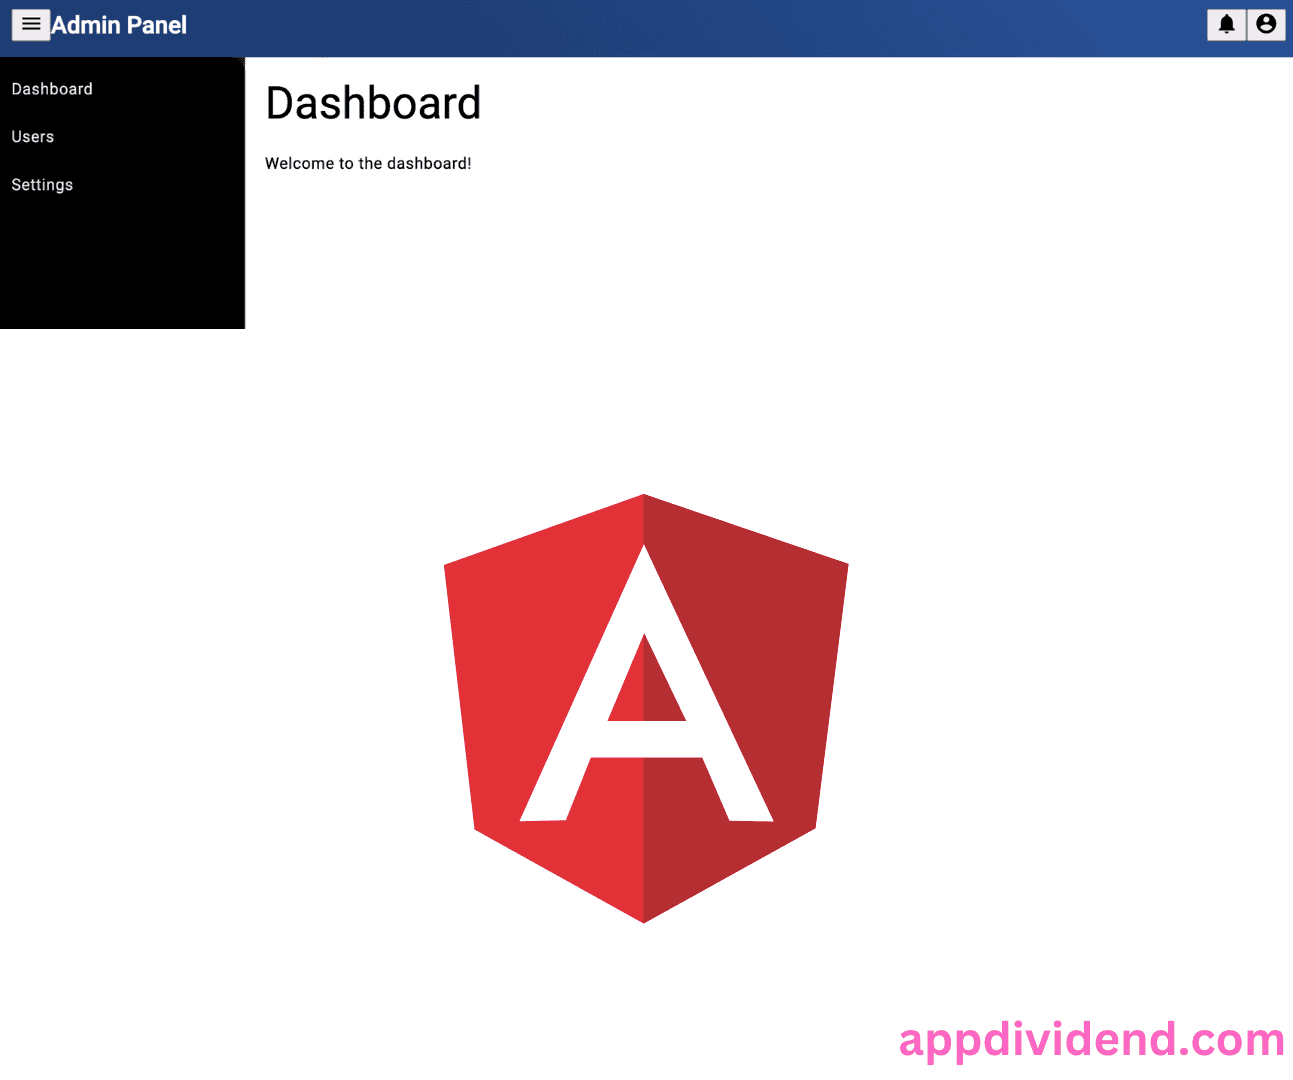
<h2>Dashboard</h2>

<p>Welcome to the dashboard!</p>
Here is the code for the src/app/users/users.component.html:
<h2>Users</h2>

<p>Manage your users here.</p>
Here is the code for the src/app/settings/settings.component.html:
<h2>Settings</h2>

<p>Update your settings here.</p>
Step 8: Update the App component
Import all the necessary components inside the src/app/app.component.ts file:
// app.component.ts

import { Component, ViewChild } from '@angular/core';
import { MatSidenavModule, MatSidenav } from '@angular/material/sidenav';
import { MatButtonModule } from '@angular/material/button';
import { FlexLayoutModule } from '@angular/flex-layout';

import { NavbarComponent } from './components/navbar/navbar.component';
import { SidebarComponent } from './components/sidebar/sidebar.component';
import { RouterOutlet } from '@angular/router';
@Component({
  selector: 'app-root',
  standalone: true,
  imports: [
    MatSidenavModule,
    MatButtonModule,
    FlexLayoutModule,
    SidebarComponent,
    NavbarComponent,
    RouterOutlet,
  ],
  templateUrl: './app.component.html',
  styleUrl: './app.component.css',
})
export class AppComponent {
  @ViewChild('sidenav') sidenav!: MatSidenav;

  onToggleSidenav() {
    this.sidenav.toggle();
  }
}
Also, update the src/app/app.component.html file:
<app-navbar (toggleSidenav)="onToggleSidenav()"></app-navbar>

<mat-sidenav-container class="sidenav-container">
  <mat-sidenav #sidenav mode="side" opened class="sidenav">
    <app-sidebar></app-sidebar>
  </mat-sidenav>

  <mat-sidenav-content class="content">
    <div class="content-area">
      <router-outlet></router-outlet>
    </div>
  </mat-sidenav-content>
</mat-sidenav-container>
Add the css code for styling in the src/app/app.component.css file:
.sidenav-container {
  height: 100%;
}

.sidenav {
  background-color: black;
  color: white;
  width: 250px; /* Set the desired width here */
}

.mat-sidenav-content {
  margin-left: 250px; /* This should match the width of the sidenav */
}

.content {
  background-color: white;
  color: black;
  padding: 20px;
}

.content-area {
  min-height: 100vh;
}
Step 9: Start the development server
Start your application and verify the layout:
ng serve -o
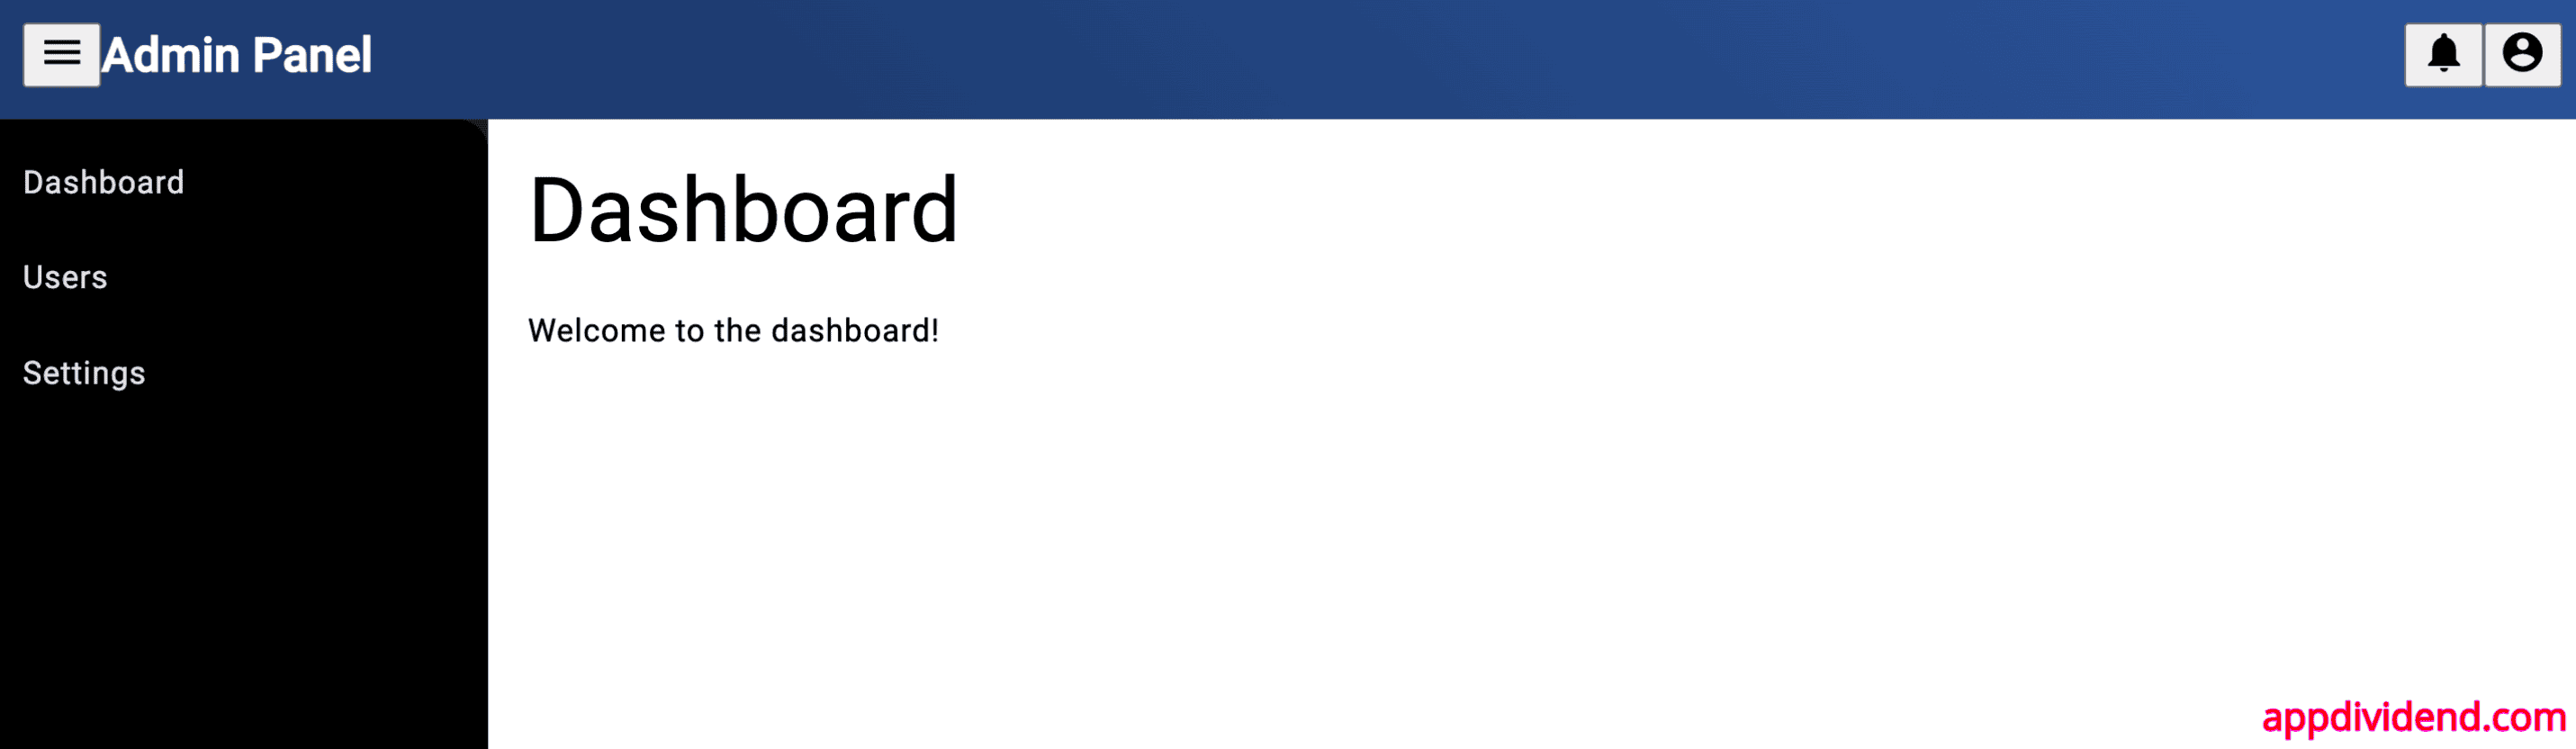
The output looks like this:
That’s all!

william
Hi Krunal!
I am beginner at angular js. I need guidance about which technology i should learn first type script or ES6 before jumping in angular js. Thanks!
Krunal
Definitely, go with typescript. It is by default language of angular 2 or 4.
Cornel
The title is a bit misleading since AngularJS generally refers to version 1.
Krunal
Yes but now and the future, It will always remember as Angular 4 as an AngularJS. But thanks for the suggestion.
awank
hi krunal, that is good tutorial for me. I want to ask you a question. How about, when we want to have another page like login page and backend page which have different css and js? How to implement it in angular 4? thank you.
Ahmad
hi, Krunal,
Great work and you put a great effort. it helps me a lot.
Thanks
yogesh
its superb,thanks alot…….
saravanan
Hi Krunal ,
Great work and you put a great effort
I want to ask you a question , i have added login page , after login it will go to dahsboard
the sidebar is not working
Avani Bhatnagar
Hey can I use this technique to integrate some online website template that I found online or is it just for the admin?
Also am I supposed to install any plug ins? I’m using Webstorm and I get a TSLint Error saying “Could not find custom rule directory: C:\…\node_modules\codelyzer”. Was I supposed to install codelyzer?
Krunal
I do not know other templating structure, but this is the standard way to do it, plugins are totally different things. You need to read the docs for that plugin. If the admin package is the third party then you need to read the full documentation of it. Otherwise, it will not work. If your admin panel is powered only bootstrap css framework then and then go for this technique.
Senthilkumar S P
Really Nice tutorial and very useful. On the side bar you are showing the icon and title, how to have only icon i.e., to expand the main content area and reduce the side bar to display only icon using accordion.
Mohammad Zeeshan
Hey krunal i am new in Angular 5 and i need to integrate ClientDashBoard, Admin Dashboard, ExtraDashboard with Different themes Each How can i achieve it,
Thanks in advance
sakthi
It’s nice .. Could you please explain and give some sample to maintain Admin and client template on same application in angular4/6 ?
Praphul Agarwal
it was very helpful….
appreciate your efforts to understand us in detail manner..
thank you sir
Sudhir
Hello Krunal,
I like your article it’s really help full. But, I have a situation.
I have about us and contact us setup. I created controllers and everything is set according to your article. Now who can we load aboutus content when I click on about navigation
Hope you understand.
Thanks
Sudhirk
Dandu Muniraja
Hi Krunal,
I like this article very much, Looks great I enjoyed, My doubt is shall I add admin template for Angular 7 with the same procedure? above mentioned steps?
Please let me know. Thanks in advance …!!!!
Kamlesh
Thanks for this tutorial. Theme is working well but javascript for datepicker, notifications, charts and other modules related to javascripts are not working. Could you please suggest me how can i use javascript in ts file for datepicker, notifications, charts and other modules. Thanks a lot. Look forward to hear you.
Amanda
Hey! I saw this tutorial was updated 1 year ago. Do you have the version of this tutorial with AngularJS? It would help me a lot!!!
jagadeesh
Finally, our today’s task Integrate admin template in Angular 4 application is complete. Right now I have just integrated the home page, but you can also link any of the pages via angular routing, which we will see in the next tutorial.
provide me a link for next tutorial.
Thank You
Namit Singh
Sidebar is not working
Namit Singh
No one is telling the answer why sidebar is not working? can anyone please?
ahmed bel
Hello
if you can helpme , i want to integrate in this dashboard login and logout app and myapp databse web api asp core, please help me i dont know from what to start.
thanks