
MEVN stack stands for (MongoDB, Express.js, Vue.js, Node.js) is the open-source JavaScript software stack that has emerged as a new and evolving way to build robust and dynamic web applications.
- MongoDB: It is a document-oriented NoSQL database that provides a flexible and scalable solution.
- Express.js: It is a minimalist web application framework that runs on Node.js and simplifies server-side development and API creation.
- Vue.js: It is a progressive front-end web framework.
- Node.js: It is a JavaScript run-time environment.
Let’s install @vue-cli globally using this command:
npm install -g @vue/cli

# OR

yarn global add @vue/cli
You can check the version of Vue.js using this command.
vue --versionHere are the steps to create a MEVN stack application.
Step 1: Create a Vue.js project
Type the following command to install Vue.js.
vue create mevnexample 
Inside the vue project.
cd mevnexampleOpen the project inside the code editor. I am using Visual Code.
code .Start the vue dev server using the following command.
npm run serveGo to http://localhost:8080.
You can see that we have successfully installed Vue.js.
Step 2: Install Vue dependencies.
Type the following command to install the axios, vue-router, and vue-axios dependencies. The vue-router is used for routing our Vue.js application to use the different components, and the vue-axios is for sending the network request to the server.
npm install axios vue-router vue-axios --saveInstall the Bootstrap CSS Framework version 4 using the following command.
npm install bootstrap --saveImport the Bootstrap 4 CSS inside the main.js file.
// main.js

import Vue from 'vue'
import App from './App.vue'
import 'bootstrap/dist/css/bootstrap.min.css'

Vue.config.productionTip = false

new Vue({
  render: h => h(App),
}).$mount('#app')
Step 3: Create the vue components.
Go to the src >> components folder, remove the HelloWorld.vue file, and create the following components.
- HomeComponent.vue
- CreateComponent.vue
- EditComponent.vue
- IndexComponent.vue
Add the following code inside the HomeComponent.vue file.
<template>
  <div class="row justify-content-center">
      <div class="col-md-8">
          <div class="card card-default">
              <div class="card-header">Home Component</div>

              <div class="card-body">
                  I'm the Home Component component.
              </div>
          </div>
      </div>
  </div>
</template>
<script>
export default {
}
</script>
The next step is to import the HomeComponent.vue file inside the App.vue file.
// App.vue

<template>
  <div>
    <HomeComponent />
  </div>
</template>

<script>
import HomeComponent from './components/HomeComponent.vue'

export default {
  name: 'app',
  components: {
    HomeComponent
  }
}
</script>
Save the file, and if the server is running, you can go to http://localhost:8080 and see that HomeComponent is rendering.
Create the remaining three components.
// CreateComponent.vue

<template>
  <div class="row justify-content-center">
      <div class="col-md-8">
          <div class="card card-default">
              <div class="card-header">Create Component</div>

              <div class="card-body">
                  I'm the Create Component component.
              </div>
          </div>
      </div>
  </div>
</template>

<script>
  export default {
  }
</script>
// EditComponent.vue

<template>
  <div class="row justify-content-center">
      <div class="col-md-8">
          <div class="card card-default">
              <div class="card-header">Edit Component</div>

              <div class="card-body">
                  I'm an Edit component.
              </div>
          </div>
      </div>
  </div>
</template>

<script>
  export default {
  }
</script>
// IndexComponent.vue

<template>
  <div class="row justify-content-center">
      <div class="col-md-8">
          <div class="card card-default">
              <div class="card-header">Index Component</div>

              <div class="card-body">
                  I'm an Index component.
              </div>
          </div>
      </div>
  </div>
</template>

<script>
  export default {
  }
</script>
Step 4: Configure the vue-router
Inside the main.js file, write the following code.
// main.js

import Vue from 'vue'
import App from './App.vue'
import 'bootstrap/dist/css/bootstrap.min.css'

import VueRouter from 'vue-router';
Vue.use(VueRouter);

Vue.config.productionTip = false;

import HomeComponent from './components/HomeComponent.vue';
import CreateComponent from './components/CreateComponent.vue';
import IndexComponent from './components/IndexComponent.vue';
import EditComponent from './components/EditComponent.vue';

const routes = [
  {
      name: 'home',
      path: '/',
      component: HomeComponent
  },
  {
      name: 'create',
      path: '/create',
      component: CreateComponent
  },
  {
      name: 'posts',
      path: '/posts',
      component: IndexComponent
  },
  {
      name: 'edit',
      path: '/edit/:id',
      component: EditComponent
  }
];

const router = new VueRouter({ mode: 'history', routes: routes});

new Vue(Vue.util.extend({ router }, App)).$mount('#app');
Add the <router-view> inside the App.vue file.
// App.vue

<template>
  <div>
    <router-view></router-view>
  </div>
</template>

<script>


export default {
  name: 'app'
}
</script>
Save the file and check the following route paths to see if we get the exact routes.
- http://localhost:8080/create
- http://localhost:8080/posts
- http://localhost:8080/edit/21
Write the following code inside the App.vue file. I have added the navbar.
// App.vue

<template>
  <div class="container">
    <nav class="navbar navbar-expand-sm bg-dark navbar-dark">
      <ul class="navbar-nav">
        <li class="nav-item">
          <router-link to="/" class="nav-link">Home</router-link>
        </li>
        <li class="nav-item">
          <router-link to="/create" class="nav-link">Create Post</router-link>
        </li>
        <li class="nav-item">
          <router-link to="/posts" class="nav-link">Posts</router-link>
        </li>
      </ul>
    </nav><br />
    <transition name="fade">
      <router-view></router-view>
    </transition>
  </div>
</template>

<style>
    .fade-enter-active, .fade-leave-active {
      transition: opacity .5s
    }
    .fade-enter, .fade-leave-active {
      opacity: 0
    }
</style>

<script>

    export default{
    }
</script>
What we have done is add the navigation bar and add some animation effects like transition. So when we navigate the routes, the component changes according to their path.

Step 6: Create a Form
We need to create a form to enter the details of the form. So let us create a form inside the CreateComponent.vue file.
// CreateComponent.vue

<template>
  <div>
    <h1>Create A Post</h1>
    <form @submit.prevent="addPost">
      <div class="row">
        <div class="col-md-6">
          <div class="form-group">
            <label>Post Title:</label>
            <input type="text" class="form-control" v-model="post.title">
          </div>
        </div>
        </div>
        <div class="row">
          <div class="col-md-6">
            <div class="form-group">
              <label>Post Body:</label>
              <textarea class="form-control" v-model="post.body" rows="5"></textarea>
            </div>
          </div>
        </div><br />
        <div class="form-group">
          <button class="btn btn-primary">Create</button>
        </div>
    </form>
  </div>
</template>

<script>
    export default {
        data(){
        return {
          post:{}
        }
    },
    methods: {
      addPost(){
        console.log(this.post);
      }
    }
  }
</script>
Save the file and go to this URL: http://localhost:8080/create or /create. Then you can see the form below.

Step 7: Create a Node.js backend.
Create one folder inside the vue project root called api and go inside that folder.
Initialize the package.json file.
npm init -yInstall the following node.js dependencies.
yarn add express body-parser cors mongoose

# or

npm install express body-parser cors mongoose --save
Install a nodemon server as a development dependency. So that we do not need to restart every time we change our server code.
npm install nodemon --save-devCreate three files called server.js, DB.js, post.model.js, and post.route.js. All these files are inside the root of the api folder. For example, write the following code in the server.js file.
// server.js

const express = require('express');
const app = express();
const bodyParser = require('body-parser');
const PORT = 4000;
const cors = require('cors');

app.use(cors());
app.use(bodyParser.urlencoded({extended: true}));
app.use(bodyParser.json());

app.listen(PORT, function(){
  console.log('Server is running on Port:',PORT);
});
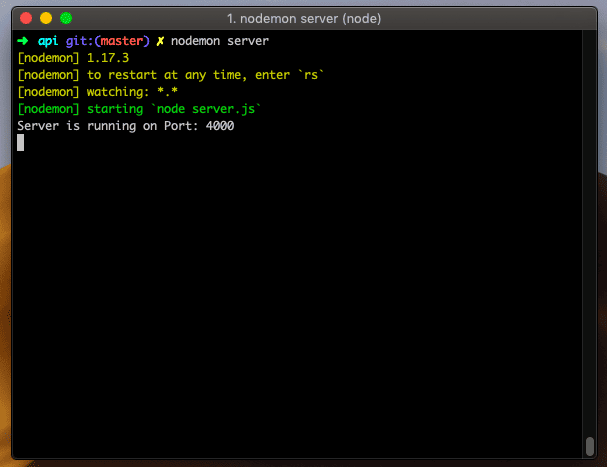
We need to start a node server using the following command.
nodemon serverOur node.js server is running at port: 4000.
Step 8: Set up and connect the MongoDB database.
mongodInside an api folder, create one file called DB.js, which connects our node application to the mongodb database. So add the following line of code.
// DB.js

module.exports = {
    DB: 'mongodb://localhost:27017/mevncrud'
}
In my local MongoDB database, the username and password are empty, but in the production database, you must create one user and assign that user to the database.
Import this DB.js file into the server.js file.
// server.js

const express = require('express');
const app = express();
const bodyParser = require('body-parser');
const PORT = 4000;
const cors = require('cors');
const mongoose = require('mongoose');
const config = require('./DB.js');

mongoose.Promise = global.Promise;
mongoose.connect(config.DB, { useNewUrlParser: true }).then(
  () => {console.log('Database is connected') },
  err => { console.log('Can not connect to the database'+ err)}
);

app.use(cors());
app.use(bodyParser.urlencoded({extended: true}));
app.use(bodyParser.json());

app.listen(PORT, function(){
  console.log('Server is running on Port:',PORT);
});
Save the file, and you can see inside the terminal that our node.js application is connected to the mongodb database.
Step 9: Create a Mongoose Schema
Write the following code inside the post.model.js file.
// post.model.js

const mongoose = require('mongoose');
const Schema = mongoose.Schema;

// Define collection and schema for Post
let Post = new Schema({
  title: {
    type: String
  },
  body: {
    type: String
  }
},{
    collection: 'posts'
});

module.exports = mongoose.model('Post', Post);
We have taken three fields called title and body with the String data type.
Step 10: Define a route for the Node.js Express application
Write the CRUD operation code inside the post.route.js file.
// post.model.js

const express = require('express');
const postRoutes = express.Router();

// Require Post model in our routes module
let Post = require('./post.model');

// Defined store route
postRoutes.route('/add').post(function (req, res) {
  let post = new Post(req.body);
  post.save()
    .then(() => {
      res.status(200).json({'business': 'business in added successfully'});
    })
    .catch(() => {
      res.status(400).send("unable to save to database");
    });
});

// Defined get data(index or listing) route
postRoutes.route('/').get(function (req, res) {
    Post.find(function(err, posts){
    if(err){
      res.json(err);
    }
    else {
      res.json(posts);
    }
  });
});

// Defined edit route
postRoutes.route('/edit/:id').get(function (req, res) {
  let id = req.params.id;
  Post.findById(id, function (err, post){
      if(err) {
        res.json(err);
      }
      res.json(post);
  });
});

//  Defined update route
postRoutes.route('/update/:id').post(function (req, res) {
    Post.findById(req.params.id, function(err, post) {
    if (!post)
      res.status(404).send("data is not found");
    else {
        post.title = req.body.title;
        post.body = req.body.body;
        post.save().then(() => {
          res.json('Update complete');
      })
      .catch(() => {
            res.status(400).send("unable to update the database");
      });
    }
  });
});

// Defined delete | remove | destroy route
postRoutes.route('/delete/:id').delete(function (req, res) {
    Post.findByIdAndRemove({_id: req.params.id}, function(err){
        if(err) res.json(err);
        else res.json('Successfully removed');
    });
});

module.exports = postRoutes;
Here, we have defined the CRUD operations in Node.js, the backend server-side. So when the request from the clientside hits the node express server, it maps the URI, and according to URI, the above function will be executed. Database operation will be performed, and send the response to the client; in our case, it is the vue.js front.
We have used a Mongoose ORM to create, read, update, and delete the data from the mongodb database. Mongoose is an ORM(Object Relational Mapping) used in the MongoDB database. We have all the CRUD operations on the post.route.js file; we must import them into the server.js file.
The final server.js file looks like this.
// server.js

const express = require('express');
const app = express();
const bodyParser = require('body-parser');
const PORT = 4000;
const cors = require('cors');
const mongoose = require('mongoose');
const config = require('./DB.js');
const postRoute = require('./post.route');

mongoose.Promise = global.Promise;
mongoose.connect(config.DB, { useNewUrlParser: true }).then(
  () => { console.log('Database is connected') },
  err => { console.log('Can not connect to the database'+ err)}
);

app.use(cors());
app.use(bodyParser.urlencoded({extended: true}));
app.use(bodyParser.json());

app.use('/posts', postRoute);

app.listen(PORT, function(){
  console.log('Server is running on Port:',PORT);
});
Step 11: Use axios to send a network request
Go to the frontend vue project and import the axios and vue-axios inside the main.js file.
// main.js

import Vue from 'vue'
import App from './App.vue'
import 'bootstrap/dist/css/bootstrap.min.css'

import VueRouter from 'vue-router';
Vue.use(VueRouter);

import VueAxios from 'vue-axios';
import axios from 'axios';

Vue.use(VueAxios, axios);

Vue.config.productionTip = false;

import HomeComponent from './components/HomeComponent.vue';
import CreateComponent from './components/CreateComponent.vue';
import IndexComponent from './components/IndexComponent.vue';
import EditComponent from './components/EditComponent.vue';

const routes = [
  {
      name: 'home',
      path: '/',
      component: HomeComponent
  },
  {
      name: 'create',
      path: '/create',
      component: CreateComponent
  },
  {
      name: 'posts',
      path: '/posts',
      component: IndexComponent
  },
  {
      name: 'edit',
      path: '/edit/:id',
      component: EditComponent
  }
];

const router = new VueRouter({ mode: 'history', routes: routes});

new Vue(Vue.util.extend({ router }, App)).$mount('#app');
We have created the backend. The next step is to send the POST request to the node.js api server. Remember, now we have three servers running.
- Vue development server
- Node.js server
- MongoDB server
Remember, all are running fine; otherwise, the project won’t work.
Write the following code inside the CreateComponent.vue file’s addPost() function.
// CreateComponent.vue

addPost(){
    let uri = 'http://localhost:4000/posts/add';
    this.axios.post(uri, this.post).then(() => {
       this.$router.push({name: 'posts'});
    });
}
You can now create the post and see it in the mongodb database.
To check from the terminal, you must open the mongoshell using the following command.
mongo

Step 12: Display the backend data.
Write the following code inside the IndexComponent.js file.
// IndexComponent.js

<template>
  <div>
      <h1>Posts</h1>
        <div class="row">
          <div class="col-md-10"></div>
          <div class="col-md-2">
            <router-link :to="{ name: 'create' }" class="btn btn-primary">Create Post</router-link>
          </div>
        </div><br />

        <table class="table table-hover">
            <thead>
            <tr>
              <th>Title</th>
              <th>Body</th>
              <th>Actions</th>
            </tr>
            </thead>
            <tbody>
                <tr v-for="post in posts" :key="post._id">
                  <td>{{ post.title }}</td>
                  <td>{{ post.body }}</td>
                  <td><router-link :to="{name: 'edit', params: { id: post._id }}" class="btn btn-primary">Edit</router-link></td>
                  <td><button class="btn btn-danger">Delete</button></td>
                </tr>
            </tbody>
        </table>
  </div>
</template>

<script>
  export default {
      data() {
        return {
          posts: []
        }
      },
      created() {
      let uri = 'http://localhost:4000/posts';
      this.axios.get(uri).then(response => {
        this.posts = response.data;
      });
    }
  }
</script>
When the component is created, it will send a GET request to the node.js server, fetch the data from the database, assign that data to the posts array, and then loop through that array and display the data in the tabular format.

Step 13: Send edit and update request
When our edit component loads, we need to fetch the data from the server to display the existing data.
Then, after changing the data in the textbox and textarea, we hit the update button and called the updatePost() function to send a post request to the server to update the data.
// EditComponent.vue

<template>
  <div>
    <h1>Edit Post</h1>
    <form @submit.prevent="updatePost">
      <div class="row">
        <div class="col-md-6">
          <div class="form-group">
            <label>Post Title:</label>
            <input type="text" class="form-control" v-model="post.title">
          </div>
        </div>
        </div>
        <div class="row">
          <div class="col-md-6">
            <div class="form-group">
              <label>Post Body:</label>
              <textarea class="form-control" v-model="post.body" rows="5"></textarea>
            </div>
          </div>
        </div><br />
        <div class="form-group">
          <button class="btn btn-primary">Update</button>
        </div>
    </form>
  </div>
</template>

<script>
    export default {

      data() {
        return {
          post: {}
        }
      },
      created() {
        let uri = `http://localhost:4000/posts/edit/${this.$route.params.id}`;
        this.axios.get(uri).then((response) => {
            this.post = response.data;
        });
      },
      methods: {
        updatePost() {
          let uri = `http://localhost:4000/posts/update/${this.$route.params.id}`;
          this.axios.post(uri, this.post).then(() => {
            this.$router.push({name: 'posts'});
          });
        }
      }
    }
</script>
You will see the edited data from the database, and also you can update the database. So till now, insert, read, and update operations are complete. Now, last, the delete is remaining.
Step 14: Delete or Remove the data.
The only remaining thing is to delete or remove the data from the database.
Let us write the final code inside the IndexComponent.vue file.
// IndexComponent.vue

<template>
  <div>
      <h1>Posts</h1>
        <div class="row">
          <div class="col-md-10"></div>
          <div class="col-md-2">
            <router-link :to="{ name: 'create' }" class="btn btn-primary">Create Post</router-link>
          </div>
        </div><br />

        <table class="table table-hover">
            <thead>
            <tr>
              <th>Title</th>
              <th>Body</th>
              <th>Actions</th>
            </tr>
            </thead>
            <tbody>
                <tr v-for="post in posts" :key="post._id">
                  <td>{{ post.title }}</td>
                  <td>{{ post.body }}</td>
                  <td><router-link :to="{name: 'edit', params: { id: post._id }}" class="btn btn-primary">Edit</router-link></td>
                  <td><button class="btn btn-danger" @click.prevent="deletePost(post._id)">Delete</button></td>
                </tr>
            </tbody>
        </table>
  </div>
</template>

<script>
  export default {
      data() {
        return {
          posts: []
        }
      },
      created() {
      let uri = 'http://localhost:4000/posts';
      this.axios.get(uri).then(response => {
        this.posts = response.data;
      });
    },
    methods: {
      deletePost(id)
      {
        let uri = `http://localhost:4000/posts/delete/${id}`;
        this.axios.delete(uri).then(response => {
          this.posts.splice(this.posts.indexOf(id), 1);
        });
      }
    }
  }
</script>
Save the file; now, you can delete the values from the MongoDB database.
Our MEVN Stack Tutorial With Example Demo is over. However, I have put this code on Github. So check that out as well.
That’s it!

mohamed
I’m trying it in server but it return error apis not working , i cloned the project
andrel
work..
Gil
best mevn crud tutorial that i’ve found so far. thanks
Bill Jenner
This is a bug. This code deletes from the end of the list until a refresh occurs.
this.posts.splice(this.posts.indexOf(id), 1);
Dany
Thank you this is very useful
Marco Oliveira
Fixed the bug at the end on delete:
this.posts.splice(this.posts.findIndex(i => i._id == id), 1);
Vishal
Clear and distinct. Good post. (y)
Yahnic
ERROR Failed to compile with 1 errors 4:45:15 PM
error in ./src/components/IndexComponent.vue
Module Error (from ./node_modules/eslint-loader/index.js):
error: ‘response’ is defined but never used (no-unused-vars) at src\components\IndexComponent.vue:48:37:
46 | {
47 | let uri = `http://localhost:4000/posts/delete/${id}`;
> 48 | this.axios.delete(uri).then(response => {
| ^
49 | this.posts.splice(this.posts.findIndex(i => i._id == id), 1); });
50 | }
51 | }
Bijay
Great tutorial bro. Thanks 🙂
Yonas
The delete statement is not working. I have tried the solutions suggested by the comment section and it is still not working. any other suggestions?