
The process.env is a property of the process module that is used to get the user environment. It is a global object that contains the environment variables of a system on which Node.js is running.
Syntax
process.env
Return value
This property returns an object containing the user environment.
Accessing Environment Variables
Accessing environment variables in Node.js is supported out of the box.
When your Node.js process boots up, it will automatically provide access to all the existing environment variables by creating the env object as a property of the process global object.
I am using Node.js version 21.7. Please install it if you have not already done so.
After that, create a file called app.js and add the following code.
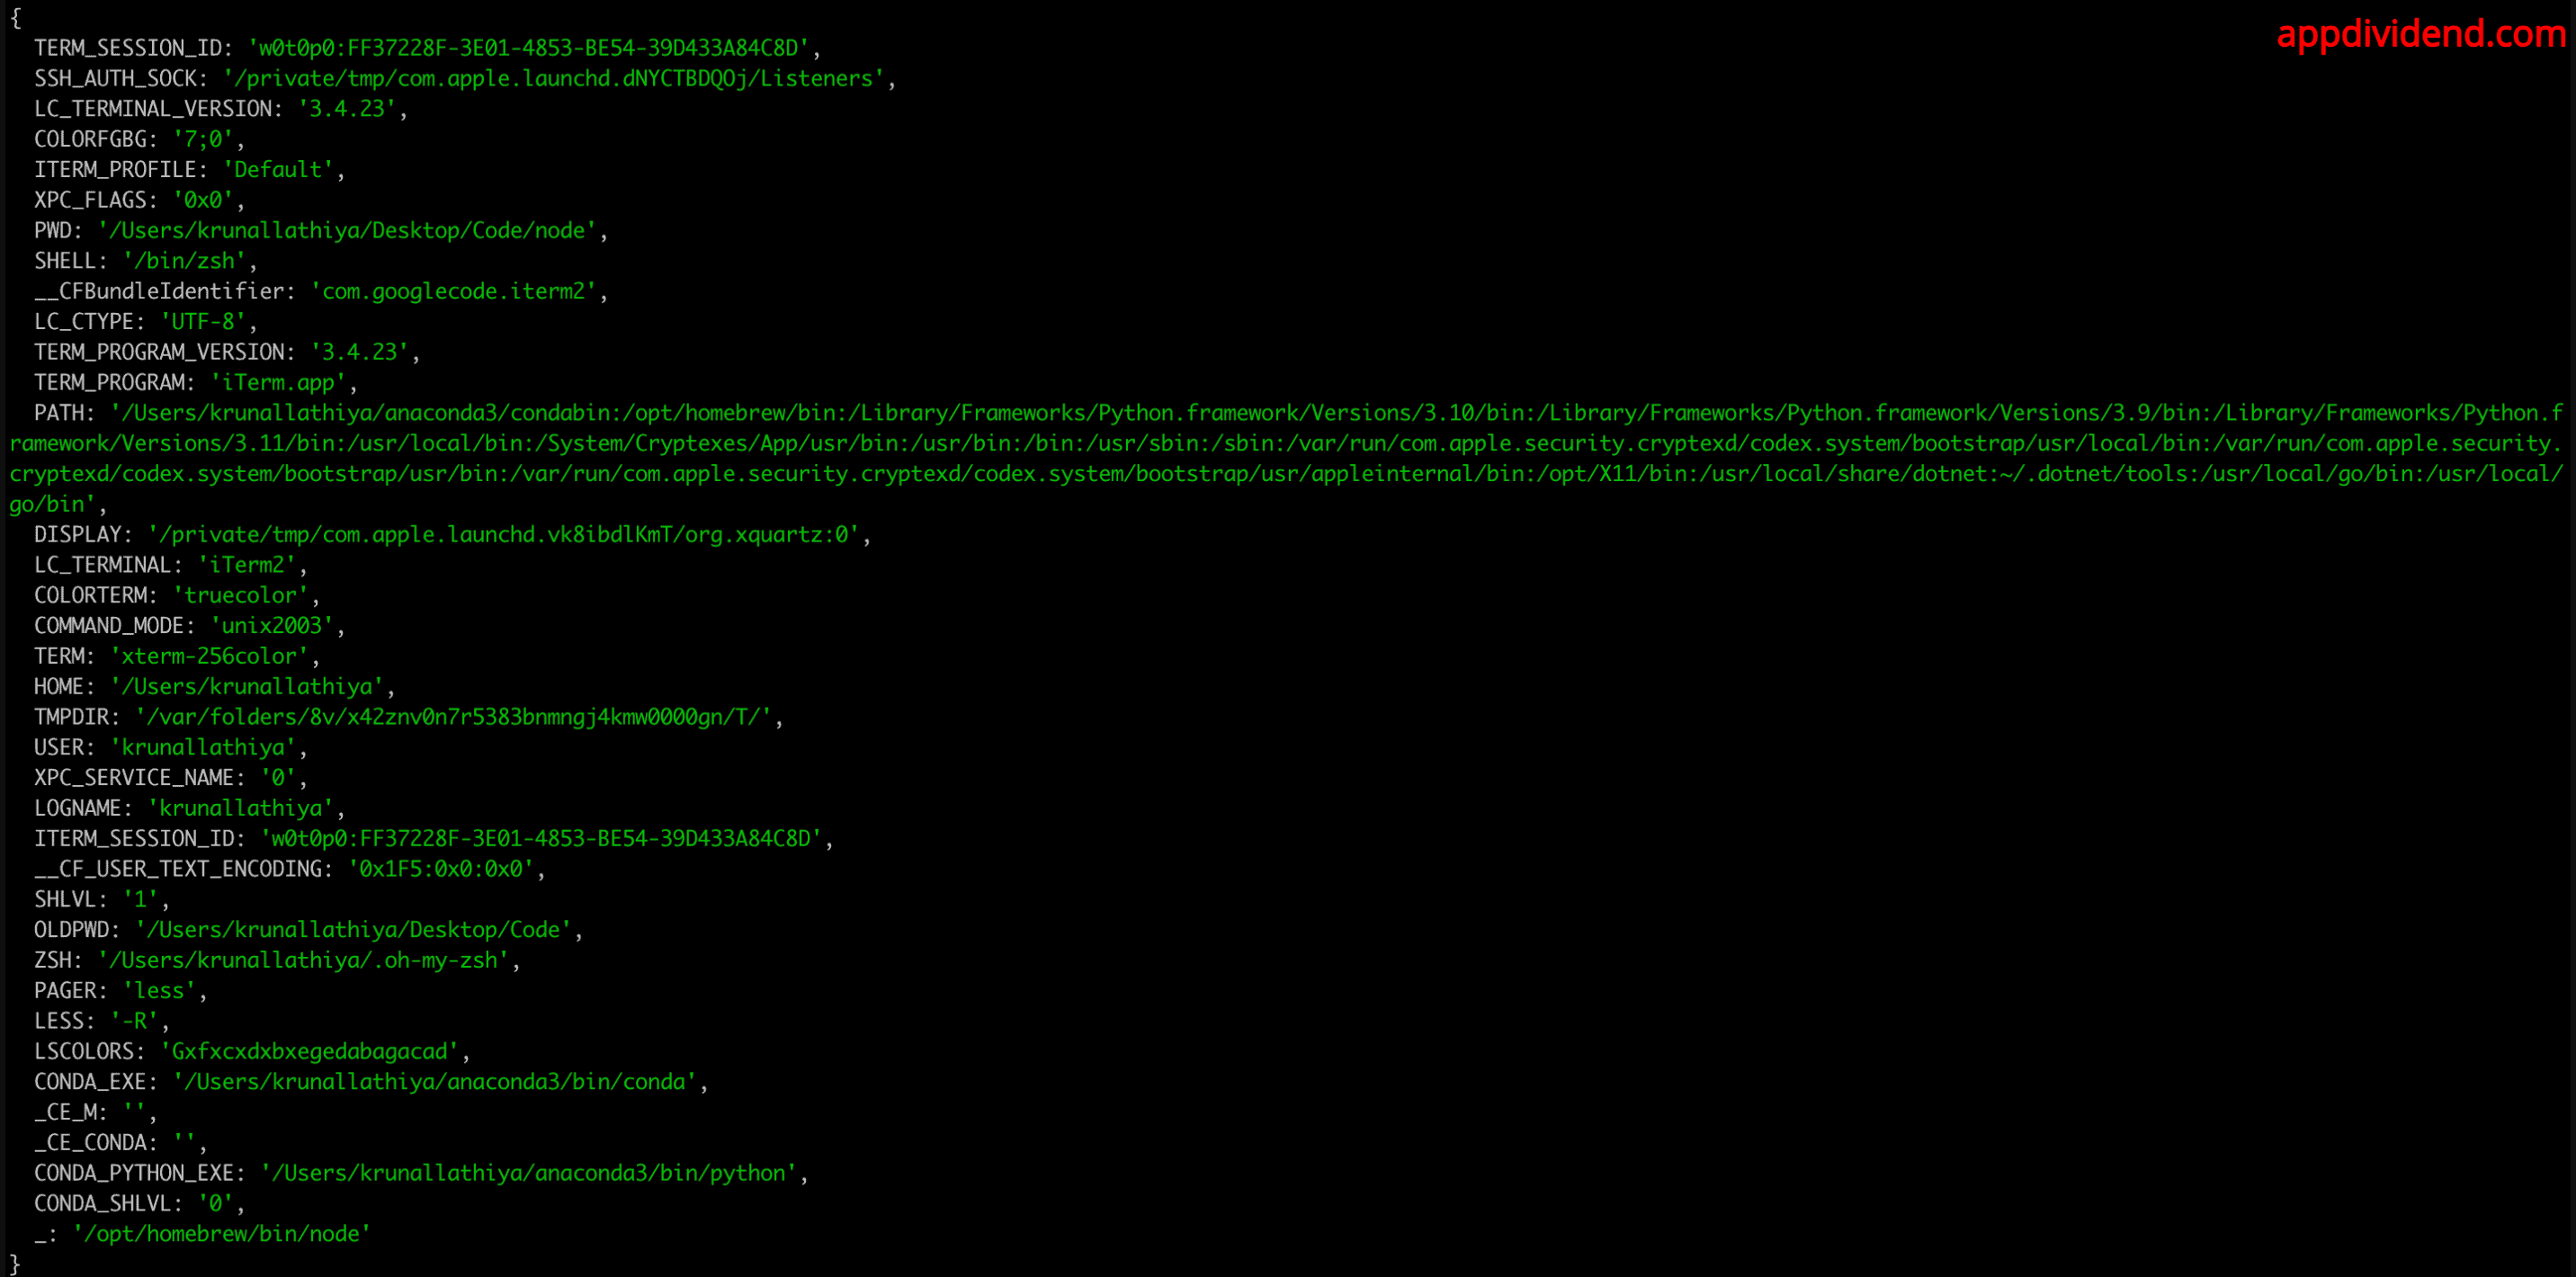
console.log(process.env);
Go to the terminal and hit the following command.
node app
It will return an object like this:
If we want to access one specific variable, access it like any object property.
For example, let’s access the PORT property.
console.log(process.env.PORT);
You will see the undefined output because we have not defined a specific port yet.
Cloud hosts like Heroku or Azure use the PORT variable to tell you which port your server should listen to so the routing works correctly.
Therefore, the next time you set up the web server, you should determine the port to listen on by checking PORT first and giving it a default value otherwise.
Setting Environment Variables
There are three ways to set environment variables in Node.js:
- Directly in code (Not recommended)
- Command line (Not recommended)
- By creating .env file (Recommended)
Method 1: Directly in code (Not recommended)
In Node.js 21, you can use the latest JavaScript features, including ES modules and modern syntax.
Make sure your package.json file includes “type”: “module” to enable ES module support like this:
{
  "type": "module"
}
Now, add the below code inside the “app.js” file:
import { createServer } from 'http';

process.env.PORT = 4000;

const app = createServer((req, res) => {
    res.writeHead(200, { 'Content-Type': 'text/plain' });
    res.end('Ahoy!');
});

app.listen(process.env.PORT, () => {
    console.log(`Server is listening on port: ${process.env.PORT}`);
});
In the above code, we have created the HTTP server, which runs on a 4000 port.
The above code lacks security for sensitive information, so this approach is not recommended.
Method 2: Command line (Not recommended)
You can also define a port via the command line while booting up the node.js server like this:
PORT=4000 node app
And your app.js file looks like this:
import { createServer } from 'http';

// Use the PORT environment variable or default to 3000
const PORT = process.env.PORT || 3000;

const app = createServer((req, res) => {
    res.writeHead(200, { 'Content-Type': 'text/plain' });
    res.end('Ahoy!');
});

app.listen(PORT, () => {
    console.log(`Server is listening on port: ${PORT}`);
});
If you run the command, you will see something like this in the terminal output: Server is listening on port: 4000. Go to the browser and navigate to this URL: http://localhost:4000/
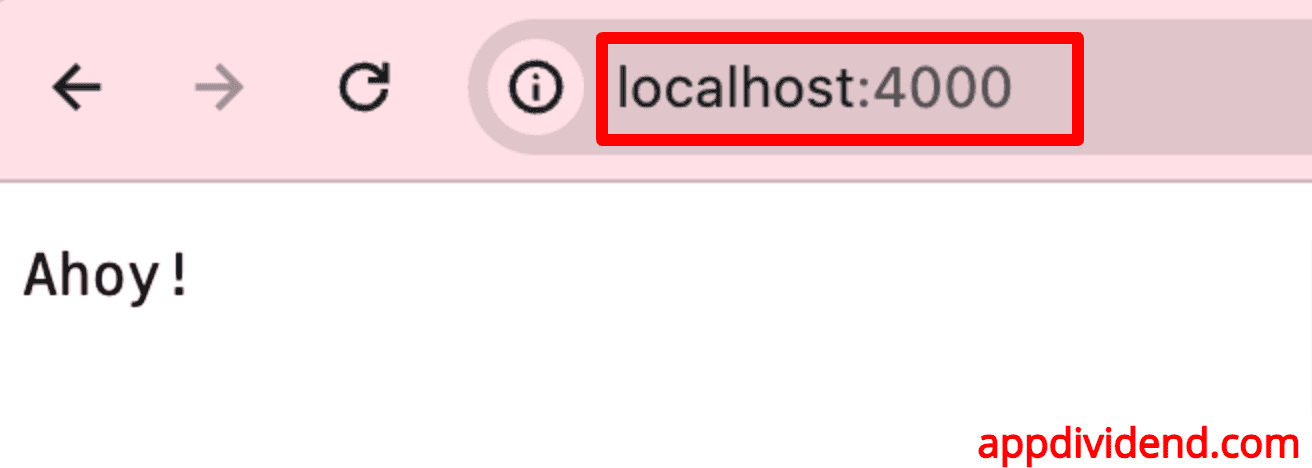
If you provide a port number while starting the server, it will run on that port; however, if you don’t explicitly provide a port, it will run on port 3000 because we defined a default port number.
If you are using Windows, the syntax for setting environment variables in the command line is slightly different:
set PORT=3000 && node app
Method 3: By creating a .env file (Recommended)
The .env file is the most recommended way to define environment variables for your application. To keep sensitive information secure, the .env file is not included in version control (e.g., using .gitignore for Git).
A standard application-level tool, dotenv, allows us to load the environment variables from a file named .env.
Let’s install the “dotenv” package using the following command:
npm install dotenv
Create a .env file in the root of your project like this:
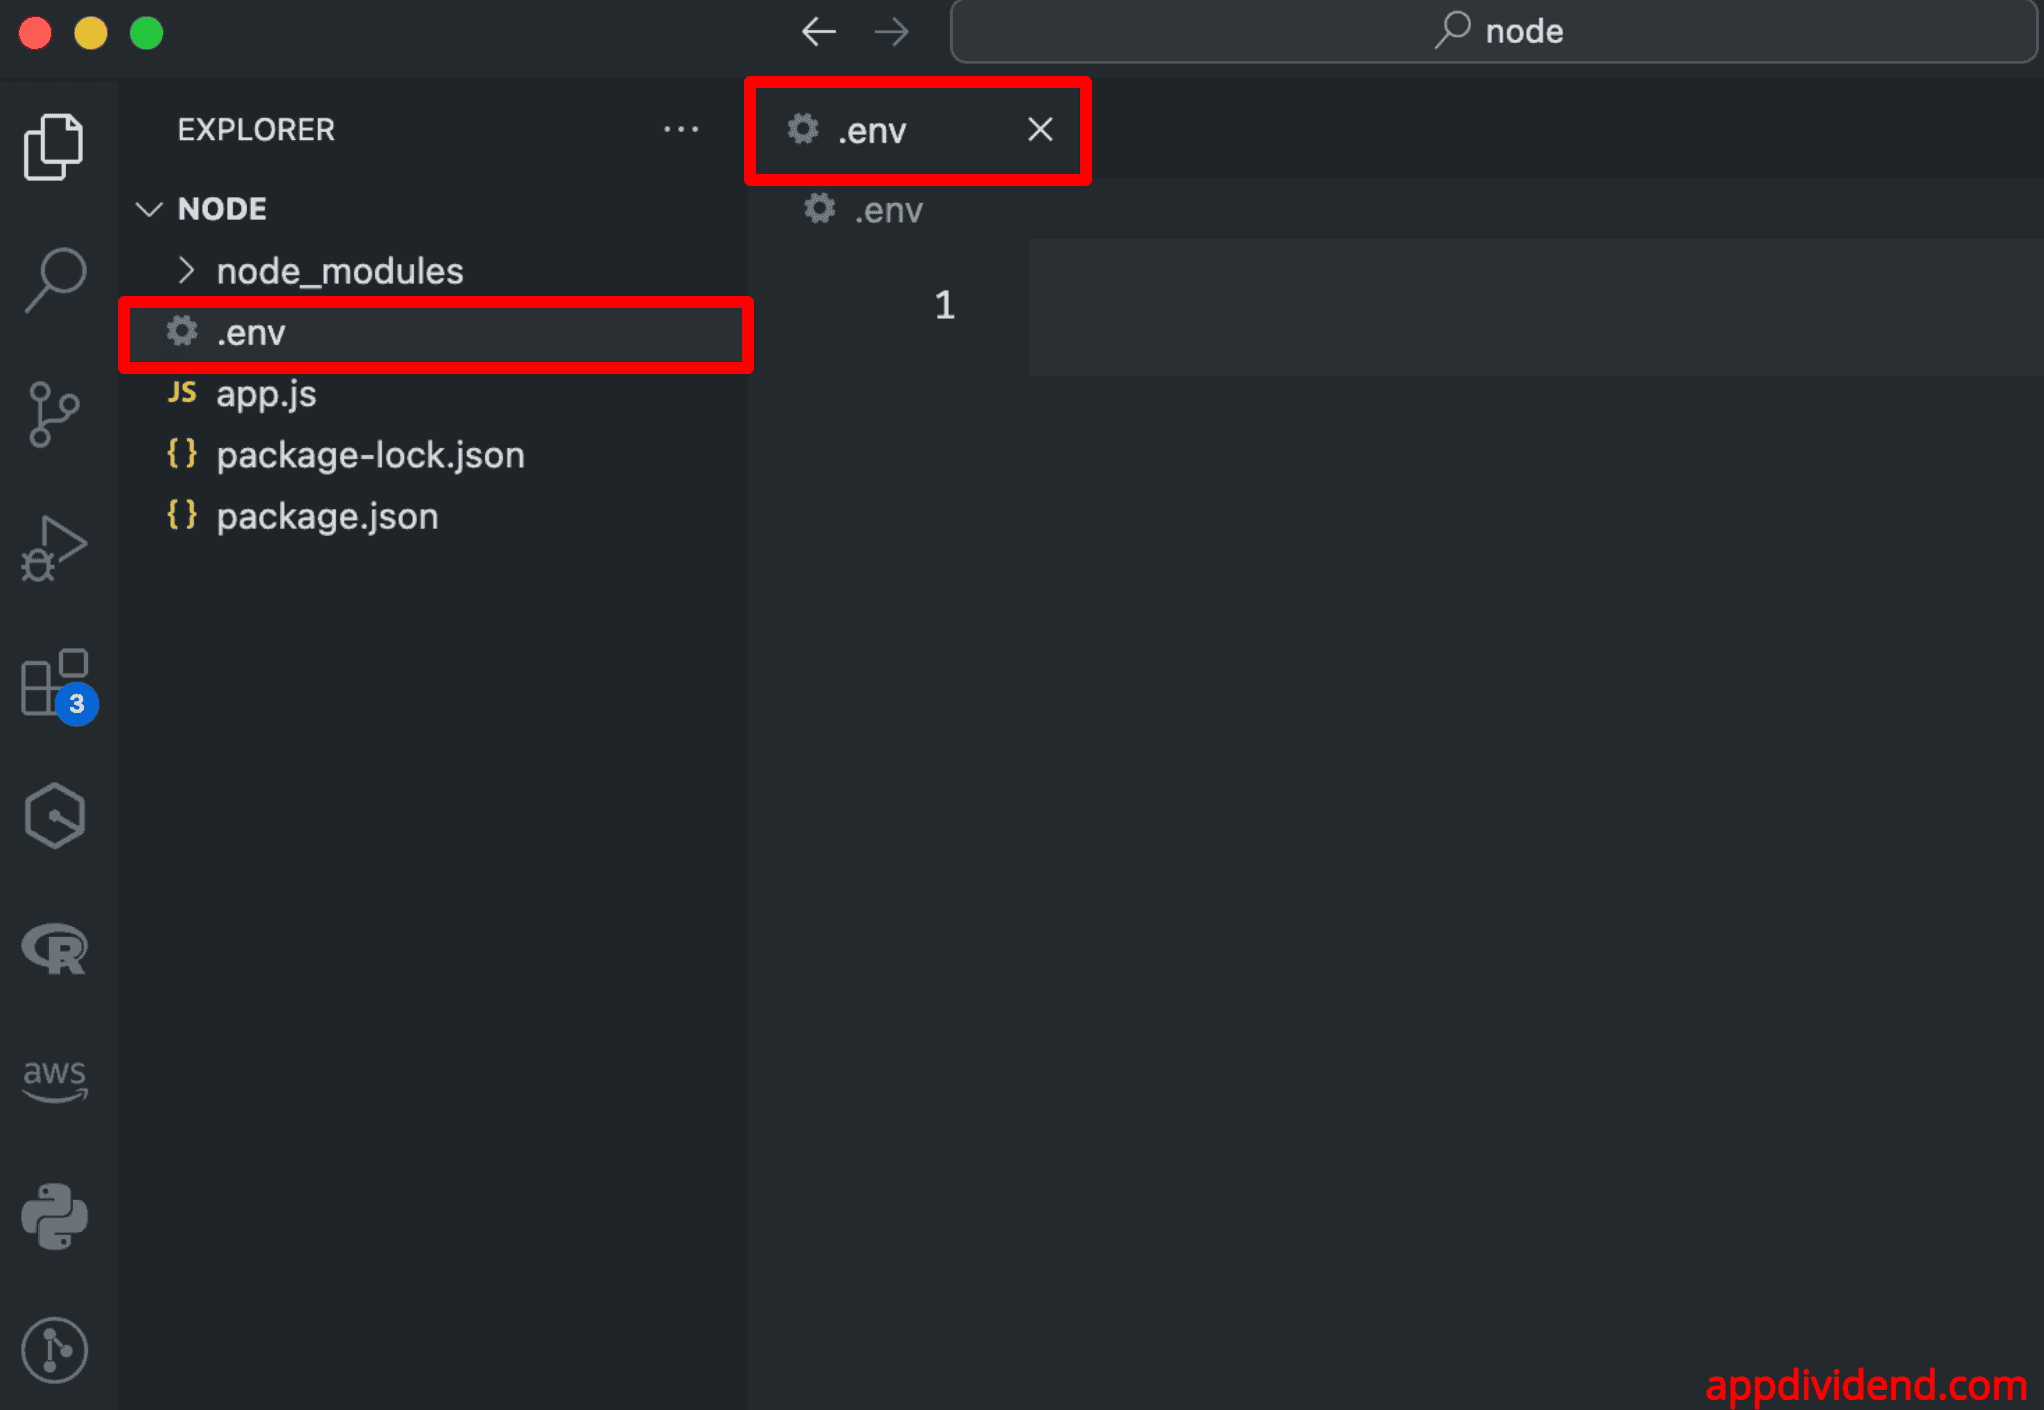
Define the following variables inside the .env file:
PORT=4000
DATABASE_URL=mongodb://localhost/mydb
We defined two sensitive variables:
- Port number
- Database URL
Now, you can load these variables in your application like this:
// app.js

import { createServer } from 'http';
import { config } from 'dotenv';

// Load environment variables from .env file
config();

const PORT = process.env.PORT || 4000;
const dbUrl = process.env.DATABASE_URL;

const app = createServer((req, res) => {
    res.writeHead(200, { 'Content-Type': 'text/plain' });
    res.end('Ahoy!');
});

app.listen(PORT, () => {
    console.log(`Server is listening on port: ${PORT}`);
    console.log(`Database URL: ${dbUrl}`);
});
Go to the terminal and start the development server using this command: node app

While this is convenient for development needs, pairing the environment with our application is considered harmful, so keep it out by adding .env to your .gitignore file.
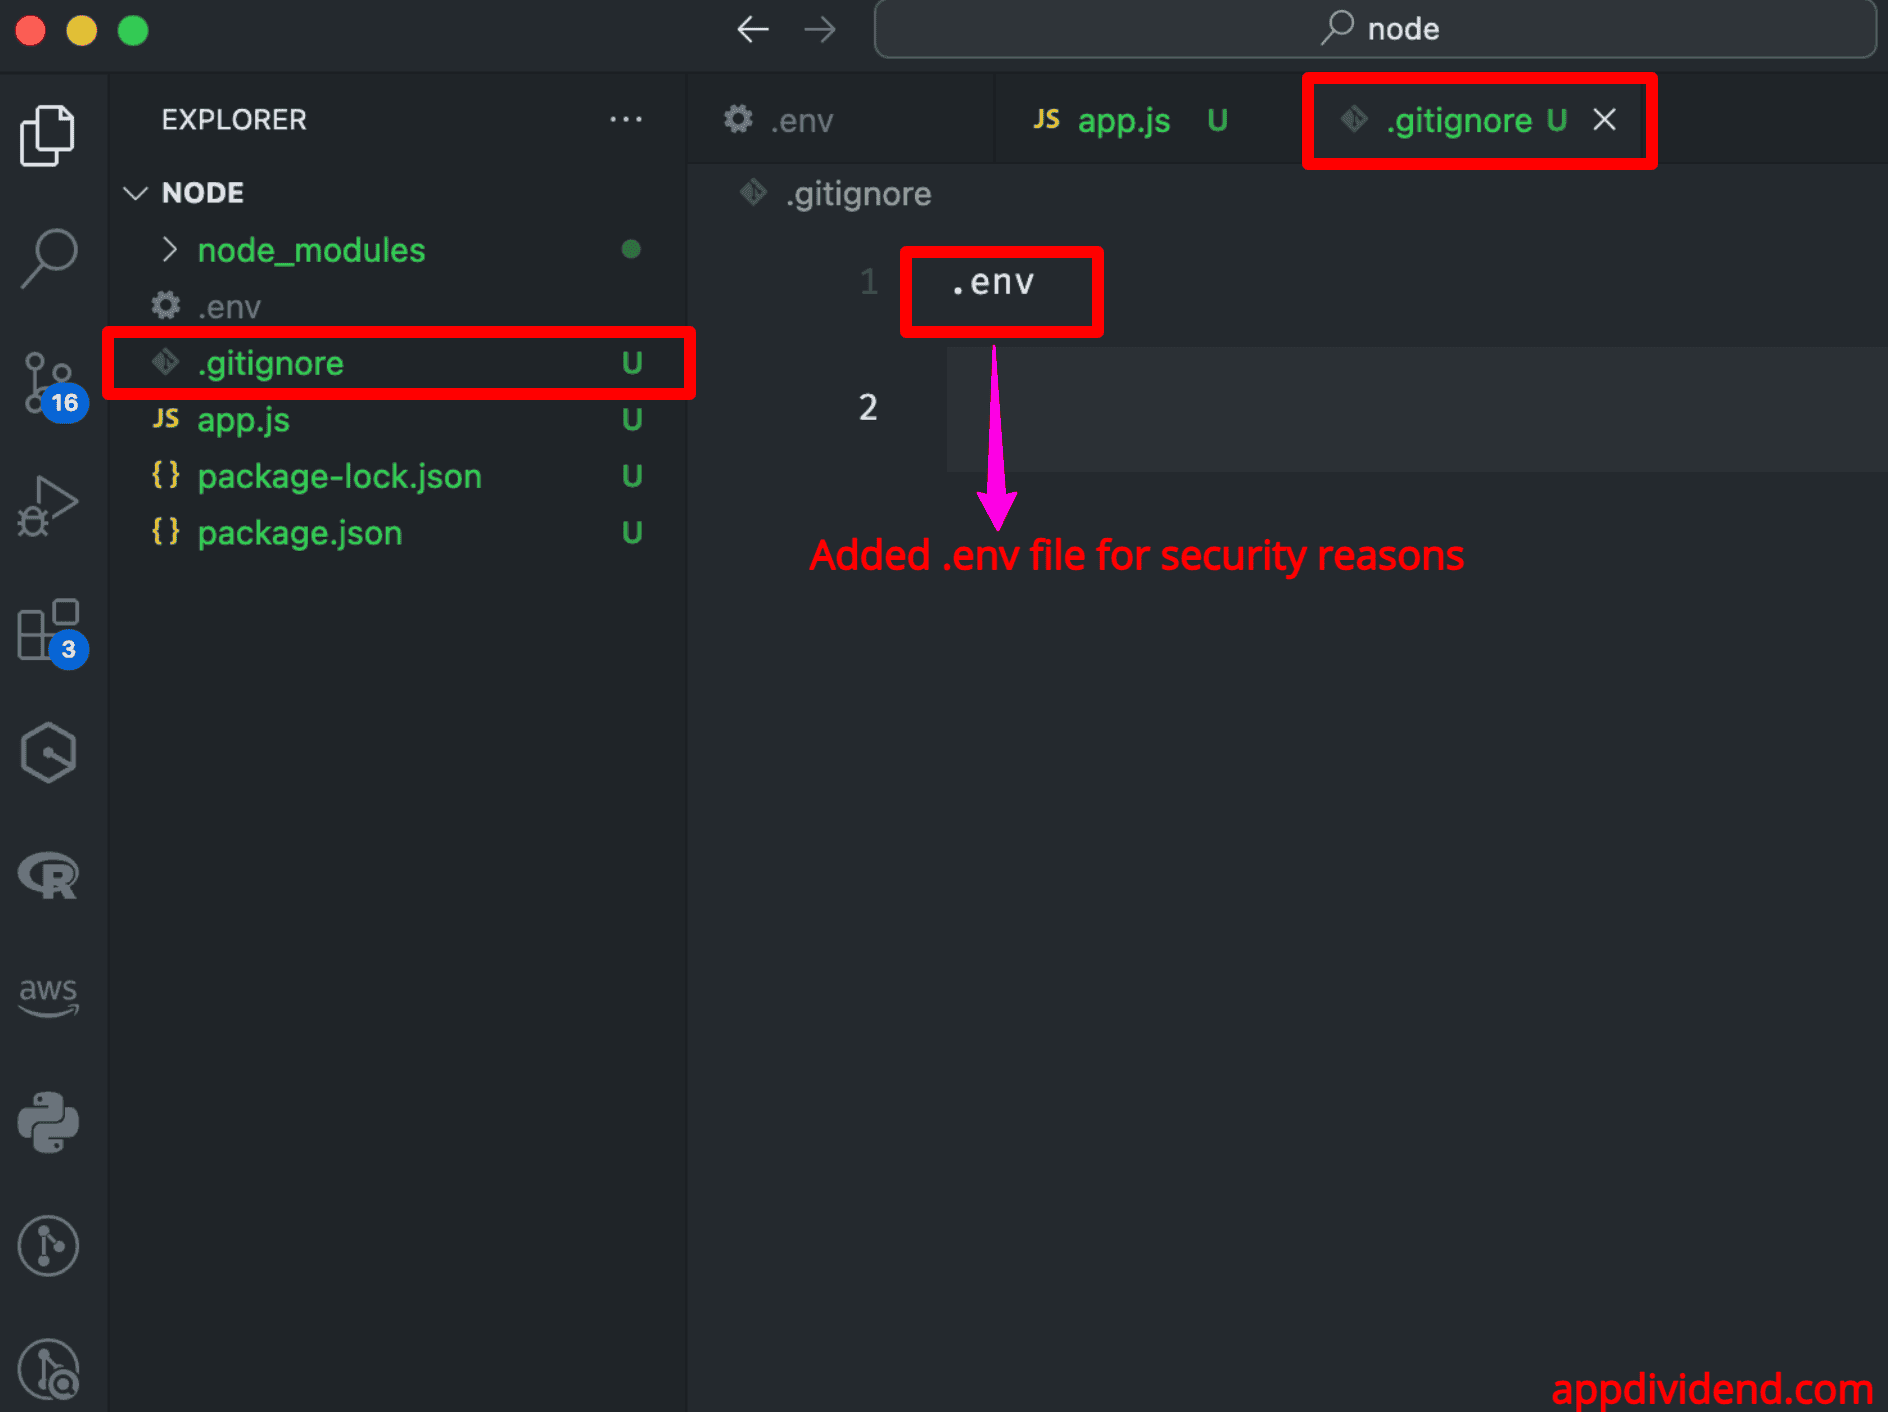
Create a .gitignore file in the root of your project and add the .env file like this:
Securing Environment Variables
Securing environment variables includes but is not limited to API keys, port numbers, database credentials, and other secrets.
Here are some best practices and techniques to ensure the security of environment variables:
Use .env file for local development
If you are working on local development, you should create a .env file and store all the essential credentials and application secrets in the .env file. Then, use the .gitignore file to prevent the .env file from being exposed.
Avoid Hardcoding Secrets
It would be best not to write your API Key or secret in plain hard code. Always use environment variables for secrets and configuration.
Set Environment Variables in Deployment Environment
PM2 uses an ecosystem.yaml file where you can specify the environment using the env property.
apps:
  - script: ./app.js
    name: 'my_application'
    env:
      NODE_ENV: development
    env_production:
      NODE_ENV: production
    ...
Docker Compose likewise allows the environment property to be specified in the service manifest.
version: "3"
services:
  my_application:
    image: node:8.9.4-alpine
    environment:
      NODE_ENV: production
      ...
    ...
Kubernetes has an equivalent to the env property in the pod template manifest, which allows us to set the environment:
kind: Deployment
apiVersion: extensions/v1beta1
metadata:
  name: my_application
spec:
  ...
  template:
    spec:
      env:
        - name: NODE_ENV
          value: production
        ...
We are using process.env.* correctly, which results in applications that can be tested quickly and deployed/scaled elegantly.
Use Secrets Management Services
To secure your application to the next level, use dedicated secrets management services to store and manage your passwords, db urls, or secrets.
Here are some of the examples provided by cloud providers:
- AWS Secrets Manager
- Azure Key Vault
- Google Cloud Secret Manager
- HashiCorp Vault
Limit Access to Environment Variables
Use role-based access control (RBAC) and the principle of least privilege (PoLP) to limit access to environment variables.
These are some of the best ways to secure your Node.js application from being exposed to the world.
Conclusion
It is best practice to define environment variables in a .env file and then refer to that file to access them anywhere in the project. Make sure that you add this file to the .gitignore file.
To access the .env variables, import config from dotenv and use the process.env.variable_name syntax.
