To navigate the Vue application, you need routing for the application.
Why should we care about routing? We need routing on the client side without a full page reload, which results in a faster user experience.
Vue Router is the official router for Vue.js. It profoundly integrates with Vue.js core to make building single-page applications with Vue.js a breeze. Features include:
- Expressive routing syntax
- Component-based configurations
- History modes
- Scroll control
- Automatic encoding
Here are the steps to implement routing in Vue.js.
Step 1: Create a new Vue project
You can use the create-vue command to create a new Vue project, but I will be using the Vite template because it is much cleaner.
You can create a new vue project using the Vite template using the below command:
npm create vite@latest vue-app -- --template vue
It will create a project folder called “vue-app”.
Go inside the project folder and install the dependencies:
cd vue-app

npm install
Install the Bootstrap 5 for styling using this command:
npm install bootstrap
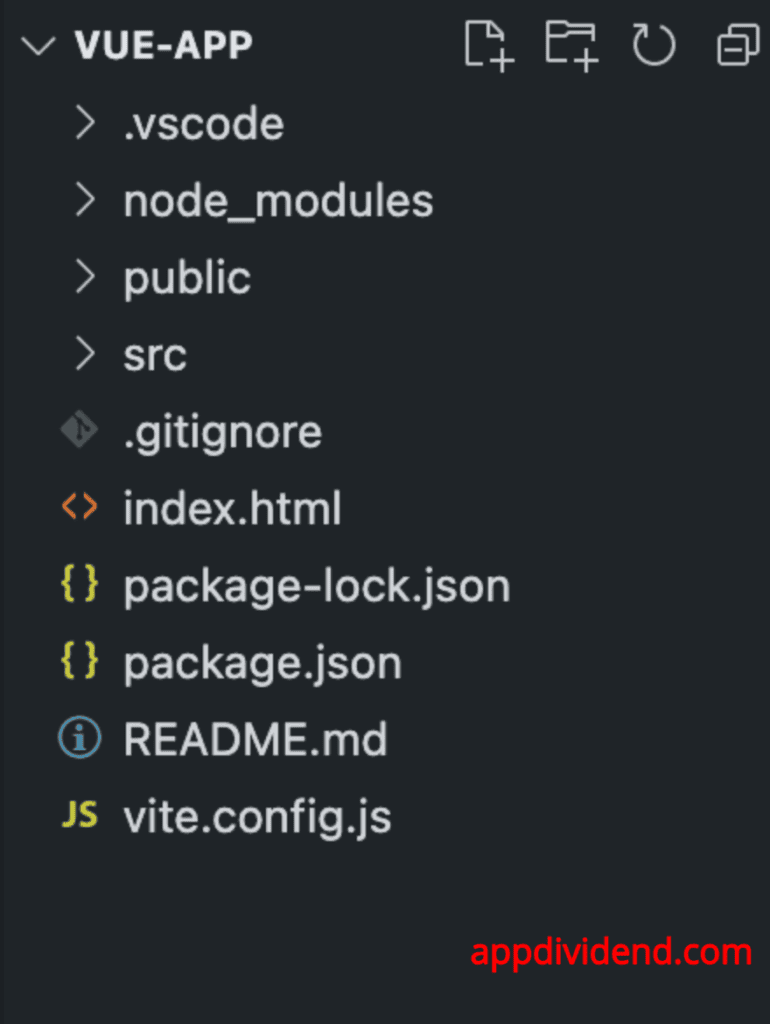
Your basic project folder structure looks like this:
All new project folders and files will be under the “src” folder.
Step 2: Create components
Inside the “src” folder, create a new folder called “components”, and inside that folder, create two new files:
- Home.vue
- About.vue
Write the below code inside the Home.vue file:
<template>
  <div class="container mt-5">
    <div class="row justify-content-center">
      <div class="col-md-8">
        <h1 class="mb-3">Welcome to Our Vue App!</h1>
        <p class="lead">
          This is the home page of our simple Vue application.
        </p>
      </div>
    </div>
  </div>
</template>

<script>
export default {
  name: 'Home'
};
</script>

<style scoped>
/* Additional custom styling if needed */
</style>
This is a simple Bootstrap 5 styling with some basic informational text.
Add the below code inside the About.vue file:
<template>
    <div class="about">
        <h1>About Us</h1>
        <p>This is the about page of our Vue application.</p>
    </div>
</template>

<script>
export default {
    name: 'About',
    data() {
        return {
            // Data properties specific to the About page can go here
        };
    },
    methods: {
        // Any methods this component needs can go here
    }
};
</script>

<style scoped>
.about {
    max-width: 800px;
    margin: auto;
    padding: 20px;
    text-align: center;
}

.about h1 {
    color: #2c3e50;
}

.about p {
    font-size: 16px;
    line-height: 1.6;
    color: #34495e;
}
</style>
Step 3: Configure routing
Type the following command to install the vue-router:
npm install vue-router
Right now, vue-router 4.3.2 is the latest version.
Create a new file called router.js inside the src folder and add the below code in it:
import { createRouter, createWebHistory } from 'vue-router';

import Home from './components/Home.vue';
import About from './components/About.vue';

const router = createRouter({
    history: createWebHistory(),
    routes: [
        {
            path: '/',
            name: 'home',
            component: Home
        },
        {
            path: '/about',
            name: 'about',
            component: About
        }
    ]
});

export default router;
In this code, we imported two modules from the “vue-router” library:
- createRouter(): It creates a router instance in our application. It is responsible for managing the navigation and rendering of different components based on the browser’s URL.
- createWebHistory(): It defines the History mode for this router. It configures the router to use the HTML5 History API.
The routes object has an array of objects where you can define path, name, and component.
- The path is a URL path.
- The name is the name of that route.
- And component is which page you want to render for a specific route.
The createRouter() and createWebHistory() provide a robust way to handle client-side routing in Vue applications.
Now, our project structure looks like this:
Step 4: Render components based on routing
We defined routing for our application inside the router.js file, but we need to display the components based on their URLs. To display the content based on the URL, we can use the <router-view /> component.
Write the below code inside App.vue file:
<template>
  <div id="app">
    <nav class="navbar navbar-expand-lg navbar-light bg-light">
      <div class="container-fluid">
        <a class="navbar-brand" href="#">VueApp</a>
        <button class="navbar-toggler" type="button" data-bs-toggle="collapse" data-bs-target="#navbarNav"
          aria-controls="navbarNav" aria-expanded="false" aria-label="Toggle navigation">
          <span class="navbar-toggler-icon"></span>
        </button>
        <div class="collapse navbar-collapse" id="navbarNav">
          <ul class="navbar-nav">
            <li class="nav-item">
              <router-link to="/" class="nav-link" aria-current="page">Home</router-link>
            </li>
            <li class="nav-item">
              <router-link to="/about" class="nav-link">About</router-link>
            </li>
          </ul>
        </div>
      </div>
    </nav>
    <router-view />
  </div>
</template>
In this file, we added a basic navigation bar and <router-view /> component to display various pages based on the URL.
Step 5: Import router.js in main.js file
The last thing is to integrate the router.js file into our Vue application.
In other words, we need to register the routing to our vue application so that it recognizes every route and displays the proper component based on the routes.
Add the below code inside the src/main.js file:
import { createApp } from 'vue';
import App from './App.vue';
import router from './router';

import 'bootstrap/dist/css/bootstrap.min.css';

const app = createApp(App);
app.use(router);
app.mount('#app');
Save the file and start the development server using this command: http://localhost:5173/
If you click on the About page, it will display like this:
That’s it! We successfully integrated routing in our Vue.js application.


Joseph
Hello. Thank you for this useful tutorial on VueJS with Laravel. I’ve followed your steps but am having issue with this.$router.push(). Home component loads when the page is mounted. But when I click on any of the routes, I end up having two components. One on top of another. I need your help with this. Thank you
Zhao
I got the same issue, and after checking his example you can see that he has the same problem. So if you fixed it. plz let me know thank a lot.
YOSHIT PATEL
Hi,
Thanks for this tutorial. It helped me to set up Vue routes from scratch. It works absolutely fine.
Dave
Thank you. This was a great intro to Vue routes
Francisco Susana
This is so useful! I tested everything with Vue js 2 and it also worked!
Mahdi
Thank you So Much .really help me this tutorial
Seema
Thanx well explained each and every step.
kuthbudeen
excellent tutorial.
thanks a lot man
Pamela
Thanks, tutorial is explained every important think in vue router on short way. You are awesome men 😀
Alex
Thanks a lot!
Rishi
Thank you so much for this.
haidar
thats very simple routing 🙂
im ready to next tutor
Happy
Thanks! Finally an example that actually works!
Omer
awesome!!!
Jairo
Good Tutorial
some desperate dev
I can not express how happy I was to just land in this page and follow the steps of this tutorial and see that everything just…WORKED… you know?
thank so much why is it so difficult to find nice and complete tutorials like this
if this was stack overflow I would create 437 accounts just to upvote your answer
god bless u good night thanks