

Axios is the most popular client-side HTTP request library for front-end apps. Its easy-to-use API allows users to make all types of HTTP requests.
Here is the step-by-step guide to making requests in Vue.js:
Step 1: Create a new Vue project
We will use the Vite template to create a new project using this command:
npm create vite@latest axios-app -- --template vue
It will create a new folder called “axios-app”.
Go inside that folder and install the dependencies:
cd axios-app

npm install
Step 2: Install Axios
You can install the axios library in your project using this command:
npm install axios
Step 3: Create an Axios Instance
It is always considered good practice to create an axios instance and then use that instance to create a request. This allows you to set base URLs, headers, and other configurations.
Create services folder inside the src folder, and inside that folder, create a new file called “axiosInstance.js” and add the below code inside it:
import axios from 'axios';

const axiosInstance = axios.create({
    baseURL: 'https://jsonplaceholder.typicode.com',
    timeout: 10000,
    headers: {
        'Content-Type': 'application/json',
    },
});

export default axiosInstance;
You can skip this step if you want to use Axios directly, but again, this is an excellent practice to follow.
To create a new axios instance, we used the “axios.create()” function. That function took an object containing baseURL, timeout, and headers properties.
The baseURL is our primary API URL. We set the header by passing a content-type to the application/json.
Step 4: Create a Vue Component to Display Data
You can create a new Vue component to fetch and display the data.
Inside the src folder, create a new folder called components, and inside that folder, create a new file called Posts.vue and add the below code:
<template>
    <div>
        <h1>Posts</h1>
        <ul>
            <li v-for="post in posts" :key="post.id">
                <h2>{{ post.title }}</h2>
                <p>{{ post.body }}</p>
            </li>
        </ul>
    </div>
</template>

<script>
import axiosInstance from '../services/axiosInstance';

export default {
    data() {
        return {
            posts: [],
            error: null,
        };
    },
    async created() {
        try {
            const response = await axiosInstance.get('/posts');
            this.posts = response.data;
        } catch (error) {
            this.error = error.message;
        }
    },
};
</script>

<style>
/* Add some basic styling */
h1 {
    font-size: 2em;
    margin-bottom: 0.5em;
}

h2 {
    font-size: 1.5em;
    margin-top: 0.5em;
}

p {
    margin-bottom: 1em;
}
</style>
In this component, we imported axiosInstance to send a GET request to the API server, and that server will return the data response in JSON format.
Based on the response, we run for loop to display the post title and post body.
Step 5: Import the Posts.vue component
To attach the Posts.You need to import the vue component to our main application inside src/App.vue file.
Add the below code inside the App.vue file:
<template>
  <div id="app">
    <Posts />
  </div>
</template>

<script>
import Posts from './components/Posts.vue';

export default {
  name: 'App',
  components: {
    Posts,
  },
};
</script>

<style>
/* Add some global styling */
#app {
  font-family: Avenir, Helvetica, Arial, sans-serif;
  text-align: center;
  color: #2c3e50;
  margin-top: 60px;
}
</style>
And your src/main.js file looks like this:
import { createApp } from 'vue';
import App from './App.vue';

const app = createApp(App);

app.mount('#app');
Save the file and start the Vite development server using this command:
npm run dev
It will boot up the application at this URL: http://localhost:5173/
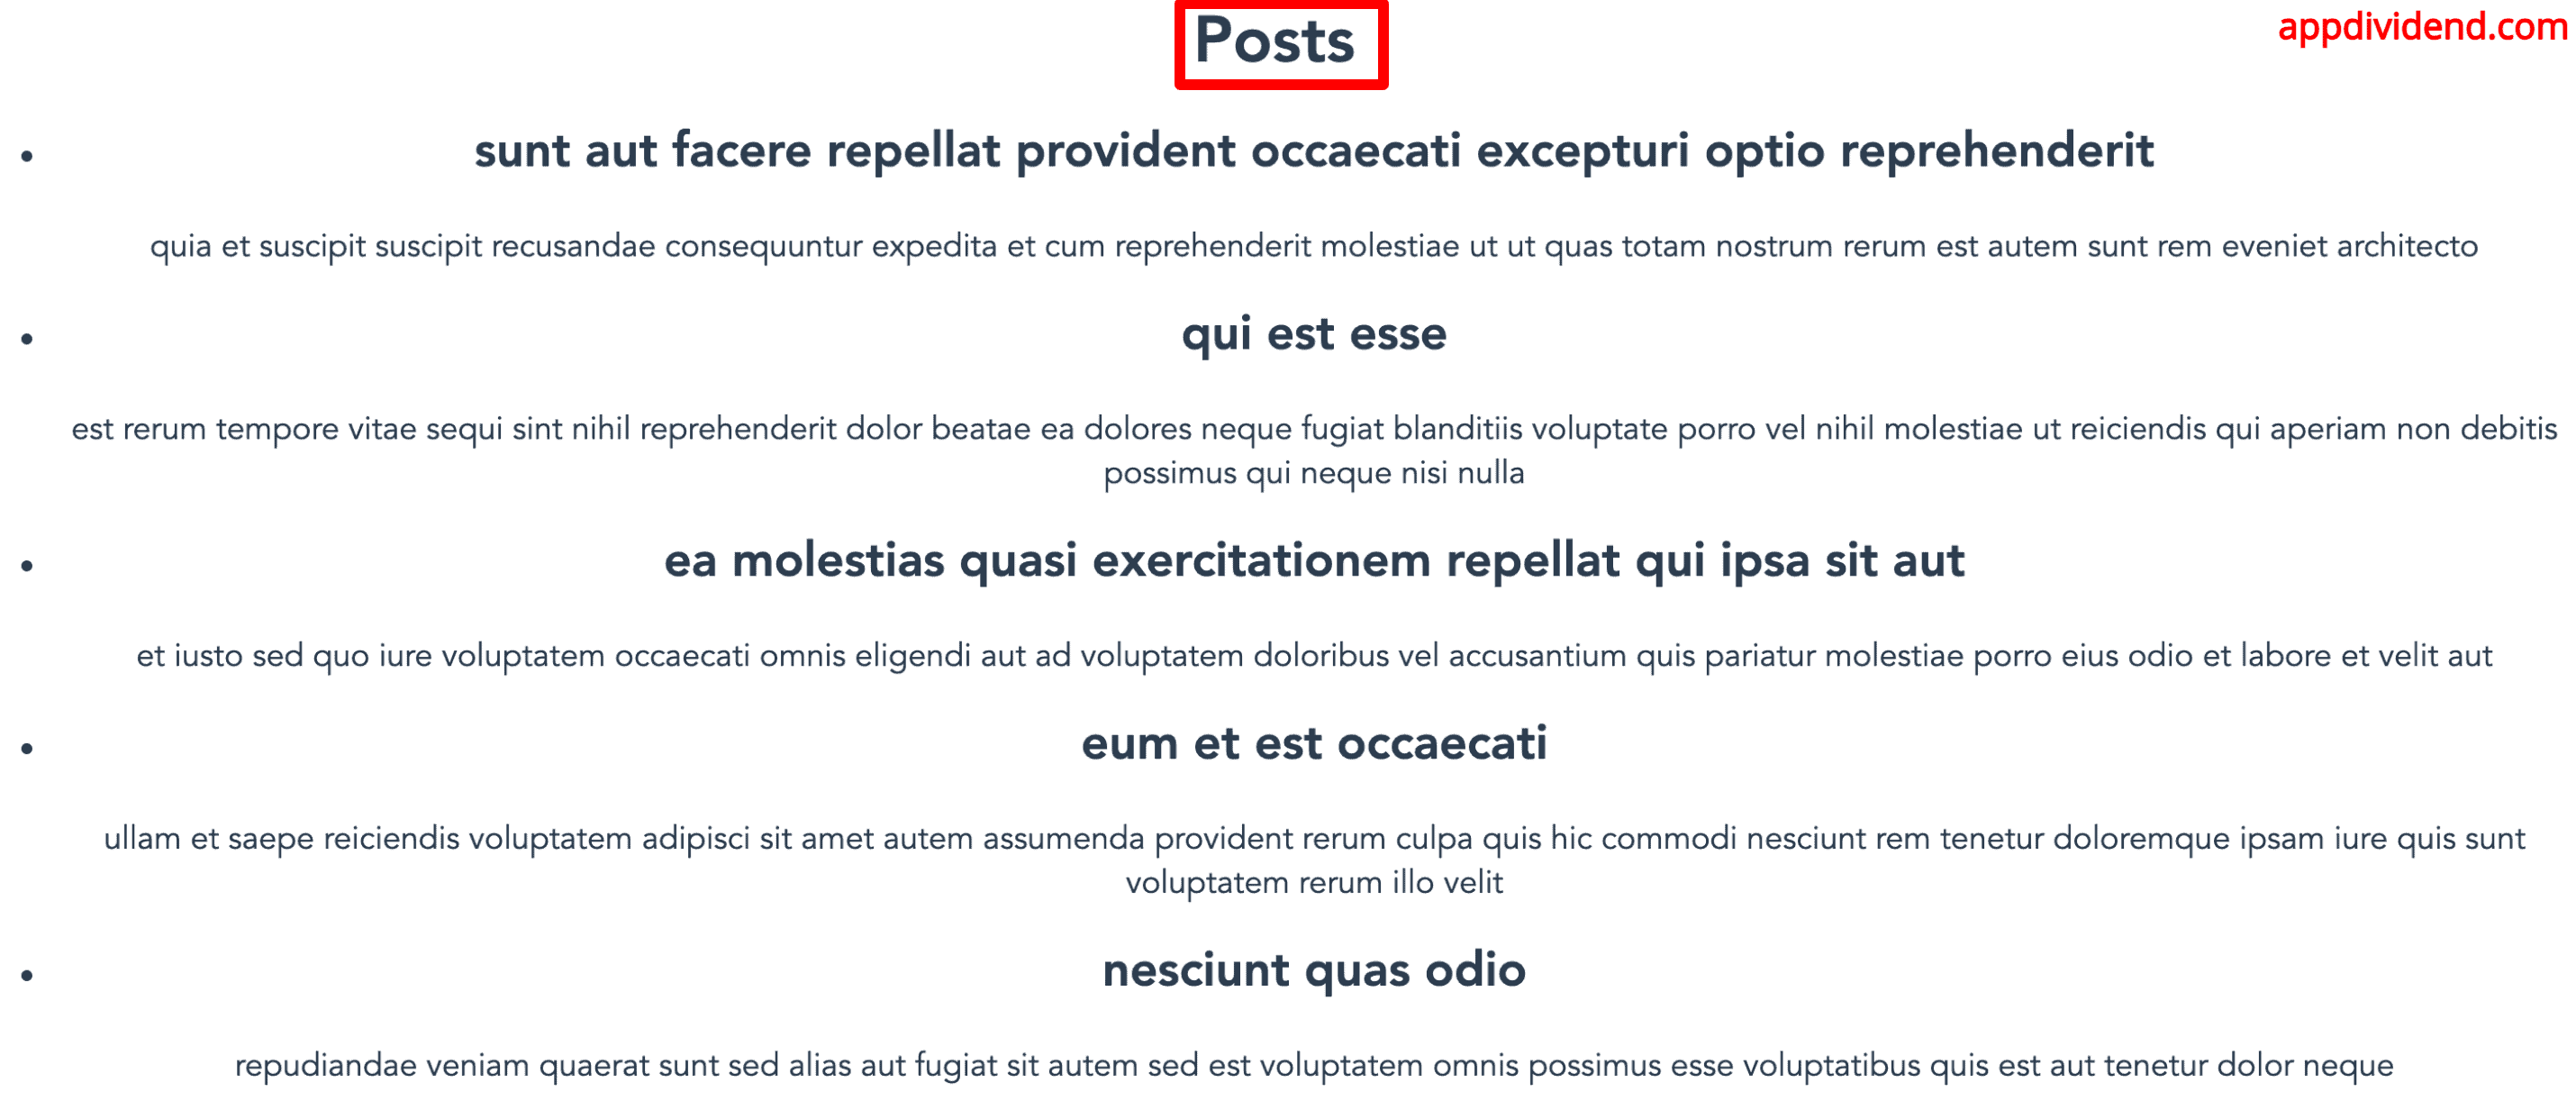
You can see that we successfully sent a GET request to https://jsonplaceholder.typicode.com/posts API that returns a JSON response.
Sending a POST request to API Server
You can send a POST request to the API server using the .post() method.
Here is how you can create a POST request:
async createPost() {
     try {
              const payload = {
                  title: this.title,
                  body: this.body,
                  userId: 1,
              };
              const response = await axiosInstance.post('/posts', payload);
              this.response = response.data;
              this.title = '';
              this.body = '';
        } catch (error) {
             this.error = error.message;
      }
},
We already put the code in the try-catch block to catch any type of error.
You can see that we also passed a payload with the post request.
The payload is data we must submit to the server, which will be saved in the database.
We can make PATCH and PUT requests the same by calling axios.patch() and axios.put() requests.
Sending requests with a multipart/form-data
To send requests with a multipart/form-data format request body using Axios, you must construct your request payload using the FormData object.
Also, you need to modify the Axios request by passing the header to “multipart/form-data” inside the axiosInstance.js file:
import axios from 'axios';

const axiosInstance = axios.create({
    baseURL: 'https://jsonplaceholder.typicode.com',
    timeout: 10000,
    headers: {
        'Content-Type': 'multipart/form-data',
    },
});

export default axiosInstance;
Your post request containing the file looks like this:
async uploadFile() {
      const formData = new FormData();
      formData.append('file', this.file);

      try {
        const response = await axiosInstance.post('/upload', formData);
        this.response = response.data;
        this.file = null;
      } catch (error) {
        this.error = error.message;
      }
}
Request Interceptors
The Axios interceptors allow you to handle requests and responses globally before they are handled correctly. This helps add headers and handle authentication, logging, or error handling.
Here is how you can initiate an interceptor in Axios:
// axiosInstance.js

import axios from 'axios';

const axiosInstance = axios.create({
    baseURL: 'https://jsonplaceholder.typicode.com',
    timeout: 10000,
    headers: {
        'Content-Type': 'multipart/form-data',
    },
});

// Request interceptor
axiosInstance.interceptors.request.use(
    config => {
        // Adding authorization token or any custom headers here
        config.headers['Authorization'] = 'Bearer your_token_here'; // Replace with your actual token
        config.headers['Custom-Header'] = 'custom_value';
        console.log('Request:', config);
        return config;
    },
    error => {
        console.error('Request error:', error);
        return Promise.reject(error);
    }
);

// Response interceptor
axiosInstance.interceptors.response.use(
    response => {
        console.log('Response:', response);
        return response;
    },
    error => {
        console.error('Response error:', error);
        return Promise.reject(error);
    }
);


export default axiosInstance;
We have added two interceptors:
- Request interceptor: axios.interceptors.request.use()
- Response interceptor: axios.interceptors.response.use()
We attach an auth token when sending a request using the Request Interceptor and log the response using the Response Interceptor.
By following these steps, your Vue application will use Axios interceptors to handle requests and responses globally. That’s all!

Vishwas
Can we install axios with npm and what will be the changes due to that in further code in tutorial ?
Yoder
como ejecuto esto ?
mariano
how do you post de data if you have a onetoone relationship between “ticket” and suposed “reservation”,and you pick the data from the same form,how you send ticket.id ,ticket.email , ticket.description and reservation.number all in the same json?