
To convert a PIL Image to a Numpy array, the easiest way is to use numpy.array() or np.asarray() method. Conversion of an image into an array transforms pixel data (a grid of color/intensity values) into a multidimensional array, enabling efficient vectorized operations.
You need to install the following libraries:
pip install Pillow numpy opencv-python matplotlib
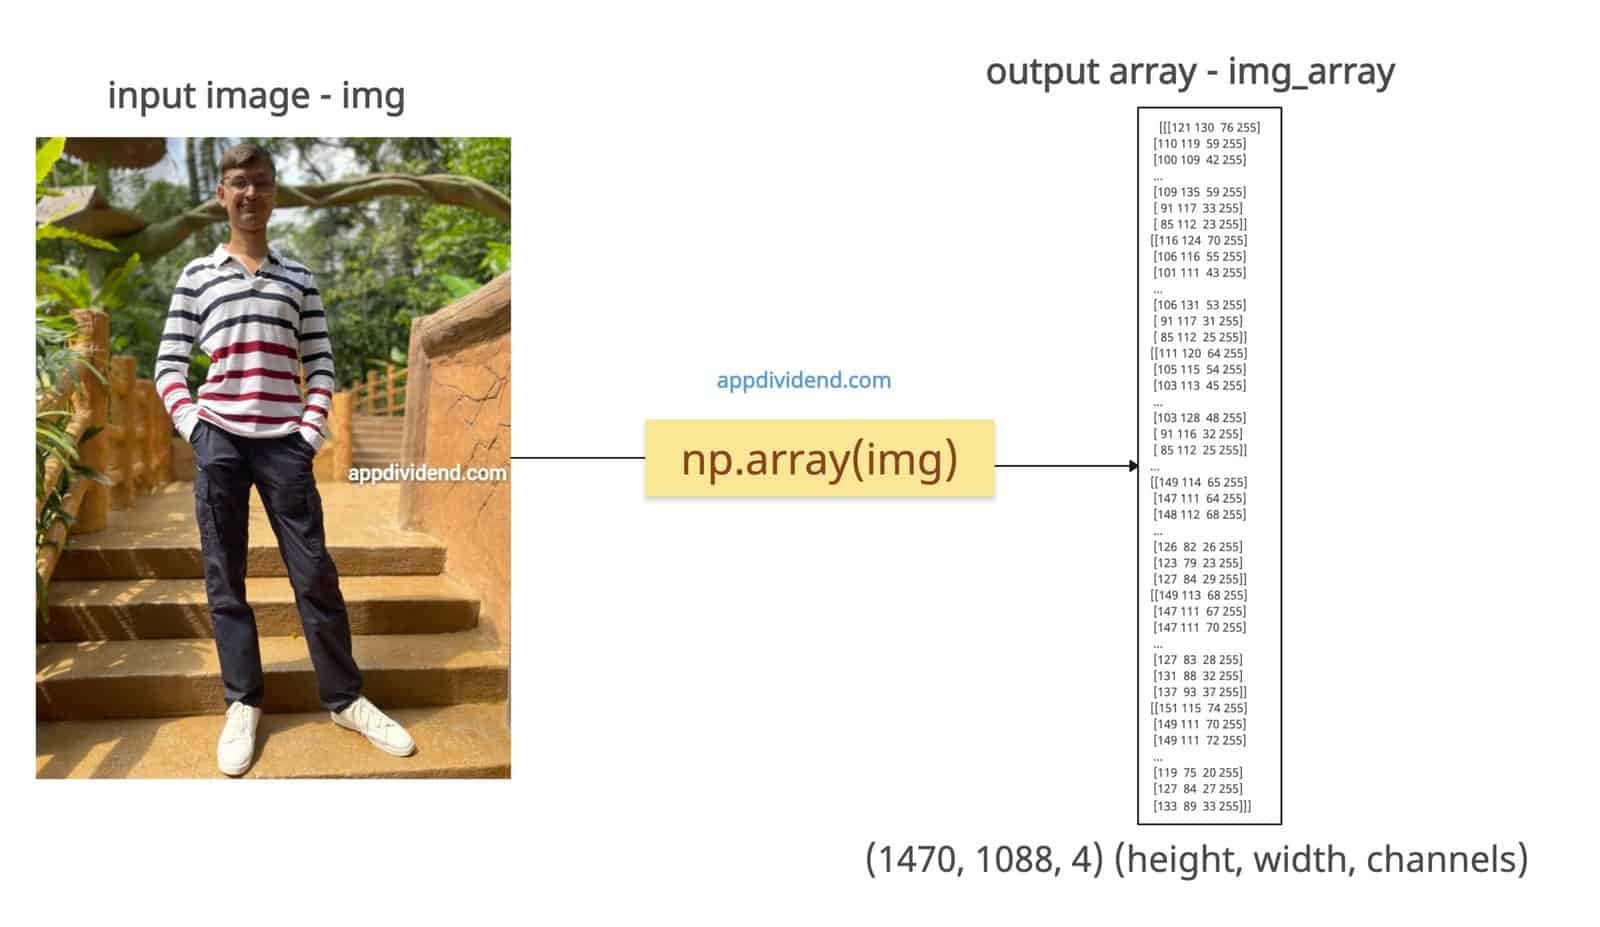
Here is the demo image called “person.png” that we will convert into an array.

from PIL import Image
import numpy as np

img = Image.open('person.png')

img_array = np.array(img)

print(img_array.shape)

# Output: (1470, 1088, 4) (height, width, channels)

print(type(img_array))

# Output: <class 'numpy.ndarray'>

print(img_array[0, 0])

# Output: [121 130  76 255]

print(img_array)

# Output:
# [[[121 130  76 255]
#   [110 119  59 255]
#   [100 109  42 255]
#   ...
#   [109 135  59 255]
#   [ 91 117  33 255]
#   [ 85 112  23 255]]

#  [[116 124  70 255]
#   [106 116  55 255]
#   [101 111  43 255]
#   ...
#   [106 131  53 255]
#   [ 91 117  31 255]
#   [ 85 112  25 255]]

#  [[111 120  64 255]
#   [105 115  54 255]
#   [103 113  45 255]
#   ...
#   [103 128  48 255]
#   [ 91 116  32 255]
#   [ 85 112  25 255]]

#  ...

#  [[149 114  65 255]
#   [147 111  64 255]
#   [148 112  68 255]
#   ...
#   [126  82  26 255]
#   [123  79  23 255]
#   [127  84  29 255]]

#  [[149 113  68 255]
#   [147 111  67 255]
#   [147 111  70 255]
#   ...
#   [127  83  28 255]
#   [131  88  32 255]
#   [137  93  37 255]]

#  [[151 115  74 255]
#   [149 111  70 255]
#   [149 111  72 255]
#   ...
#   [119  75  20 255]
#   [127  84  27 255]
#   [133  89  33 255]]]
In this code, we first read the image file using Image.open() method and then used numpy.array() method to convert the PIL Image object to a view (no copy unless modified). Pixels are 0-255 (uint8).
We also printed the numpy array, but it is very long, making it virtually impossible for us to read.
Numpy.asarray()
The np.asarray() method accepts an image and converts it into a numpy array. It can convert a list to an array, an image to an array, or an array-like object to an array.
from PIL import Image
import numpy as np

img = Image.open('person.png')

img_array = np.asarray(img)

print(img_array.shape)

# Output: (1470, 1088, 4) (height, width, channels)

print(img_array[0, 0])

# Output: [121 130  76 255]

print(type(img_array))

# Output: <class 'numpy.ndarray'>
Alternate approaches
Using OpenCV
When you are using OpenCV, it automatically reads images as NumPy arrays in BGR order (not RGB).
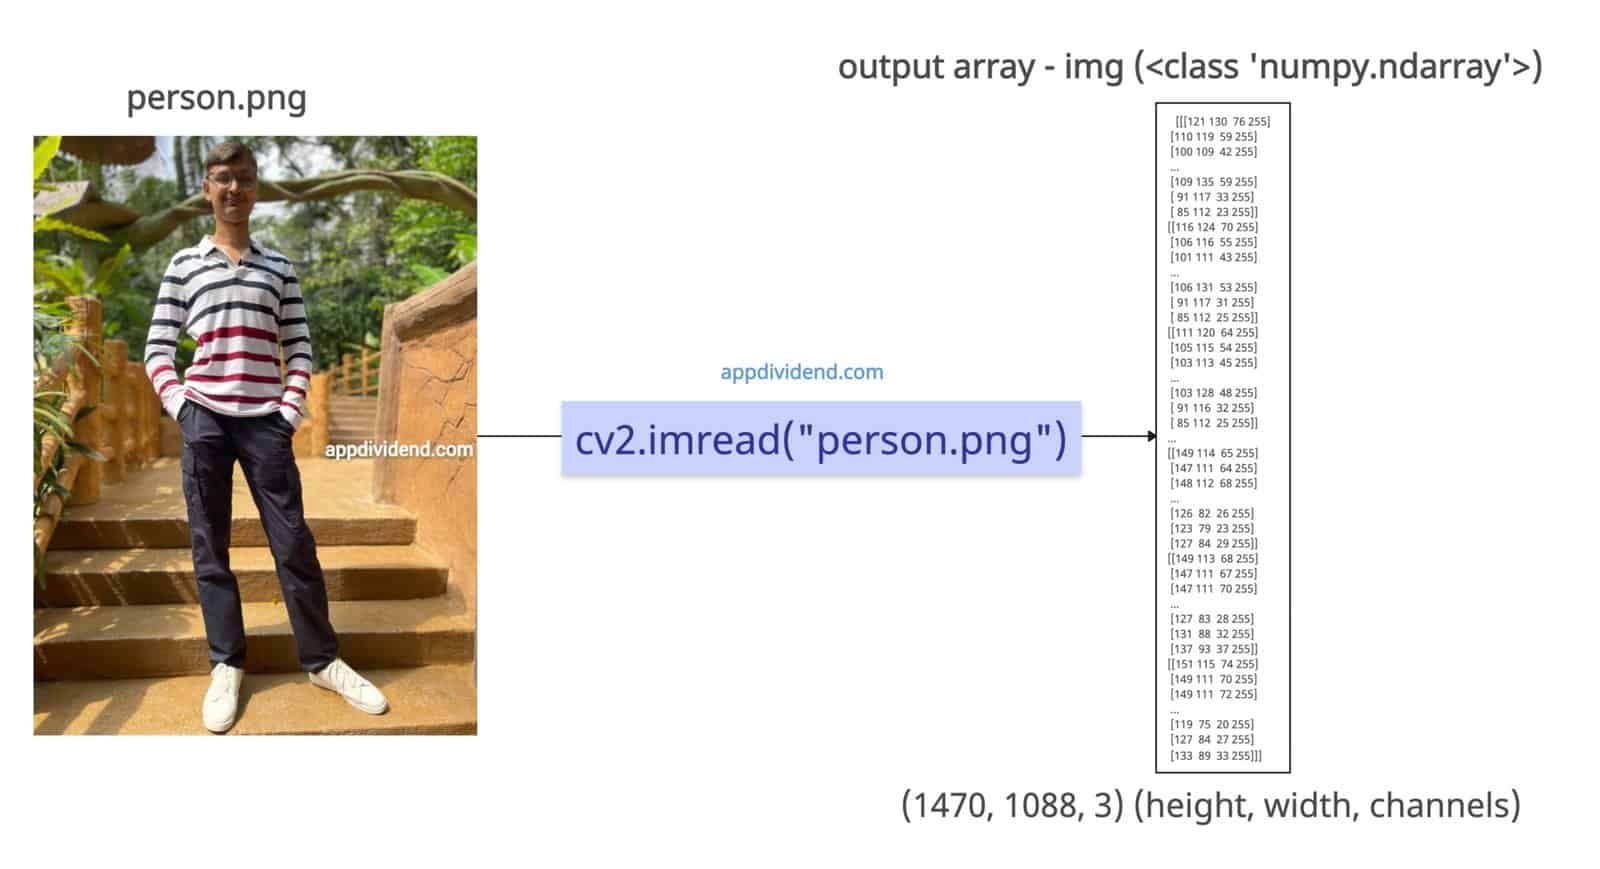
import cv2

img = cv2.imread("person.png")

print(type(img))

# Output: <class 'numpy.ndarray'>

print(img.shape)

# Output: (1470, 1088, 3) (height, width, 3)
You can see that just by using the cv2.imread() method, the image is already converted into an array.
Here, we have not printed the whole array because it looks cluttered. So, printed its shape and its type.
Using matplotlib.image
Matplotlib also provides a method called “imread()” that, by default, converts an image into an array to read its data.
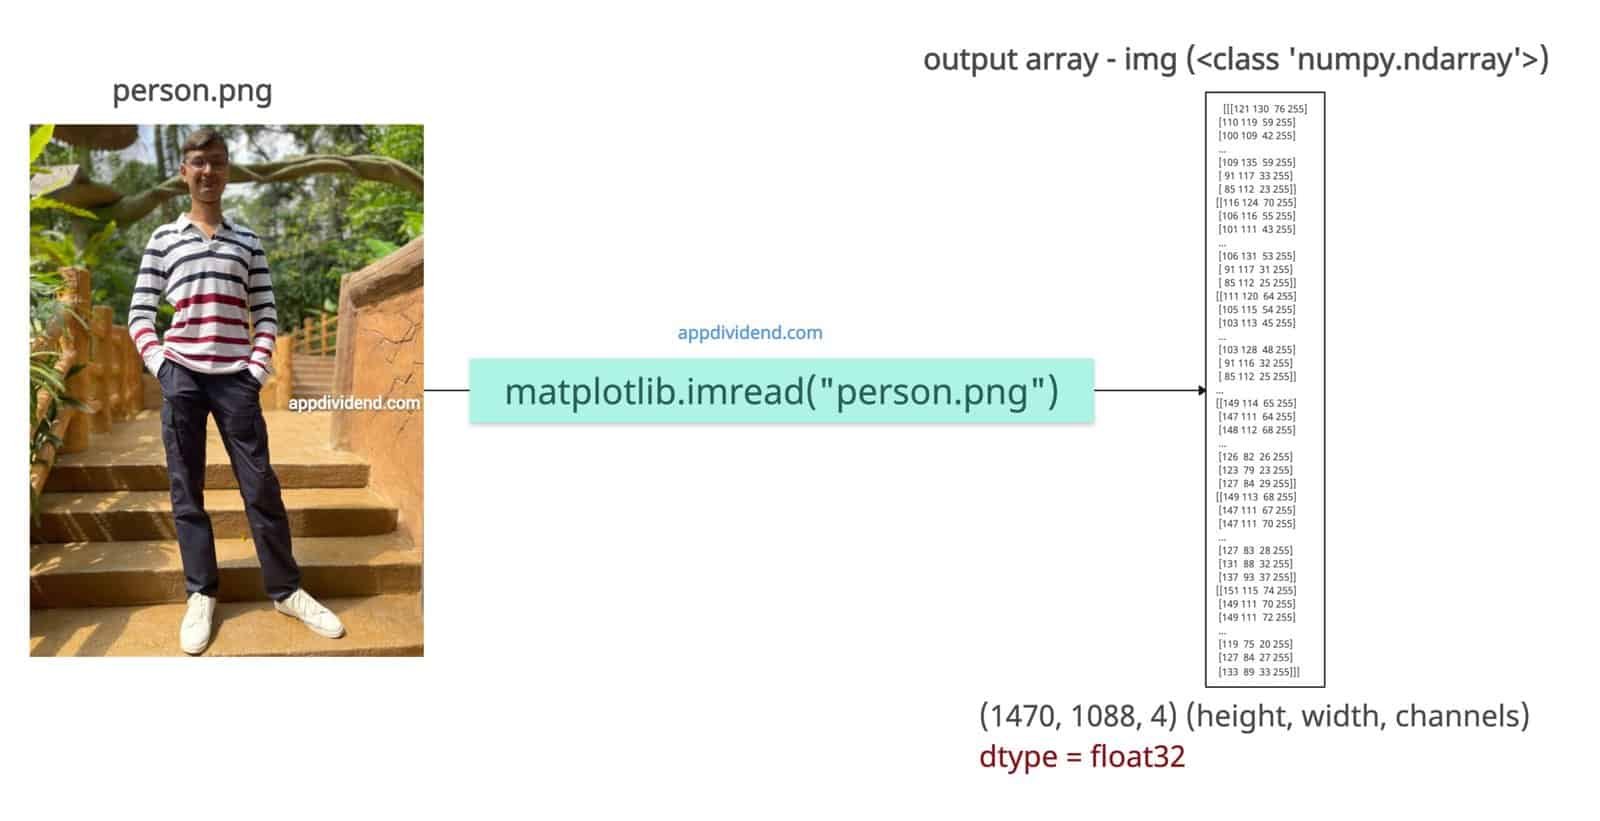
import matplotlib.image as mpimg

img = mpimg.imread("person.png")

print(type(img))
# Output: <class 'numpy.ndarray'>

print(img.shape)
# Output: (1470, 1088, 4)

print(img.dtype)
# Output: float32 if PNG (scaled 0–1), uint8 if JPG
One thing to note is that PNG images often load as float arrays (0–1) and JPEGs load as uint8 arrays (0–255).