
To implement datatables in Laravel, use the “yajra/laravel-datatables-oracle” package.
The DataTables are jQuery plugins that allow you to add advanced interaction controls to your HTML tables’ data, which is very useful in UI/UX design.
Datatables also provides Ajax for data searching and filtering. It provides functionalities such as search, sorting, and pagination for a table.
Here is the step-by-step guide:
Step 1: Install the Laravel Project
composer create-project --prefer-dist laravel/laravel laraveldatatables
The latest version is Laravel 11, so it will install Laravel 11 on your machine.
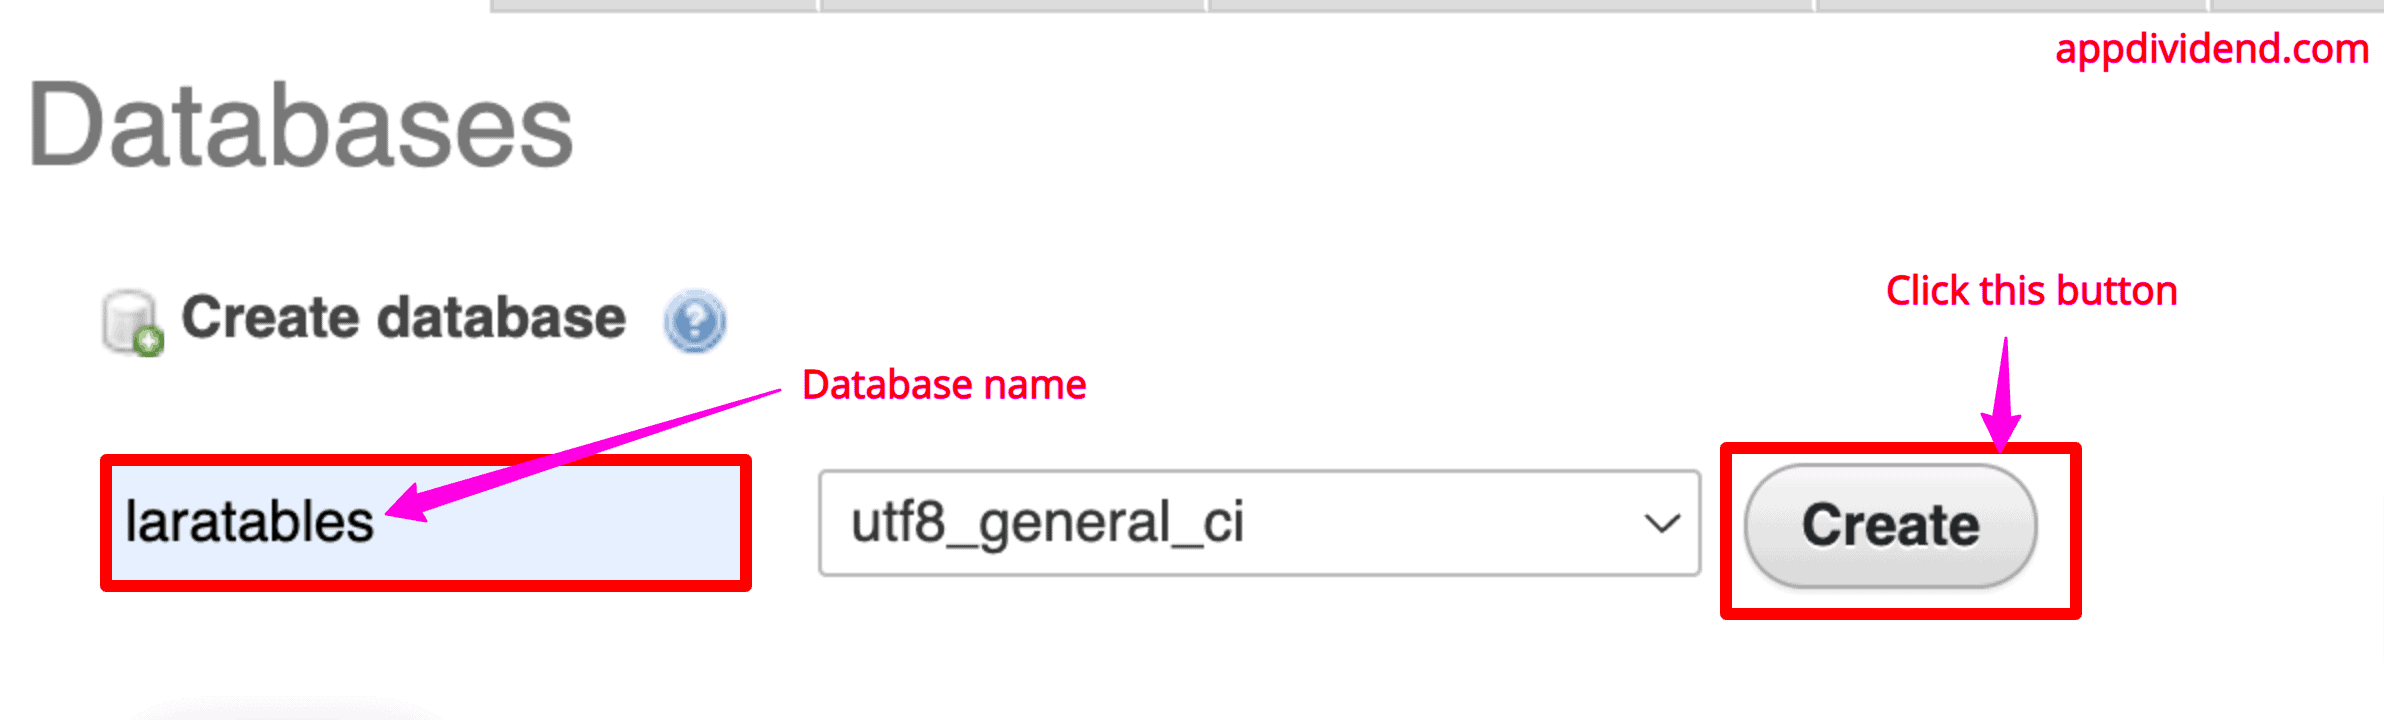
Step 2: Set up MySQL database
I created a new Database inside phpmyadmin called laratables like this:
Now, configure this new database in the .env file.
//.env

DB_CONNECTION=mysql
DB_HOST=127.0.0.1
DB_PORT=8889
DB_DATABASE=laratables
DB_USERNAME=root
DB_PASSWORD=root
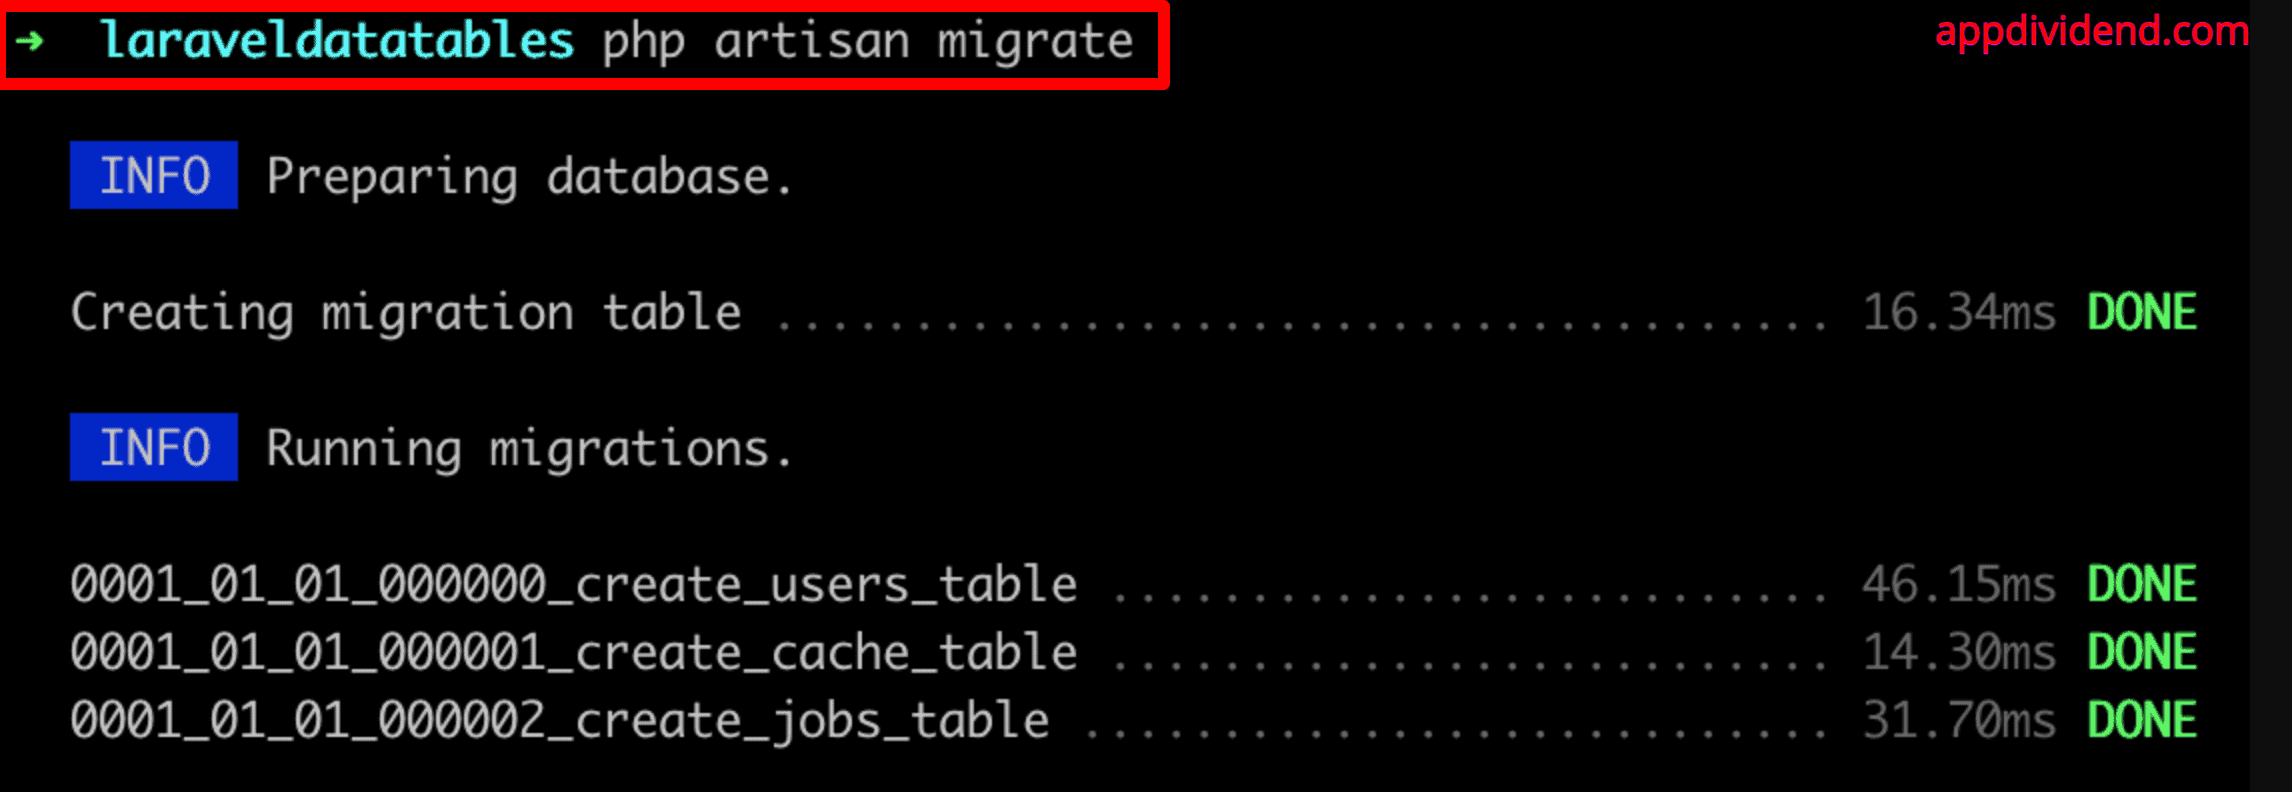
Now migrate the tables using this command:
php artisan migrate
Step 3: Install the yajra/laravel-datatables-oracle package
Let’s install the yajra/laravel-datatables-oracle package using the below command:
composer require yajra/laravel-datatables-oracle
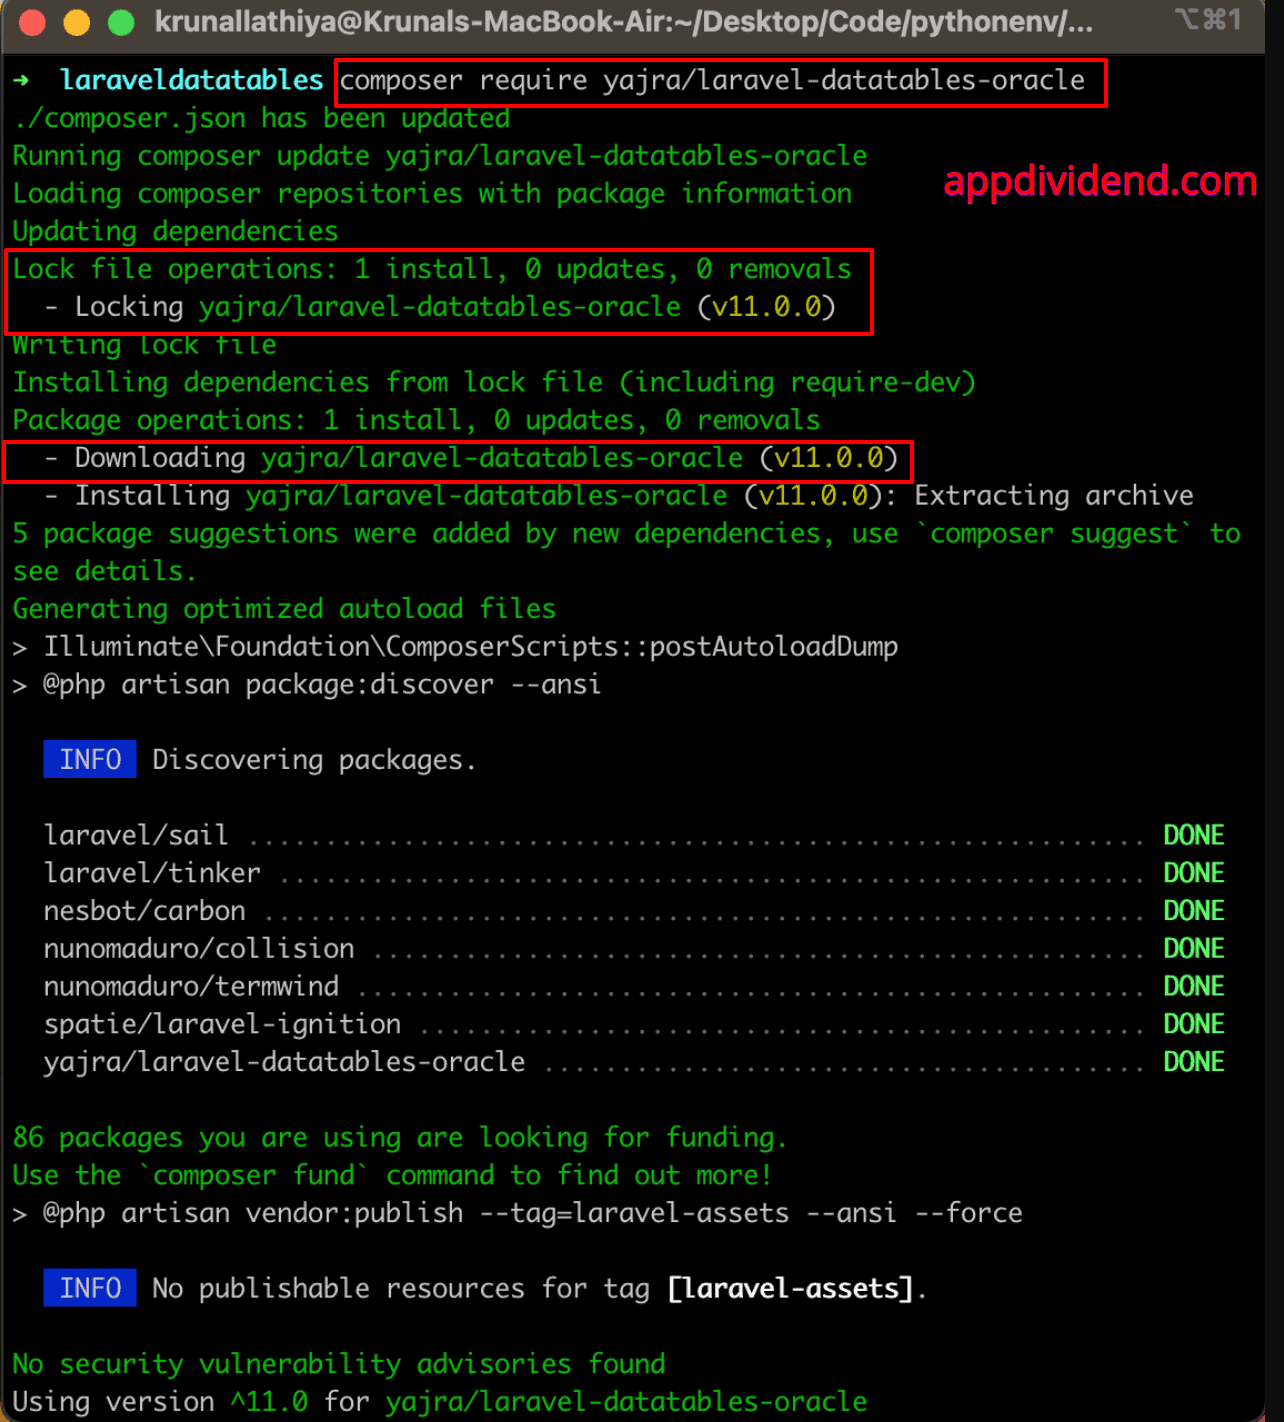
You can see that Laravel Datatables is v11.0.0, the latest version compatible with Laravel 11.
Step 4: Add Datatables ServiceProvider
Inside bootstrap >> provider.php file, add the DataTablesServiceProvider like this:
<?php

// providers.php

return [
    App\Providers\AppServiceProvider::class,
    Yajra\DataTables\DataTablesServiceProvider::class,
];
Step 5: Generating dummy data
To display the data in datatables, we need some user data. We will use the Factory to generate dummy users.
Type the command below to open Tinker, which will interact with our laravel application.
php artisan tinker
Now, we will generate 100 fake users using this command:
\App\Models\User::factory()->count(100)->create();
If you execute the above command, you will see something like this:

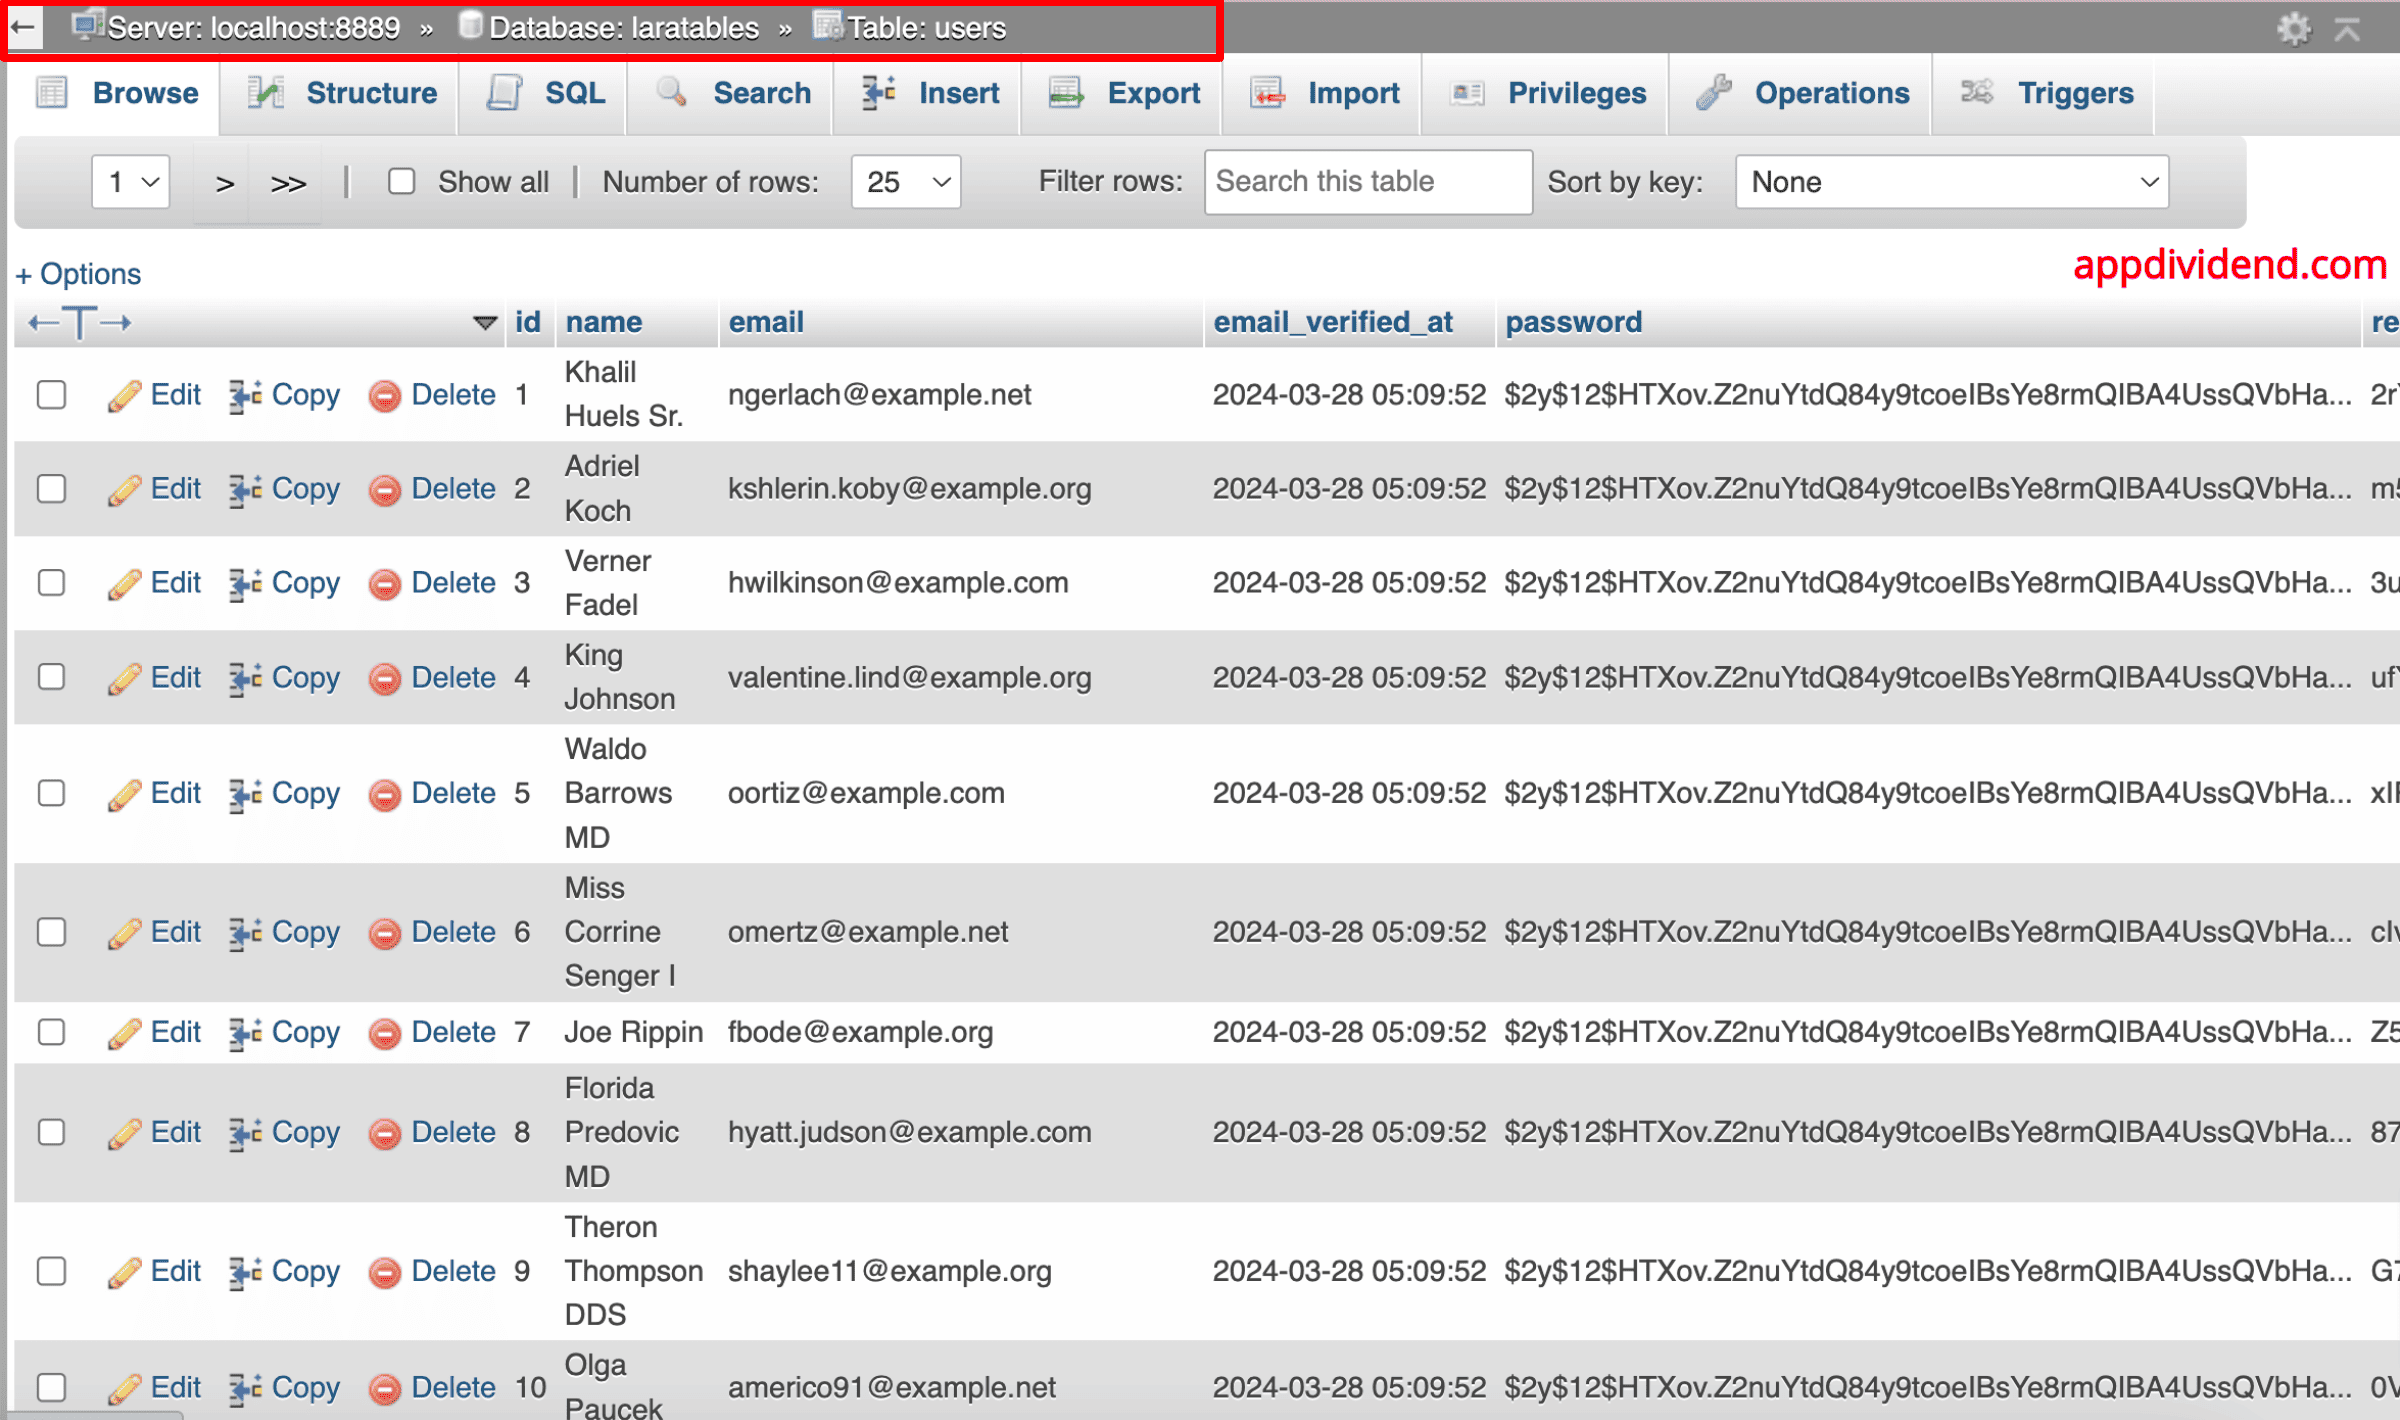
If you go to the mysql database (phpmyadmin), investigate the users table, and you will see something like this:
Step 6: Creating a controller and route
Let’s create a DisplayDataController.php using the below command:
php artisan make:controller DisplayDataController
Let’s register routes in the routes/web.php file.
<?php

// web.php

use Illuminate\Support\Facades\Route;
use App\Http\Controllers\DisplayDataController;

Route::get('/', function () {
    return view('welcome');
});


Route::get('create', [DisplayDataController::class, 'create']);
Route::get('index', [DisplayDataController::class, 'index']);
Here, we defined two routes: one for creating a view and another for an AJAX request to fetch the dummy users from the database and display them on the front end.
Go to the DisplayDataController.php file and write the code inside the create() and index() functions.
<?php

// DisplayController.php

namespace App\Http\Controllers;

use App\Models\User;
use Yajra\DataTables\DataTables;
use Illuminate\Http\JsonResponse;
use Illuminate\View\View;

class DisplayDataController extends Controller
{
    /**
     * Display a listing of the resource.
     *
     * @return \Illuminate\Http\JsonResponse
     */
    public function index(): JsonResponse
    {
        $collection = User::query();

        return DataTables::of($collection)->make(true);
    }

    /**
     * Show the form for creating a new resource.
     *
     * @return \Illuminate\View\View
     */
    public function create(): View
    {
        return view('display');
    }
}
First, we imported the necessary classes, such as DataTables and the User model, at the top of the file.
Within the index() function, we retrieve all users using the Eloquent model and return the data in JSON format.
So, when the Datatables sends an Ajax request to this function, it will return a JSON response.
Step 7: Create a view file.
Create a file in the resources >> views >> display.blade.php and put the following code in it.
<html lang="en">
<head>
    <title>Laravel DataTables Tutorial</title>
        <link href="https://maxcdn.bootstrapcdn.com/bootstrap/3.3.6/css/bootstrap.min.css" rel="stylesheet">
        <link  href="https://cdn.datatables.net/1.10.16/css/jquery.dataTables.min.css" rel="stylesheet">
        <script src="http://ajax.googleapis.com/ajax/libs/jquery/1.9.1/jquery.js"></script>
        <script src="https://maxcdn.bootstrapcdn.com/bootstrap/3.3.6/js/bootstrap.min.js"></script>
        <script src="https://cdn.datatables.net/1.10.16/js/jquery.dataTables.min.js"></script>
</head>
      <body>
         <div class="container">
               <h2>Implementing DataTables in Laravel 11</h2>
            <table class="table table-bordered" id="table">
               <thead>
                  <tr>
                     <th>Id</th>
                     <th>Name</th>
                     <th>Email</th>
                  </tr>
               </thead>
            </table>
         </div>
       <script>
         $(function() {
               $('#table').DataTable({
               processing: true,
               serverSide: true,
               ajax: '{{ url('index') }}',
               columns: [
                        { data: 'id', name: 'id' },
                        { data: 'name', name: 'name' },
                        { data: 'email', name: 'email' }
                     ]
            });
         });
         </script>
   </body>
</html>
First, we used online CDNs for Bootstrap 3 CSS, JS, jQuery, dataTables.min.css, and dataTables.min.js files.
Here, I have implemented a solution where, when the page is loaded, we send an AJAX request from the DataTables API to the server to fetch the users’ data and display it in the table.
We will display the ID, name, and email columns.
It appends all the data to the #table id with searching, sorting, and pagination functionality.
Run the command below.
php artisan serve
Open the URL in your browser: http://localhost:8000/create
If all of your configuration and code are fine, then you will see something like this in the view:

Let’s sort the data based on the Name column:

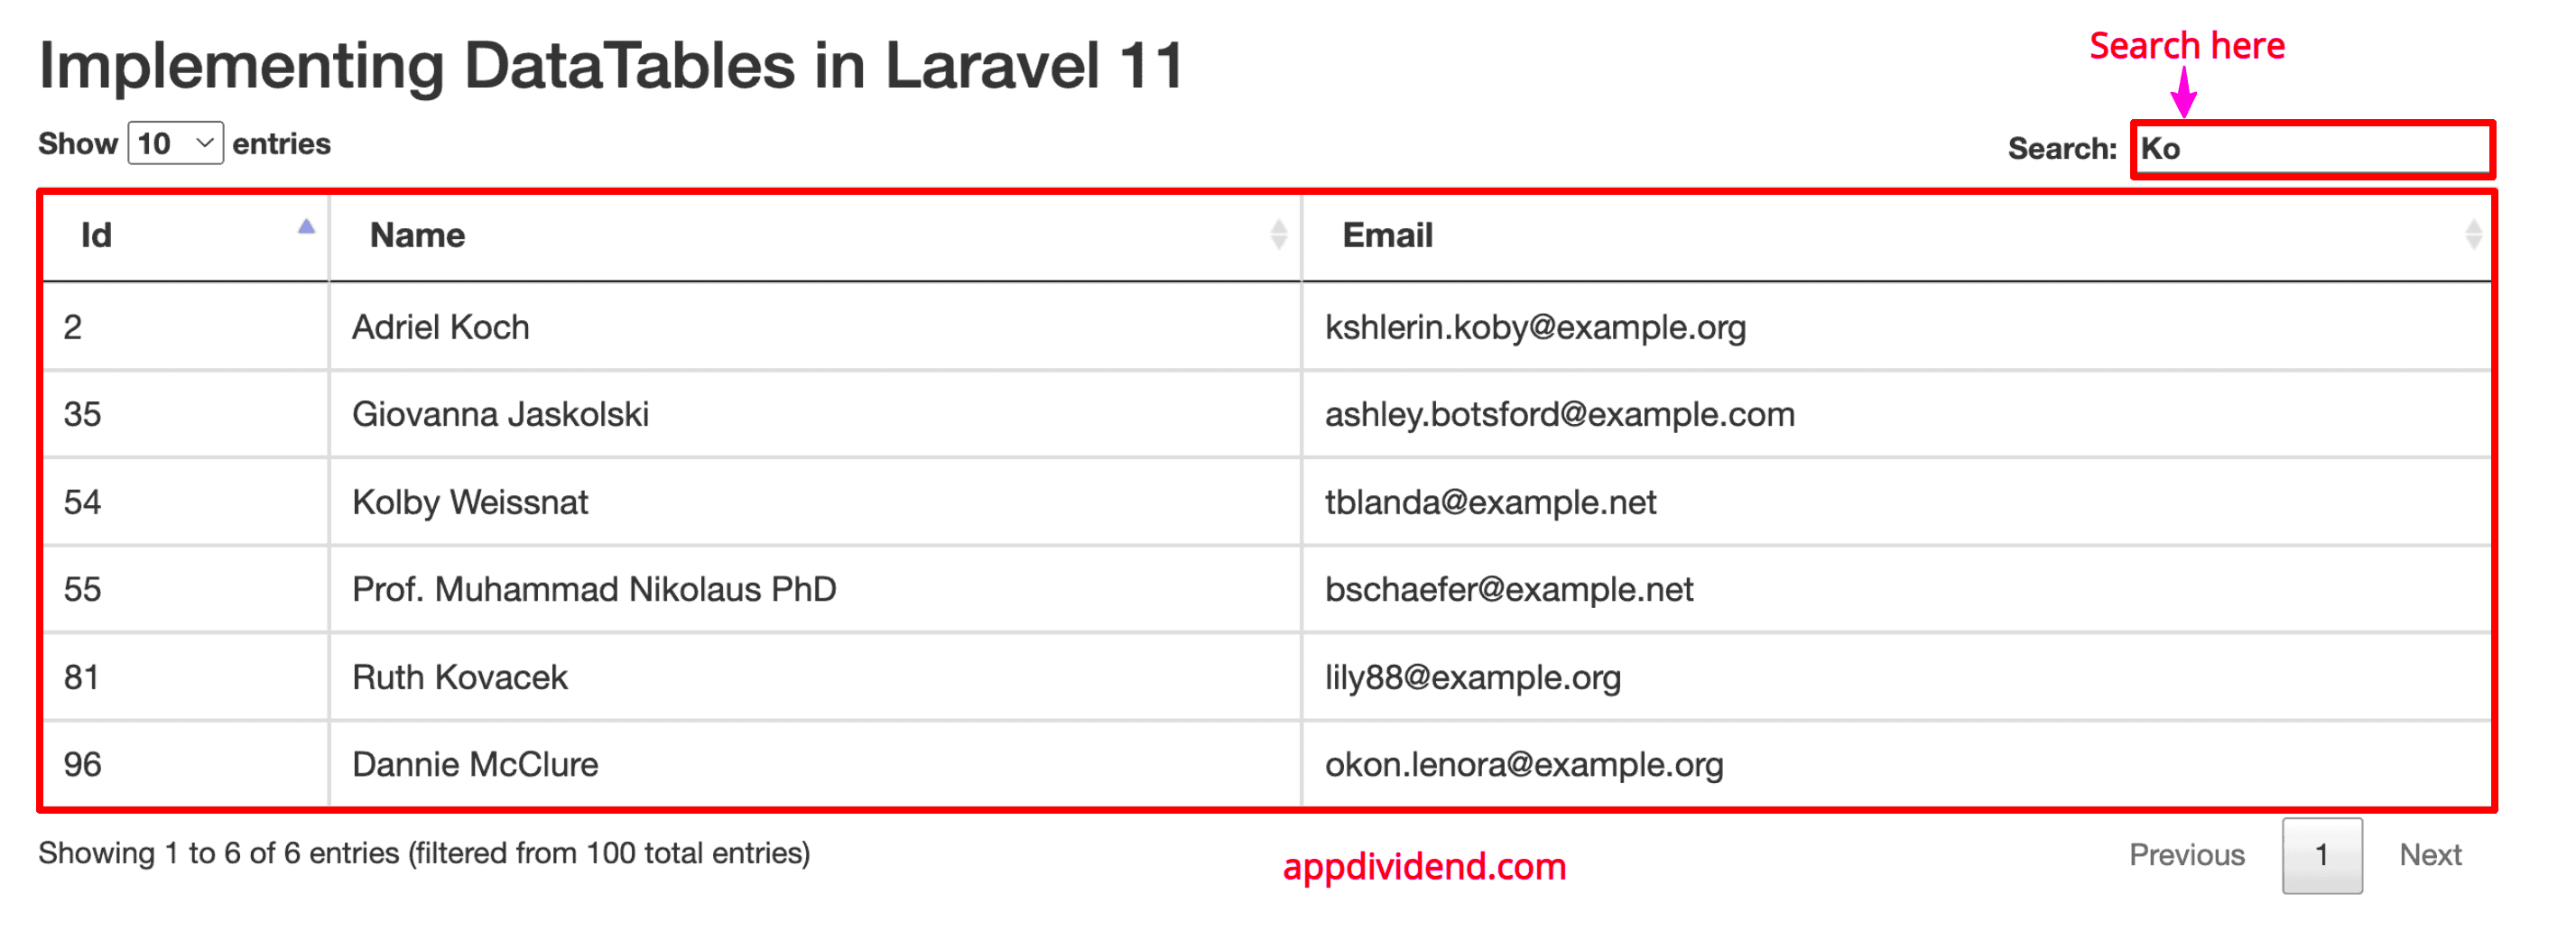
We can also search the data within the Datatable like this:
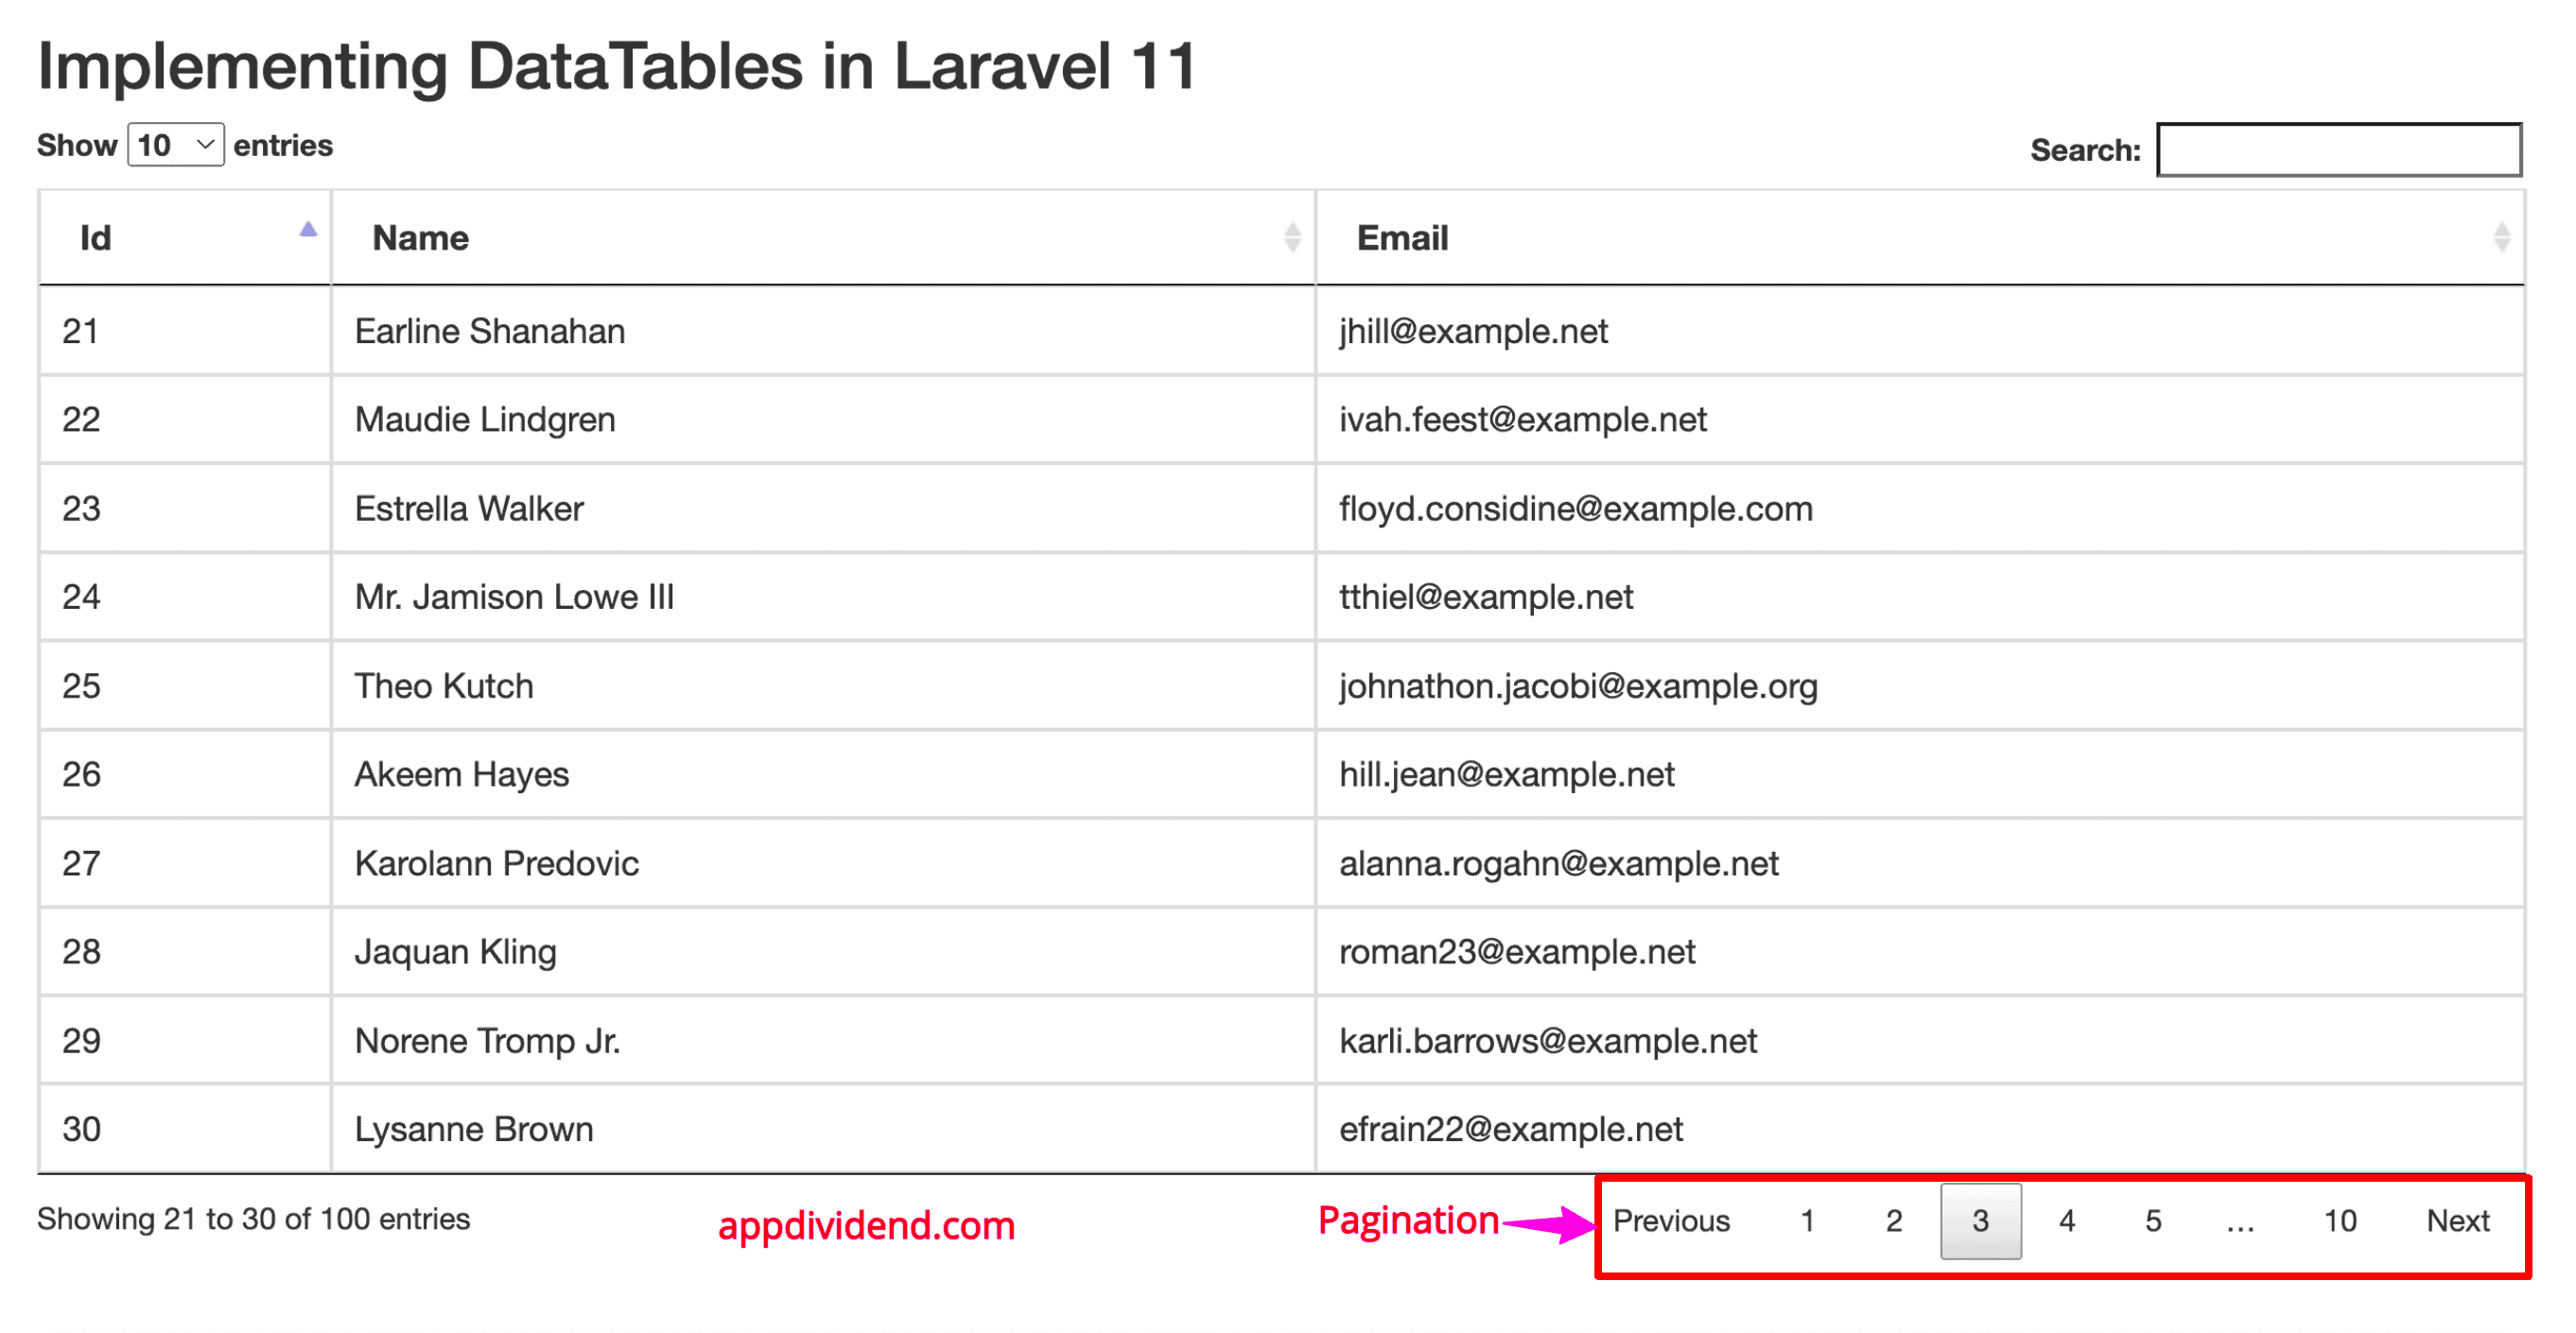
You can see that DataTables comes with built-in pagination, too:
That’s all! I hope this tutorial is helpful for you and that you will implement DataTables in your project.
Snehal Parmar
hey krunal,
i did this tutorial but i got the above discussed error and i tried it by given solution but it doesn’t work…any other solution ??
thank you,
Andrea
in DisplayDataController.php, add:
use dataTables;
use App\User;
and it works!
oswaldo
thanks
spinkalher
Thanks its working
jhon
i got an error:
DataTables warning: table id=table – Ajax error. For more information about this error, please see http://datatables.net/tn/7
help me
CFerrante
Did you see above, and try the steps?
Possible Error:
DataTables warning: table id=table – Ajax error. For more information about this error, please see http://datatables.net/tn/7
Possible Solution:
Change Providers and aliases in config >> app.php file
Yajra\Datatables\DatatablesServiceProvider::class,
‘Datatables’ => Yajra\Datatables\Datatables::class,
to this
yajra\Datatables\DatatablesServiceProvider::class,
‘Datatables’ => yajra\Datatables\Datatables::class,
maha
Thank you so much
it’s works fine
Abdullah
Thank you.
Lein
hi sir i need to implement datatables in my project how can i handle
Luis Bautista
@Jhon
Verifica el orden de tus rutas, lo solucione de esta manera:
Route::get(‘grupos/getdata’, ‘GrupoController@getdata’)->name(‘grupos.getdata’); // 1st
Route::resource(‘grupos’, ‘GrupoController’); //Last
Ropali Munshi
How can we get the result of two tables by join in datatables?
Gede Adi
How to add action button for laravel ? like edit delete or view ?
Hansraj Sagar
Hi Sir how can use Eloquent Relations in yajra datatable
axl
Nice Tuts. Where’s the next tutorial for edit and delete? Thank you.
maryam
thanks a lot…
Chintan Panchal
Great tutorial as usual, Thanks for sharing it.
Kashan Baig
It Works. Thanks
jalpa
Please help me yajra datatable using api
Amit
$data = DoctorSubCategory::with([‘doctorCategory’])->get();
// dd($data);
//— Integrating This Collection Into Datatables
return Datatables::of($data)
->addColumn(‘action’, function($data) {
return view(‘admin.doctor.action-doctor-subcategory’,compact(‘data’));
})
->toJson();
Alban
I keep getting: Target class [DisplayDataController] does not exist.
Keane Fann
I tried installing in Laravel 11 with composer require yajra/laravel-datatables-oracle:”^11″ but it gave errors, unless I change the “minimum-stability” in composer.json to “dev”. Any updates?