
To create a chat application in Laravel with Vue.js, use Pusher’s real-time messaging service, and on the client side, use Laravel Echo and Pusher.js library to update our UI in real-time.
Here are the steps to creating an app with Laravel and Vue.
Step 1: Install Laravel.
laravel new chat

# or

composer create-project laravel/laravel chat --prefer-dist
Go into the project folder.
cd chatInstall all the frontend dependencies using the following command.
npm installOpen the project in your favorite editor. Mine is VSCode.
code .Configure the database inside the .env file.
Create an auth scaffold provided by Laravel.
php artisan make:authGo to the terminal and create the tables from migrations.
php artisan migrateRegister the user at http://chat.test/register or http://localhost:8000/register.
Step 2: Create models and migrations.
We must create a Message model and migration because it stores the user’s message.
Go to the terminal and generate the model and migration using the following command.
php artisan make:model Message -mGo to the migration file and add the schema.
// create_messages_table

public function up()
{
        Schema::create('messages', function (Blueprint $table) {
            $table->increments('id');
            $table->integer('user_id')->unsigned();
            $table->text('body');
            $table->timestamps();

            $table->foreign('user_id')->references('id')->on('users')->onDelete('cascade');
        });
}
Migrate the schema to the database.
php artisan migrateStep 3: Define model relationships.
We have two models.
- User
- Message
User hasMany Message.
Message belongsTo User.
Write the relationship inside the User.php file.
// User.php

public function messages()
{
    return $this->hasMany(Message::class);
}
The same Inverse relationship is defined in the Message.php file.
// Message.php

public function user()
{
   return $this->belongsTo(User::class);
}
Define the fillable fields inside the Message.php field to prevent the Mass Assignment Exception.
// Message.php

protected $fillable = ['body'];
We also need to add one more field called selfMessage. This field tells us whether the message is our own.
// Message.php

protected $appends = ['selfMessage'];
Define the function that tells the User whether a signed-in user or another user owns the message. We need to distinguish because, based on a selfMessage attribute, we can assign different CSS classes to the User’s message.
// Message.php

public function getSelfMessageAttribute()
{
    return $this->user_id === auth()->user()->id;
}
Our whole Message.php model file looks like this.
// Message.php

<?php

namespace App;

use Illuminate\Database\Eloquent\Model;

class Message extends Model
{

    protected $fillable = ['body'];

    protected $appends = ['selfMessage'];

    public function getSelfMessageAttribute()
    {
        return $this->user_id === auth()->user()->id;
    }

    public function user()
    {
        return $this->belongsTo(User::class);
    }
}
Step 4: Create routes and Controller.
Create a controller file called ChatController.php.
php artisan make:controller ChatControllerDefine the index() function in it.
// ChatController.php

<?php

namespace App\Http\Controllers;

use Illuminate\Http\Request;

class ChatController extends Controller
{
    public function __construct()
    {
        return $this->middleware('auth');
    }

    public function index()
    {
        return view('chat');
    }
}
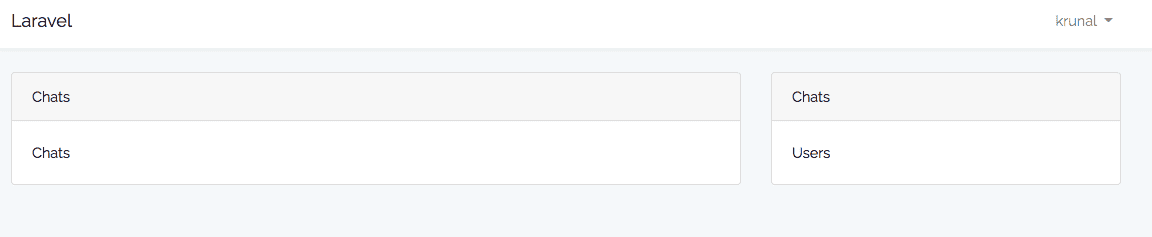
Create a chat.blade.php file inside the views folder. Write the following code inside the chat.blade.php file.
<!-- chat.blade.php -->

@extends('layouts.app')

@section('content')
<div class="container">
    <div class="row justify-content-center">
        <div class="col-md-8">
            <div class="card">
                <div class="card-header">Chats</div>
                <div class="card-body">
                   Chats
                </div>
            </div>
        </div>
        <div class="col-md-4">
        <div class="card">
                <div class="card-header">Users</div>
                <div class="card-body">
                   Users
                </div>
            </div>
        </div>
    </div>
</div>
@endsection
Define the routes. So write the following line inside a web.php file.
// web.php

Route::get('/chat', 'ChatController@index')->name('chat');
Go to this URL: http://chat.test/chat or http://localhost:8000/ chat.
Step 5: Create Vue components.
Type the below command.
npm run watchWhen we write the Vue files, it automatically compiles and is put inside the public >> js folder.
Inside assets >> js >> components folder, rename the ExampleComponent.vue file to ChatComponent.vue. Also, change the app.js file inside the assets >> js folder.
// app.js

require('./bootstrap');

window.Vue = require('vue');

Vue.component('chat-component', require('./components/ChatComponent.vue'));

const app = new Vue({
    el: '#app'
});
Save the file, and you can see the notification saying the Laravel Mix compilation was Successful.
Now write the following code inside ChatComponent.vue file.
<template>
    <div class="col-md-8">
        <div class="card">
            <div class="card-header">Chats</div>
            <div class="card-body">
                Chats
            </div>
        </div>
    </div>
</template>

<script>
    export default {
        mounted() {
            console.log('Component mounted.')
        }
    }
</script>
Create a UserComponent.vue inside the components folder.
<template>
    <div class="col-md-4">
        <div class="card">
            <div class="card-header">Users</div>
            <div class="card-body">
                Users
            </div>
        </div>
    </div>
</template>

<script>
    export default {
        mounted() {
            console.log('Component mounted.')
        }
    }
</script>
Finally, add this component inside chat >> index.blade.php file.
@extends('layouts.app')

@section('content')
<div class="container">
    <div class="row justify-content-center">
        <chat-component></chat-component>
        <user-component></user-component>
    </div>
</div>
@endsection
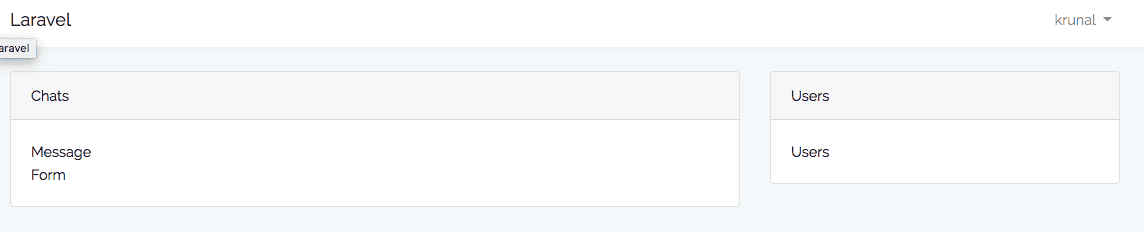
Now, we can break down the further components.
Inside ChatComponent.vue file, we can break it into two components.
- ChatMessagesComponent
- ChatFormComponent.
Create a vue component inside the components folder called ChatMessagesComponent.vue file.
// ChatMessagesComponent.vue

<template>
    <div class="chat__messages">
        Messages
    </div>
</template>

<script>
    export default {
        mounted() {
            console.log('Component mounted.')
        }
    }
</script>
We must create a form where users can type and send messages to others.
Create a vue component inside the components folder called ChatFormComponent.vue file.
// ChatFormComponent.vue

<template>
    <div>
        Form
    </div>
</template>

<script>
    export default {
        mounted() {
            console.log('Component mounted.')
        }
    }
</script>
Register both the components inside assets >> js >> app.js file.
// app.js

require('./bootstrap');

window.Vue = require('vue');

Vue.component('chat-component', require('./components/ChatComponent.vue'));
Vue.component('user-component', require('./components/UserComponent.vue'));
Vue.component('chat-messages-component', require('./components/ChatMessageComponent.vue'));
Vue.component('chat-form-component', require('./components/ChatFormComponent.vue'));

const app = new Vue({
    el: '#app'
});
We can also break down ChatMessagesComponent into a further component called MessageComponent. That only displays the messages. So each message renders this component.
Create an inside components folder.
// MessageComponent.vue

<template>
    <div class="chat__message">
       Message
    </div>
</template>

<script>
    export default {
        mounted() {
            console.log('Component mounted.')
        }
    }
</script>
Register this component inside an app.js file.
// app.js

Vue.component('message-component', require('./components/MessageComponent.vue'));
Update the ChatMessageComponent.vue file.
// ChatMessagesComponent.vue

<template>
    <div class="message-area">
        <message-component></message-component>
    </div>
</template>

<script>
    export default {
        mounted() {
            console.log('Component mounted.')
        }
    }
</script>
<style>
    .message-area {
        height: 400px;
        max-height: 400px;
        overflow-y: scroll;
        padding: 15px;
        border-bottom: 1px solid #eee;
    }
</style>
Please save the file, and our output will look like this.
Step 6: Create a form inside ChatFormComponent.
Add the following code inside ChatFormComponent.vue file.
// ChatFormComponent.vue

<template>
    <div>
        <form class="form">
            <textarea
                cols="25"
                rows="5"
                class="form-input">
            </textarea>
            <span class="notice">
                Hit Return to send a message
            </span>
        </form>
    </div>
</template>

<script>
    export default {
        mounted() {
            console.log('Component mounted.')
        }
    }
</script>

<style>
    .form {
        padding: 8px;
    }
    .form-input {
        width: 100%;
        border: 1px solid #d3e0e9;
        padding: 5px 10px;
        outline: none;
    }
    .notice {
        color: #aaa
    }

</style>
We have also styled our components. So the output looks like the below image.

Step 7: Style the MessageComponent.
So inside MessageComponent.vue file, write the following styles.
// MessageComponent.vue

<template>
    <div class="message self">
        <strong class="user">Krunal</strong>
        <p class="body">Lorem ipsum dolor sit amet consectetur adipisicing elit. Quisquam cumque quaerat rem quia veniam exercitationem, commodi numquam omnis! Non placeat perspiciatis nulla illum cumque ad natus asperiores fuga. Facere, dignissimos.</p>
    </div>
</template>

<script>
    export default {
        mounted() {
            console.log('Component mounted.')
        }
    }
</script>

<style>
    .user {
        font-weight: 800;
    }
    .body {
        margin-bottom: 0;
        white-space: pre-wrap;
    }
    .message {
        border-bottom: 1px solid #000000
    }
    .self {
        background-color: #f0f0f0;
        padding: 10px;
    }
</style>
I have written the sample chat message to see what it looks like.

A self-class is a conditional class in which we must differentiate the messages from the currently signed-in user’s message to the other user’s. So we need to do it dynamically.
Step 8: Style the Users section.
Inside UserComponent.vue, add the classes and styles. I am writing this component with a demo user.
// UserComponent.vue

<template>
    <div class="col-md-4">
        <div class="card">
            <div class="card-header">Users</div>
            <div class="card-body">
                <div class="users">
                    <a href="#">Krunal</a>
                </div>
            </div>
        </div>
    </div>
</template>

<script>
    export default {
        mounted() {
            console.log('Component mounted.')
        }
    }
</script>

<style>
    .users {
        background-color: #fff;
        border-radius: 3px;
    }
</style>
Step 9: Create MessageController.
Create a MessageController using the following command.
php artisan make:controller MessageControllerDefine the route inside a web.php file.
// web.php

Route::get('/message', 'MessageController@index')->name('message');
Inside MessageController, create an index function that returns a JSON object.
This JSON object contains all of our messages.
// MessageController.php

<?php

namespace App\Http\Controllers;

use Illuminate\Http\Request;
use App\Message;

class MessageController extends Controller
{
    public function index()
    {
        $messages = Message::with(['user'])->get();

        return response()->json($messages);
    }
}
We use this above-defined route to send a network request from a Vue component via Axios API, and then in response, we get all the messages and display those messages.
Step 10: Use Axios to send a network request.
Now we need to configure the Axios to send an AJAX request or network request to the Laravel server, fetch the messages, and display those messages to the user.
We will write the Axios get request code inside ChatMessageComponent.vue file.
// ChatMessageComponent.vue

<template>
    <div class="message-area">
        <message-component></message-component>
    </div>
</template>

<script>
    export default {
        data() {
            return {
                messages: []
            }
        },
        mounted() {
            axios.get('/message').then((response) => {
                this.messages = response.data;
            });
        }
    }
</script>
<style>
    .message-area {
        height: 400px;
        max-height: 400px;
        overflow-y: scroll;
        padding: 15px;
        border-bottom: 1px solid #eee;
    }
</style>
When the component is mounted, we send an AJAX request to the server, grab a response and assign that response to the messages property.
We need to pass that messages to the <message-component>.
That component is responsible for displaying all the messages.
Write the following code inside the ChatMessageComponent.vue file template.
// ChatMessageComponent.vue

<template>
    <div class="message-area">
        <message-component
            v-for="message in messages"
            :key="message.id"
            :message="message">
        </message-component>
    </div>
</template>
Step 11: Display the messages.
We pass the message property to the MessageComponent.vue file.
// MessageComponent.vue

<template>
    <div class="message self">
        <strong class="user">{{ message.user.name }}</strong>
        <p class="body">{{ message.body }}</p>
    </div>
</template>

<script>
    export default {
        props: ['message']
    }
</script>
I have not written the styles, but it is in there.
Save the file and go to http://chat.test/chat or http://localhost:8000/chat.
We do not have any messages in the database, but when we insert them, we can see them here.
Step 12: Sending a message.
We have not taken any submit button, so the message will submit to the server when a user hits an enter or return key. So for that, the code is the following.
First, when we send a message, we need to update our User Interface immediately. We need some events that tell our Vue.js app that a new message has arrived; please update the User Interface.
So, inside the js folder, create one file called event.js. Write the following code.
// event.js

import Vue from 'vue';

export default new Vue();
We need to add the message to the messages array, but we need a temporary message with the following properties.
- ID
- Message Body
- User Name
So, when the user hits an enter, we must create a temporary object and pass that object to an event.
Listen to that event in another Vue.js component, and that is ChatMessageComponent.
Grab the object we have passed with an event and add that object inside the messages array.
After that, Vue.js automatically detects the changes in MessageComponent and updates the User Interface.
The main reason behind using an event is that we have data in one Vue.js component, and we must pass this data to another Vue.js component.
Now, I am writing the whole ChatFormComponent.vue file. It emits an event that has a temp Object.
// ChatFormComponent.vue

<template>
    <form class="form">
        <textarea
            id="body"
            cols="28"
            rows="5"
            class="form-input"
            @keydown="typing"
            v-model="body">
        </textarea>
        <span class="notice">
            Hit Return to send a message
        </span>
    </form>
</template>

<script>

    import Event from '../event.js';

    export default {
        data() {
            return {
                body: null
            }
        },
        methods: {
            typing(e) {
                if(e.keyCode === 13 && !e.shiftKey) {
                    e.preventDefault();
                    this.sendMessage();
                }
            },
            sendMessage() {
                if(!this.body || this.body.trim() === '') {
                    return
                }
                let messageObj = this.buildMessage();
                Event.$emit('added_message', messageObj);
                this.body = null;
            },
            buildMessage() {
                return {
                    id: Date.now(),
                    body: this.body,
                    selfMessage: true,
                    user: {
                        name: 'Krunal'
                    }
                }
            }
        }
    }
</script>

<style>
    .form {
        padding: 8px;
    }
    .form-input {
        width: 100%;
        border: 1px solid #d3e0e9;
        padding: 5px 10px;
        outline: none;
    }
    .notice {
        color: #aaa
    }

</style>
I have hardcoded the username in the temp object, but it has a currently signed-in user’s name in a real scenario. We will do this in a minute to get the user’s name.
Now listen to this event inside ChatMessage.vue component.
// ChatMessageComponent.vue

<template>
    <div class="message-area">
        <message-component
            v-for="message in messages"
            :key="message.id"
            :message="message">
        </message-component>
    </div>
</template>

<script>

    import Event from '../event.js';

    export default {
        data() {
            return {
                messages: []
            }
        },
        mounted() {
            axios.get('/message').then((response) => {
                console.log(response.data);
                this.messages = response.data;
            });
            Event.$on('added_message', (message) => {
                this.messages.unshift(message);
            });
        }
    }
</script>
<style>
    .message-area {
        height: 400px;
        max-height: 400px;
        overflow-y: scroll;
        padding: 15px;
        border-bottom: 1px solid #eee;
    }
</style>
Inside view >> layouts >> app.blade.php file, write the following code inside <head> section.
<script>
        window.Laravel = {!! json_encode([
            'csrfToken'=> csrf_token(),
            'user'=> [
                'authenticated' => auth()->check(),
                'id' => auth()->check() ? auth()->user()->id : null,
                'name' => auth()->check() ? auth()->user()->name : null,
                ]
            ])
        !!};
</script>
What we have done is, if the user is signed in, then we get the username and assign it to the global Laravel variable.
That means we can now access the user’s name inside the Vue.js component. So when we set a temporary Message object, we can assign the name property to Laravel’s user’s name and finally see the currently signed-in user’s name.
Now, write this code inside ChatMessageComponent.vue file.
// ChatMessageComponent.vue

<template>
    <form class="form">
        <textarea
            id="body"
            cols="28"
            rows="5"
            class="form-input"
            @keydown="typing"
            v-model="body">
        </textarea>
        <span class="notice">
            Hit Return to send a message
        </span>
    </form>
</template>

<script>

    import Event from '../event.js';

    export default {
        data() {
            return {
                body: null
            }
        },
        methods: {
            typing(e) {
                if(e.keyCode === 13 && !e.shiftKey) {
                    e.preventDefault();
                    this.sendMessage();
                }
            },
            sendMessage() {
                if(!this.body || this.body.trim() === '') {
                    return
                }
                let messageObj = this.buildMessage();
                Event.$emit('added_message', messageObj);
                this.body = null;
            },
            buildMessage() {
                return {
                    id: Date.now(),
                    body: this.body,
                    selfMessage: true,
                    user: {
                        name: Laravel.user.name
                    }
                }
            }
        }
    }
</script>

<style>
    .form {
        padding: 8px;
    }
    .form-input {
        width: 100%;
        border: 1px solid #d3e0e9;
        padding: 5px 10px;
        outline: none;
    }
    .notice {
        color: #aaa
    }

</style>
Also, The ChatMessageComponent.vue file looks like this.
// ChatMessageComponent.vue

<template>
    <div class="message-area" ref="message">
        <message-component
            v-for="message in messages"
            :key="message.id"
            :message="message">
        </message-component>
    </div>
</template>

<script>

    import Event from '../event.js';

    export default {
        data() {
            return {
                messages: []
            }
        },
        mounted() {
            axios.get('/message').then((response) => {
                console.log(response.data);
                this.messages = response.data;
            });
            Event.$on('added_message', (message) => {
                this.messages.unshift(message);
                if(message.selfMessage) {
                    this.$refs.message.scrollTop = 0;
                }
            });
        }
    }
</script>
<style>
    .message-area {
        height: 400px;
        max-height: 400px;
        overflow-y: scroll;
        padding: 15px;
        border-bottom: 1px solid #eee;
    }
</style>
So, when the currently signed-in user sends any message, the scroller returns to the top.
Step 13: Store the message in the database.
Define the route to store the messages.
// web.php

Route::post('/message', 'MessageController@store')->name('message.store');
Code the store function to store the data in the MySQL database.
// MessageController.php

public function store(Request $request)
{
     $message = $request->user()->messages()->create([
         'body' => $request->body
     ]);

     return response()->json($message);
}
Inside ChatFormComponent.vue file, write the code to send an axios post request to this web route and pass the body as a parameter.
// ChatFormComponent.vue

sendMessage() {
        if(!this.body || this.body.trim() === '') {
               return
        }
           let messageObj = this.buildMessage();
           Event.$emit('added_message', messageObj);
            axios.post('/message', {
                body: this.body.trim()
            }).catch(() => {
                 console.log('failed');
            });
            this.body = null;
        },
Save the file and go to this URL: http://chat.test/chat or http://localhost:8000/chat.
Type one message in the text area and hit enter.
An Immediate message is showing, which is our temporary message.
Now, refresh the page and see if this message persists.
If it persists, then we have successfully saved the message.
Step 14: Setup Pusher: Real-time Message Service.
We use a Pusher service for real-time messages.
First, we need to change the broadcast driver inside the .env file.
// .env
BROADCAST_DRIVER=pusher
The next step is to uncomment the following inside config >> app.php file’s provider’s array.
App\Providers\BroadcastServiceProvider::class,
The next step is to create a pusher application.
Go to this URL: https://pusher.com/.
Sign up for an account. I have signed up using Github.
Now, you will redirect to this page: https://dashboard.pusher.com.
Create an app and go to the App Keys section. Also, check your cluster.
Now grab all the data and put it inside the .env file.
// .env

PUSHER_APP_ID=your app id
PUSHER_APP_KEY=your app key
PUSHER_APP_SECRET=your app secret
composer require pusher/pusher-php-serverPUSHER_APP_CLUSTER=your cluster
Install pusher php-server through composer. Go to the terminal and type the following command.
We also need the following front-end dependencies.
- Pusher.js
- Laravel echo
Install both using the following command.
npm install pusher-js laravel-echo --saveGo to the assets >> js >> bootstrap.js file.
Uncomment the following lines. By default, it is commented.
// bootstrap.js

import Echo from 'laravel-echo'

window.Pusher = require('pusher-js');

window.Echo = new Echo({
    broadcaster: 'pusher',
    key: process.env.MIX_PUSHER_APP_KEY,
    cluster: process.env.MIX_PUSHER_APP_CLUSTER,
    encrypted: true
});
Inside the .env file, there are also the variables like this.
// .env

MIX_PUSHER_APP_KEY=your pusher key
MIX_PUSHER_APP_CLUSTER=your cluster
In MIX_PUSHER_KEY, you put your public key provided by Pusher, the same as PUSHER_APP_KEY.
Also, write the MIX_PUSHER_APP_CLUSTER to your cluster name.
Save the file and see the console if you do not face any errors.
Step 15: Display Online Users.
Inside routes >> channels.php file, write the following code.
// channels.php

<?php

Broadcast::channel('chat', function ($user) {
    return [
        'id' => $user->id,
        'name' => $user->name
    ];
});
We have set up a global channel that returns a user object.
When a user joins the chat, we must update our Vue.js UI.
So, Vue.js has to be notified when the new user joins in for a chat.
Ideally, we can do that using Events. So, when the new user joins in, we broadcast an event, and then our frontend will listen to that event and update the User interface.
Inside resources >> assets >> js folder, create one file called echo.js.
This file listens for all the broadcasting events and notifies Vue.js to update the interface.
Write the following code inside an echo.js file.
// echo.js

Echo.join('chat')
    .here(users => {
        console.log(users);
    })
    .joining(user => {
        console.log(user);
    })
    .leaving(user => {
        console.log(user);
    })
Require this file inside resources >> assets >> js >> bootstrap.js file. I have included it in the last.
// bootstrap.js

window._ = require('lodash');
window.Popper = require('popper.js').default;

try {
    window.$ = window.jQuery = require('jquery');

    require('bootstrap');
} catch (e) {}

window.axios = require('axios');

window.axios.defaults.headers.common['X-Requested-With'] = 'XMLHttpRequest';

let token = document.head.querySelector('meta[name="csrf-token"]');

if (token) {
    window.axios.defaults.headers.common['X-CSRF-TOKEN'] = token.content;
} else {
    console.error('CSRF token not found: https://laravel.com/docs/csrf#csrf-x-csrf-token');
}

import Echo from 'laravel-echo'

window.Pusher = require('pusher-js');

window.Echo = new Echo({
    broadcaster: 'pusher',
    key: process.env.MIX_PUSHER_APP_KEY,
    cluster: process.env.MIX_PUSHER_APP_CLUSTER,
    encrypted: true
});

require('./echo');
When the user is here, joining or leaving, we need to emit an event. So let us do that first.
Inside the echo.js file, write the following code.
// echo.js

import Event from './event';

Echo.join('chat')
    .here(users => {
        Event.$emit('users.here', users);
    })
    .joining(user => {
        Event.$emit('users.joined', user);
    })
    .leaving(user => {
        Event.$emit('users.left', user);
    })
Inside the UserComponent.vue file, write the following code. Then, we write the code that listens for that emitted event and changes the User Interface.
// UserComponent.vue

<template>
    <div class="col-md-4">
        <div class="card">
            <div class="card-header">Users</div>
            <div class="card-body">
                <div class="users" v-for="user in users" :key="user.id">
                    <a href="#">{{ user.name }}</a>
                </div>
            </div>
        </div>
    </div>
</template>

<script>

    import Event from '../event.js';

    export default {

        data() {
            return {
                users: []
            }
        },

        mounted() {
            Event.$on('users.here', (users) => {
                this.users = users;
            })
            .$on('users.joined', (user) => {
                this.users.unshift(user);
            })
            .$on('users.left', (user) => {
                this.users = this.users.filter(u => {
                    return u.id != user.id
                });
            });
        }
    }
</script>

<style>
    .users {
        background-color: #fff;
        border-radius: 3px;
    }
</style>
When a new user signs in to our Laravel application and goes to this URL: http://chat.test/chat, their name appears in the User’s box. Cool!! Finally, we get a real-time update.
When a user leaves, the user’s array is filtered out to that user, and we see the remaining user.
Also, when a new user is joined, we can see the newly joined user’s name.
Step 16: Send and Receive Real-time messages.
The only remaining thing of our Laravel Vue Chat Application Tutorial is that real-time messages are sent and received using Pusher.
We need to create an Event class at the backend that broadcasts an event when a new message is created.
Go to the terminal and type the following command to create an Event.
php artisan make:event MessageCreatedWhen we store the message, we also need to broadcast the stored message to the channel. S
Write the following code inside MessageController’s store function.
// MessageController.php

<?php

namespace App\Http\Controllers;

use App\Message;
use Illuminate\Http\Request;
use App\Events\MessageCreated;

class MessageController extends Controller
{
    public function index()
    {
        $messages = Message::with(['user'])->get();

        return response()->json($messages);
    }

    public function store(Request $request)
    {
        $message = $request->user()->messages()->create([
            'body' => $request->body
        ]);

        broadcast(new MessageCreated($message))
                ->toOthers();

        return response()->json($message);
    }
}
Inside the MessageCreated.php file, we need to take that argument and pass it to the channel.
// MessageCreated.php

<?php

namespace App\Events;

use App\Message;
use Illuminate\Broadcasting\Channel;
use Illuminate\Queue\SerializesModels;
use Illuminate\Broadcasting\PrivateChannel;
use Illuminate\Broadcasting\PresenceChannel;
use Illuminate\Foundation\Events\Dispatchable;
use Illuminate\Broadcasting\InteractsWithSockets;
use Illuminate\Contracts\Broadcasting\ShouldBroadcast;

class MessageCreated implements ShouldBroadcast
{
    use Dispatchable, InteractsWithSockets, SerializesModels;

    public $message;

    /**
     * Create a new event instance.
     *
     * @return void
     */
    public function __construct(Message $message)
    {
        $this->message = $message;
    }

    public function broadcastWith()
    {
        $this->message->load(['user']);

        return [
            'message' => array_merge($this->message->toArray(), [
                'selfMessage' => false
            ])
        ];
    }

    /**
     * Get the channels the event should broadcast on.
     *
     * @return \Illuminate\Broadcasting\Channel|array
     */
    public function broadcastOn()
    {
        return new PresenceChannel('chat');
    }
}
First, we have implemented the ShouldBroadCast interface.
Then, I changed the name from PrivateChannel to PresenceChannel and passed our channel name “chat”.
Then, we receive the message from a controller and broadcast that message via the broadcastWith() function.
Inside the echo.js file, we need to add a code that listens to this event.
// echo.js

import Event from './event';

Echo.join('chat')
    .here(users => {
        Event.$emit('users.here', users);
    })
    .joining(user => {
        Event.$emit('users.joined', user);
    })
    .leaving(user => {
        Event.$emit('users.left', user);
    })
    .listen('MessageCreated', (data) => {
        Event.$emit('added_message', data.message);
    });
After listening, it broadcasts another event, which is listened to by our Vue.js component ChatMessageComponent.vue.
// ChatMessageComponent.vue

<template>
    <div class="message-area" ref="message">
        <message-component
            v-for="message in messages"
            :key="message.id"
            :message="message">
        </message-component>
    </div>
</template>

<script>

    import Event from '../event.js';

    export default {
        data() {
            return {
                messages: []
            }
        },
        mounted() {
            axios.get('/message').then((response) => {
                this.messages = response.data;
            });
            Event.$on('added_message', (message) => {
                this.messages.unshift(message);
                if(message.selfMessage) {
                    this.$refs.message.scrollTop = 0;
                }
            });
        }
    }
</script>
<style>
    .message-area {
        height: 400px;
        max-height: 400px;
        overflow-y: scroll;
        padding: 15px;
        border-bottom: 1px solid #eee;
    }
</style>
That’s it!
Check out the Github Code.

Tirex
Excellent tutorial. Thanks a lot for detailed steps. (Sorry, English is not my native language)…Thanks a lot
madhavi
this awesome
Ichsan
github code not working, message saved but not realtime, and no users appeared
Krunal
Actually, you need to follow the steps, configure the pusher api. It is working fine, please check your configuration.
ahmed
Everything is right but there is error with broadcast auth
POST http://35.204.40.203/broadcasting/auth 500 (Internal Server Error)
Rather
Before all, many thanks to Kurnal,
@Ichsan, @Ahmed i ran into the same issues, after debugging i found that my clock on Homestead was running behind, and messing up with the pusher,
Hey Kurnal, what about a tutorial for Machine lerning – Laravel implementation, that will be swell!
Mauricio
I have the same error:
500 (Internal Server Error) . How to solve this ?
Thanks
Neil barazarte
i can use laravel 5.5?
Neil barazarte
hello, inside the file public / js / app.js you must place the values of the key and the cluster that you defined in .env
moli
approve :
github code not working, message saved but not realtime, and no users appeared
i did all configurations and double check every thing ..but there is no users and there is no realtime -pusher…
please help …
Krunal
What is the error you are getting?
zelin
[Vue warn]: Property or method “message” is not defined on the instance but referenced during render. Make sure that this property is reactive, either in the data option, or for class-based components, by initializing the property. See: https://vuejs.org/v2/guide/reactivity.html#Declaring-Reactive-Properties.
how to solve this problem?
sad
Vue components are not rendering
Novice Ninja Coder
I’ve followed every step word for word up to step #13 and for some reason, the messages I’ve sent are not appearing after I refresh the page.
I reached a point where I added messages into the database directly to see if they’ll appear in the chat but still nothing.
When I got to the “/message” url the JSON returns a value but nothing in the chat.
Is it possible I might have missed something? Kindly help a brother out.
rene
we arent getting any feedback with out refreshing the page also the users arent showing up hope you can help us out or give us a hint of what we did wrong
samuel
hello @krunal the chat isn’t real time ,i have to refresh for it to appear. please do you have a solution for this cause i got the code from GitHub
vijaydhote
I can not get user list for chat??
Muhd. Zulhilmi
for all had problem if there is no realtime. just compile all the vue.js file by using this command
– “npm install”
– “npm run dev”
JV
1.composer install
2.php artisan key:generate
3.php artisan cache:clear
4.php artisan migrate
devendra
Hi, it is a very helpful article for everyone.
keep posting article.
irfan
very great tutorial, i has run and test all worked, but how user private message?
Nadeem
Very Good Tutorial , but i confuse on one step
How we open any specific user chat box from online user list ?
madhavi
this is awesome
JV
how will I make a private chat? i think this project is a public chat which like all user are gather together in the same channel.. it is possible to create more channel for specific purpose? please help…
JV
1.composer install
2.php artisan key:generate
3.php artisan cache:clear
4.make a database and connect it to the project
5.php artisan migrate
Jaikangam
chat appear only after the refresh page. And the online user not appear for me.
Vahid
I can’t see messages, and get user list:
Error in render: “TypeError: Cannot read property ‘user’ of undefined”
found in
at resources/js/components/MessageComponent.vue
at resources/js/components/ChatComponent.vue
steven
i got an issue
Vue warn]: Failed to mount component: template or render function not defined.
Nickolai
Thank you so much for the great tutorial!
Asad
Thanks for this amazing guidlines
Asad
But i need to reload screen for receive messages??
How can i solve this
fly
find any solution ?
Mohsin
Great tutorial I’ve configured this project and it is working absolutely fine. First of all thank you so much for great tutorial. One thing I need to add and that is how can I create different rooms like each and every user can see their own chat and talk to that room only. Please help me out with this functionality.
Davinder
Great Tutorial but its not displaying users list, Can it be converted to one to one chat and how Video chat can be added.
Thanks
David
app.js:37234 [Vue warn]: Unknown custom element: – did you register the component correctly? For recursive components, make sure to provide the “name” option.
Urmi
Not working with php 8
COA
Thanks for this awesome guide… My app works perfectly. However I had to change
this.messages.unshift(message); TO this.messages.push(message); IN ChatMessagesComponent.vue,
so new messages appear at the bottom instead of at the top and without the need for a refresh.
2ndly, there was a slight mixup in the file names and their content, so for example, here is the code that should be in ChatComponent.vue:
//START OF CODE FOR ChatComponent.vue
Chats
export default {
}
//END OF CODE
3rdly, in app.js where components are registered, I had to change
Vue.component(‘user-component’, require(‘./components/UserComponent.vue’)); TO
Vue.component(‘user-component’, require(‘./components/UserComponent.vue’).default);
Adding .default (note the “dot”) as shown above helped fix an error about components not found or so. (although I read that the recommended solution is to use ES6 but I didn’t know how to do that and didn’t have the time to learn how).
If your chat is NOT realtime, you may need to run npm install AND npm run dev
Finally, you can download the code from Github and compare each relevant file with your local instance to be sure you have the right code in the right file. Relevant files include all .vue (component) files, echo.js, app.js… plus be sure your .env file is okay.
I am really glad I found this guide, it’s been very helpful.
Thank you once again